My little fridge works pretty well for drying blanks and rough turned pieces but doesn’t quite have the blast for large volumes of stock, so I decided to build a kiln.
I had a bunch of thick styrofoam, a box of old freezer hardware (thanks, Dad), some random plywood and a couple of studs laying around. Ted Lightfoot offered me some steel clad 5″ foam composite freezer panels he was going to throw out. All I had to buy was some adhesive and caulking foam. Basically my kiln cost $30 to build. The dehumidifier to run the whole thing cost $160. Naturally I had lots of angle iron around for mounting the dehu as well as some racking to make shelves (haven’t used that yet because everything I put in was too big to go on shelves.
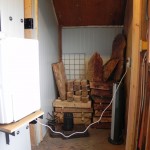
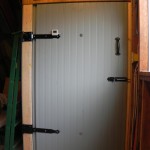
I started by cleaning out one corner of the upstairs of my shop – a very major undertaking. I sliced the foam with an electric wire heated by a battery charger into the thickness I needed to insulate the outside wall and rafters. I used Ted’s panel for the back, other side and door. The panels are self supporting so only had to cut them to size (and shape) and anchor them in place. I attached framing material to the edges of the panels to join them at the corner and provide something to attach the door hardware to the wall. The small portion over the door was framed in and insulated with the foam.The space is about 4 feet square and is insulated and sealed better than any house. Rocco (my wood guy) suggested I not get it too tight so I didn’t provide any gasket around the door except at the top.
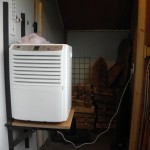
 As you can see the hinges are huge and have no problem taking the weight of the dehu (it’s heavy), so keeping it off the floor to save space. I wired in a box from a neighbouring plug for internal power. I provided a drain through the wall for the dehumudifier.
The dehu generates a fair bit of heat, so raised the temp to the high 20’s (80F+) on it’s own. I put a fan in to circulate the air and just today I added a small space heater to bring the temp up a couple more degrees in the dead of winter.
I loaded it on October 6th. The first few days the humidity being driven off made it smell a little musty so I cracked the door until that settled down. I got a remote temp and humidity monitor from Costco so can check on things from the office. How cool is that? 🙂 At the present time the humidity is running around 38 – 40%: down from 60%. The temp is about 30+ degrees (90F+) with the heater providing a bit of a boost from the high 20’s (80F+).
The first load was really wet maple burl and semi-dry curly maple. I borrowed a moisture meter from a friend and the semi dry maple is now at 15% after two weeks. The burl is still off the scale but I weighed it and it is dropping as well. Rocco says his dries wood in about five weeks, so time will tell.
The amount of wood I can out through this kiln is definitely enough to keep up. 🙂
I had put the fridge in the guild newsletter to sell it, but I have changed my mind. It is very efficient and is excellent for roughed-out pieces and bowl blanks. Now to find a place for it. 🙁

