I thought I would share a project I have been working on recently that is different than many and uses a hollowing technique I haven’t used until now. The size of this project is a bit nuts but the concept may be something that might come in handy no matter what the size.
Some background
Some of you may have seen my spiral pieces cut from tall vase forms. The one below is my favourite, standing 22” tall. It now lives somewhere in the UK.
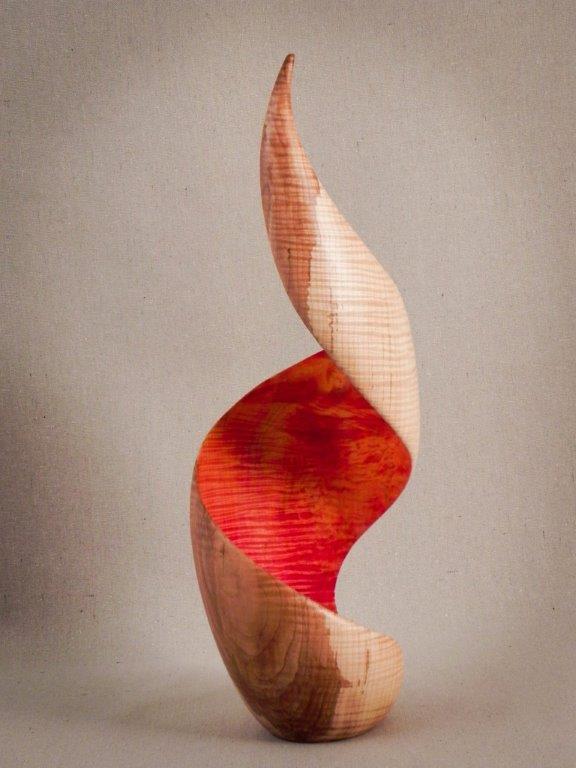
Fire in the Heart
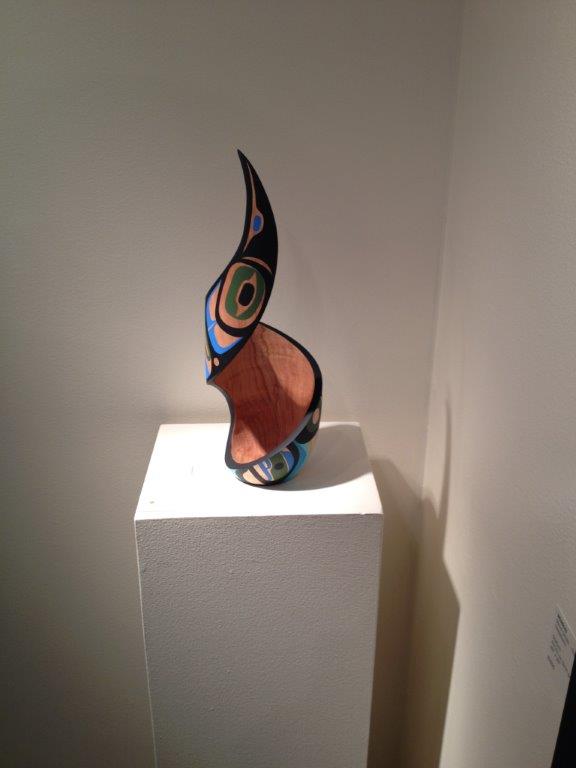
That form has morphed into several iterations, each one a spiral cut from a completed turning. In some cases, I have been able to use the negative space cut from the original for yet another piece, so that’s a cool bonus. Most of these pieces now go to a friend, Steve Smith, who is a native artist. Steve paints his very contemporary style on these pieces, which are themselves anything but traditional native forms. This has been a very rewarding collaboration for both of us. Quite honestly I feel that I gain the most, having learned so much from him about art, inspiration and life in general.
The project at hand
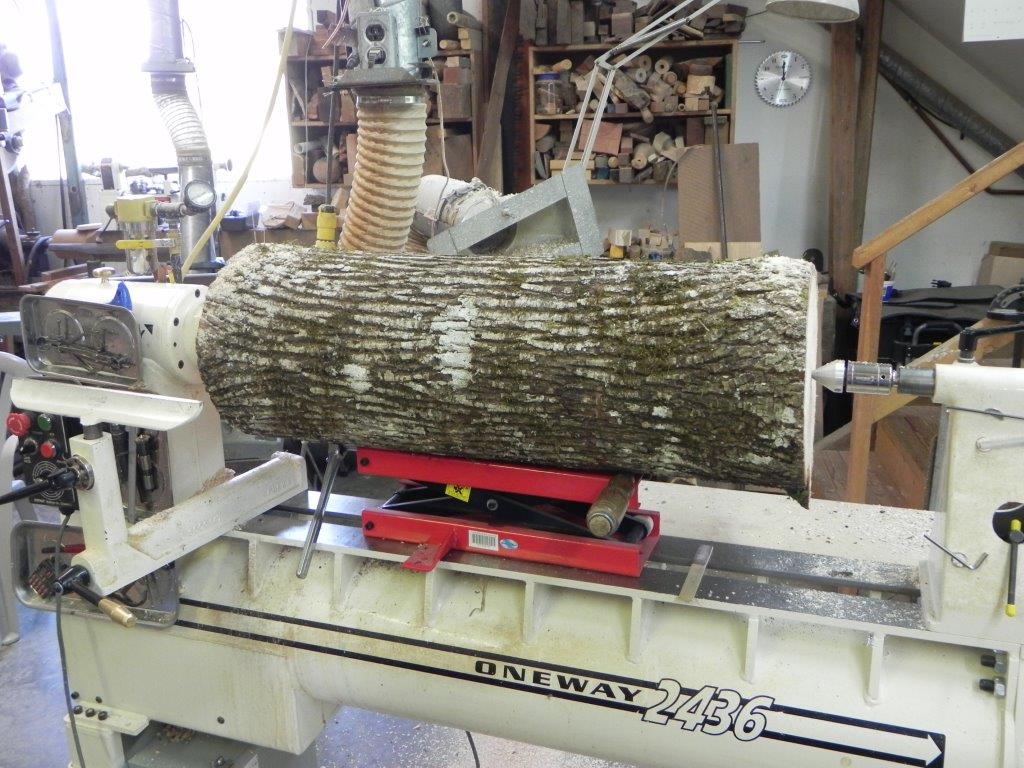
For several years I have had an idea of a wave-like form in my mind, but no surface treatment to take it to the next level. Recently it came out in its own time as something that would suit Steve’s style perfectly. He agreed with my ideas so I started the project immediately – by falling a large maple on Sumas Mountain.
The piece needed to be at least 36” long by at least 8” in diameter (so that Steve could paint the inside). Ideally the blank had to be centered with the pith in the middle to keep the dried piece from being oval. The stems from the tree I chose were perfect. I had the length and got 9” and 10” diameter pieces. At the moment the rest is taking up a lot of space beside my shop.
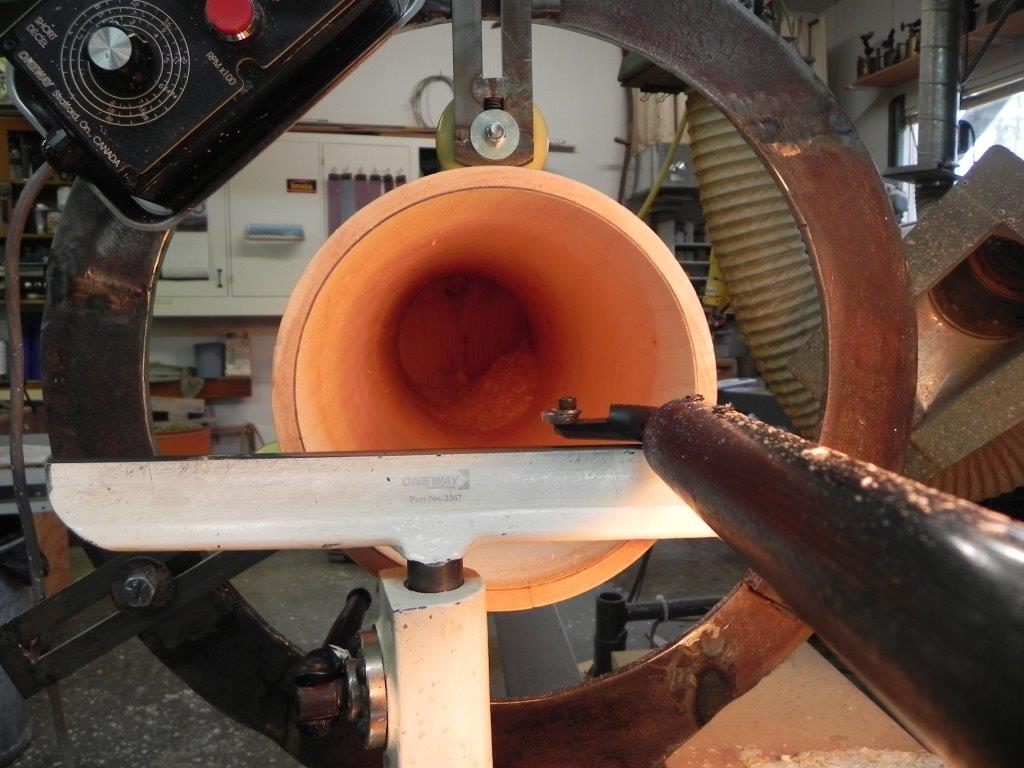
Hollowing: part one
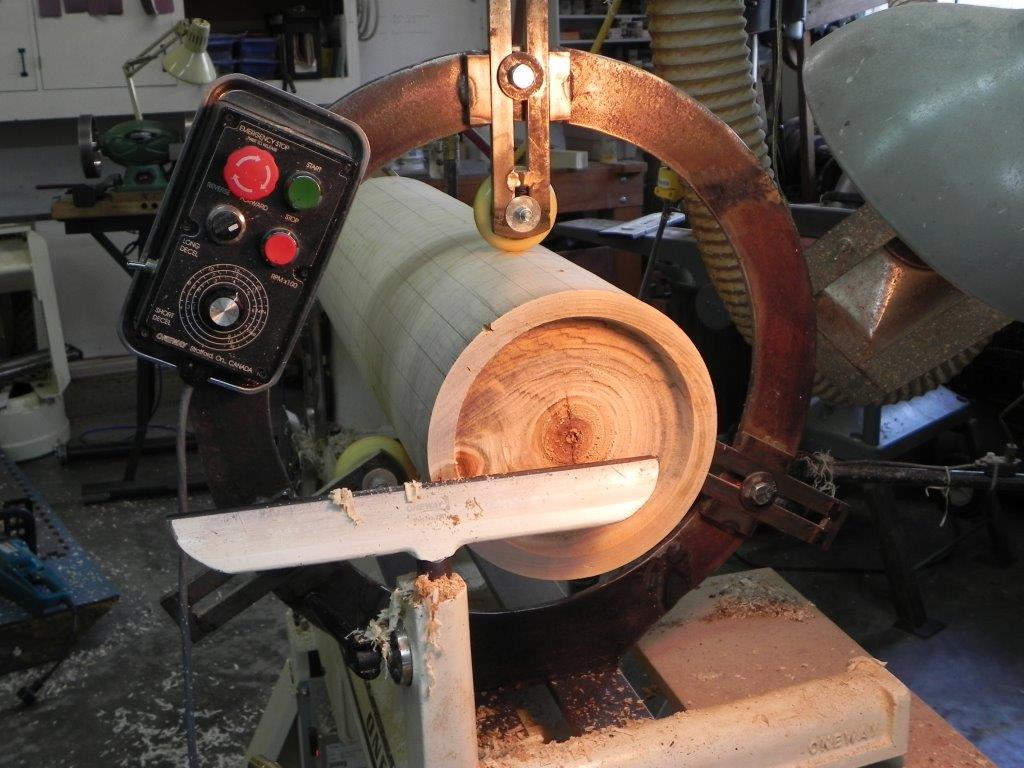
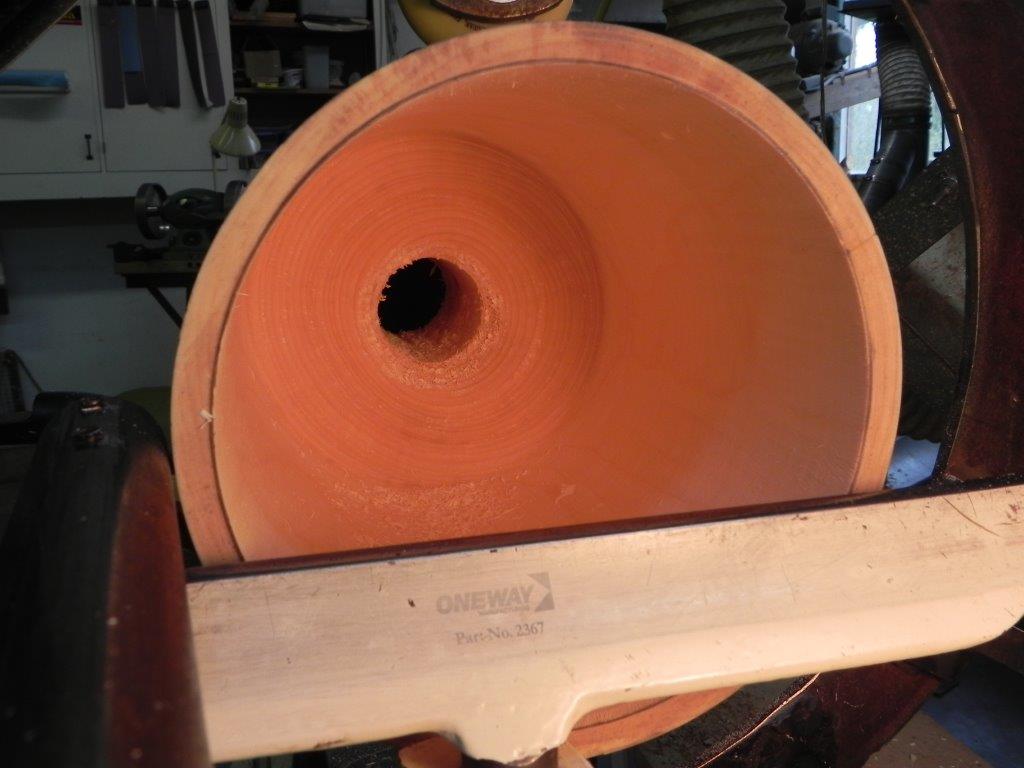
The plan was to make a 33” long “pipe” with ½” wall thickness then cut a wave form from that (to my great satisfaction, I actually get two from each one). I started by turning a cylinder between centers. I used a faceplate since this was a very heavy piece. To begin the hollowing I set up a steady rest then removed the tailstock. After boring out the center I used a large hollowing rig to hollow the piece to the middle plus a bit.
Hollowing: part two
I removed the piece from the lathe and faceplate then affixed a blank to the faceplate and turned it as a “plug” for the hollow end. I glued the plug, complete with faceplate, into the piece using the lathe as a clamp. Once set, I proceeded to hollow the second half. Parting the completed piece from the plug was a bit of an adventure but everything went as planned with the steady rest and a giant taper center on the tailstock end controlling things.
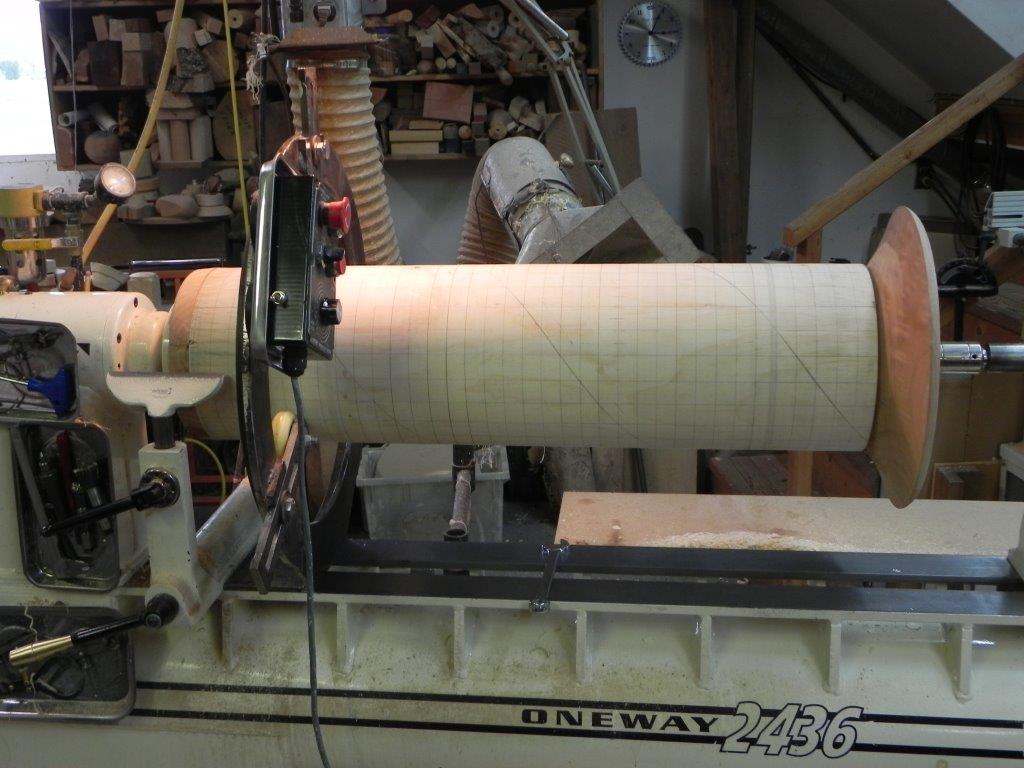
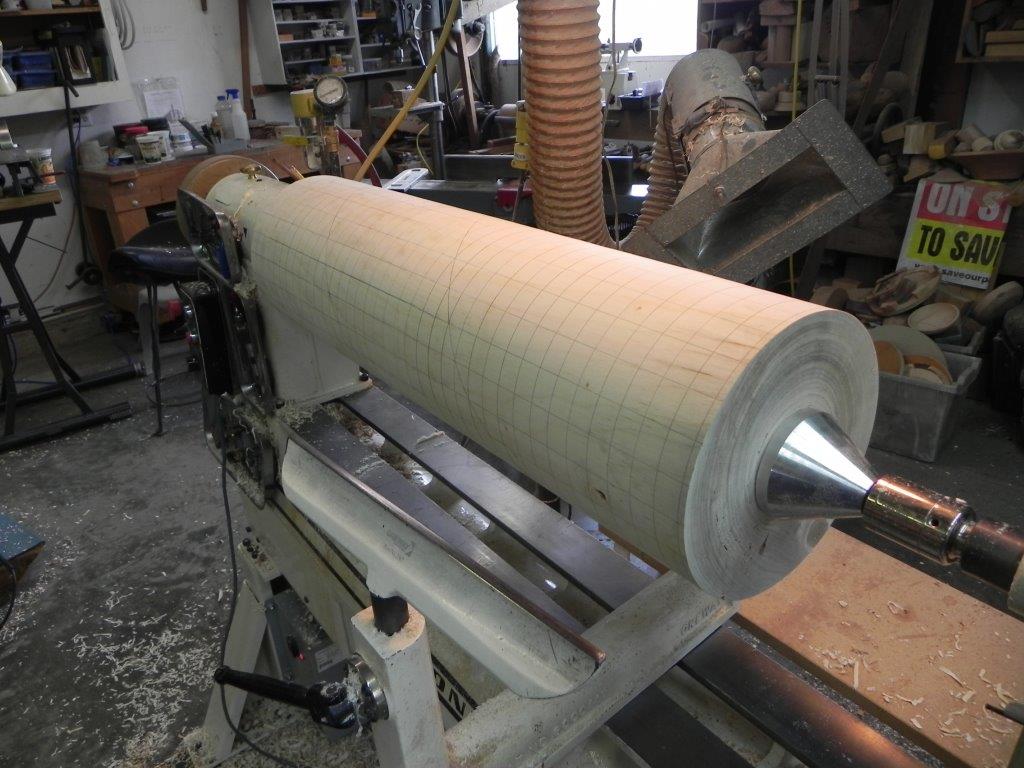
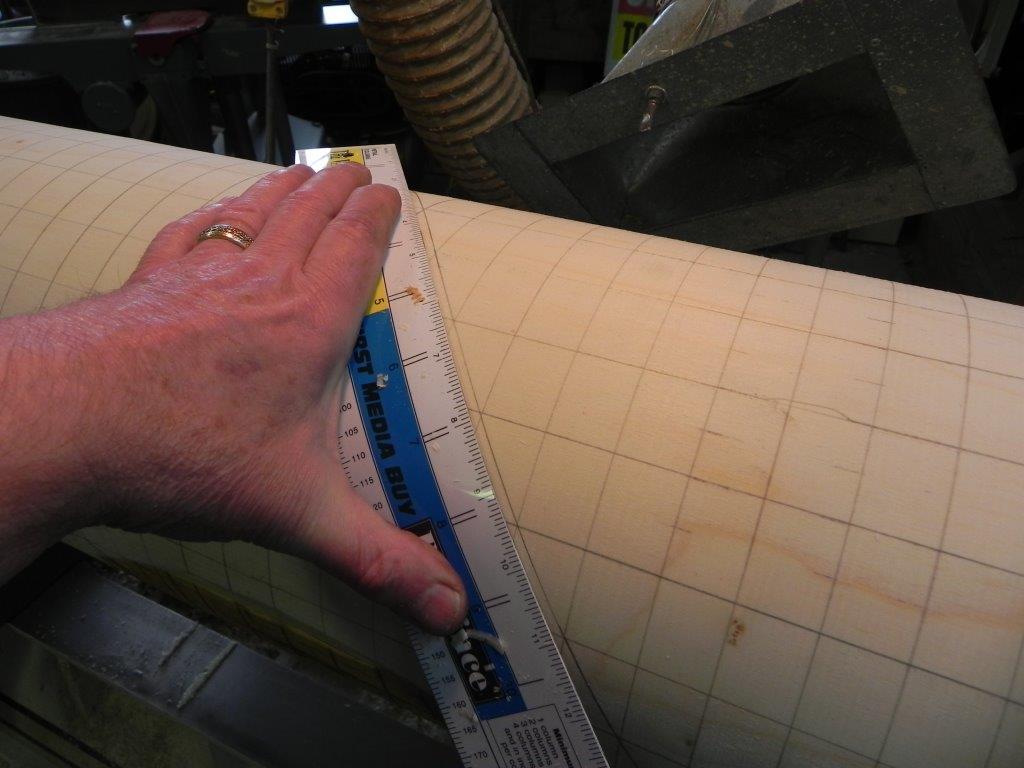
Laying out the spiral
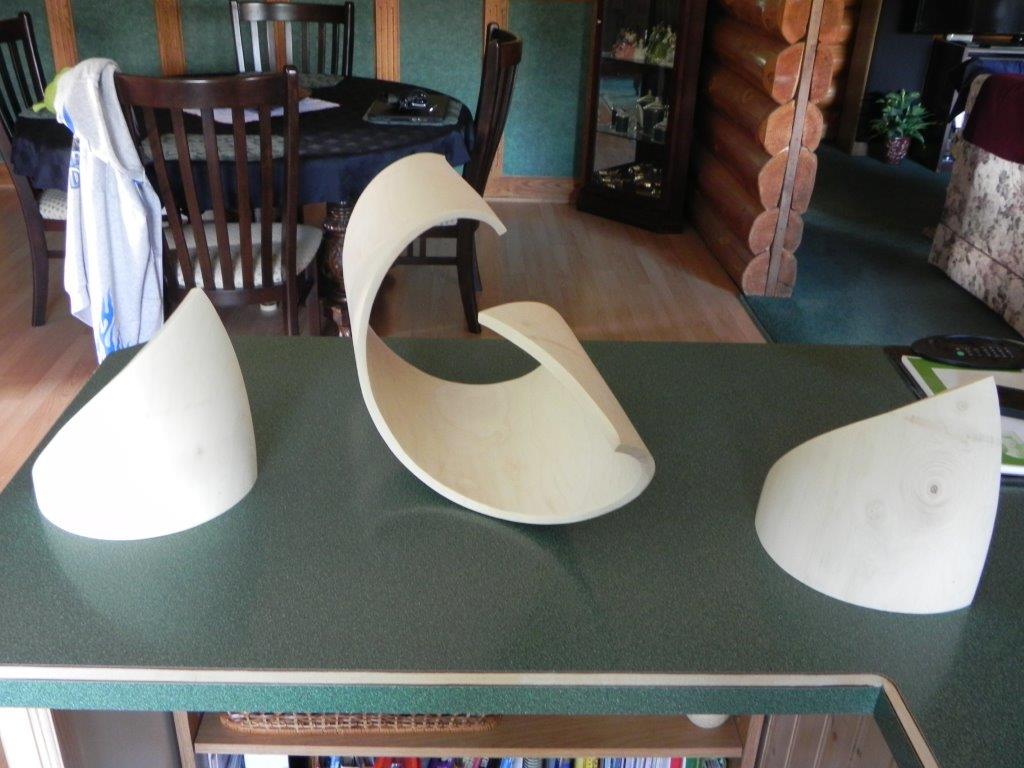
Mapping the spiral is the same technique used for marking out barley twists on spindles. I used the indexing head and divided the diameter into equal parts (24, I think) and marking the lines with the tool rest set exactly at center. I then divided the length into equal parts by using a set of dividers to step off. The trial and error method of making minute adjustments to the dividers to get to the exact destination didn’t really take all that long and achieved the end result I wanted. By using a flexible ruler (courtesy of Barry Wilkinson – Thanks, Barry) I was able to connect the dots (intersections) to get my cutting lines. The ends of the wave were drawn free form to give it at least a bit of an organic look. We were even able to use the waste pieces from the end of the waves for little shelf-mounted forms (See photo of pieces on counter top. Pardon the laundry.)
After waiting for a few weeks for the piece to dry, it was a matter of cutting carefully on the lines and sanding the pieces. And sanding. And sanding. And sanding some more. In the end, I did quite a bit of sanding. Times four. A couple of small turned buttons on the bottom keep the wave from crashing on the beach – or the floor.
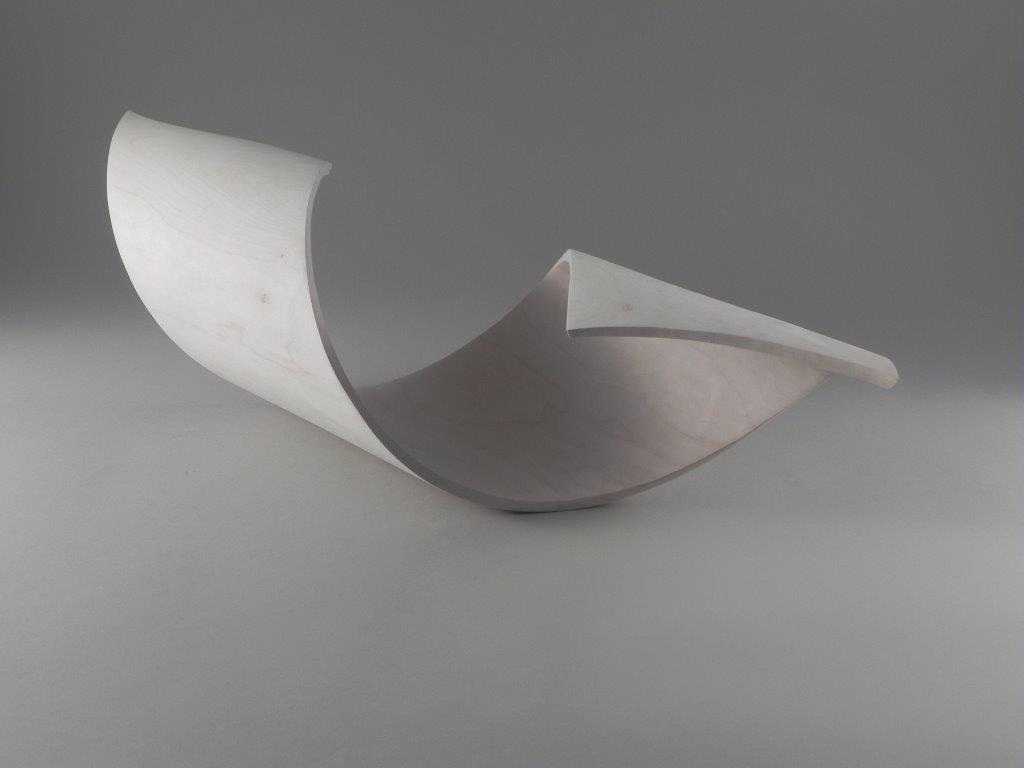
The finished form
At this point in time the work is in Steve’s hands and I have no idea what he will come up with. My original inspiration was under-sea creatures on the inside and over-the-sea-creatures on the outside. Time will tell because he is very much an artist who works in the moment. There are four of these and it will take a couple of months at least for him to paint.