
Originally written for Craftsy by Ed titled: How to Turn Stair Spindles Step by Step.
My last post talked about the basic concepts behind turning multiple pieces between centers on a lathe. I just completed a set of 42 spindles for the Kaslo City Hall restoration so what better time to follow the process step by step?
Follow along to learn how to turn spindles.

Since there are several pieces to be turned, the time-consuming process of simply marking the centers would be a good place to find a time saver.
Step 1.
A “box” slightly larger than the size of the stock will cause the stock to center itself when inserted and twisted tightly against all four sides of the box. A screw inserted at absolute dead center (remember there are 84 ends that have to be dead on) will clearly mark the center when the stock is struck with a dead blow hammer on the opposite end. Make sure there are no “feathers” from trimming to cause an error in setting in the jig. They can actually cause a significant error, marking off center.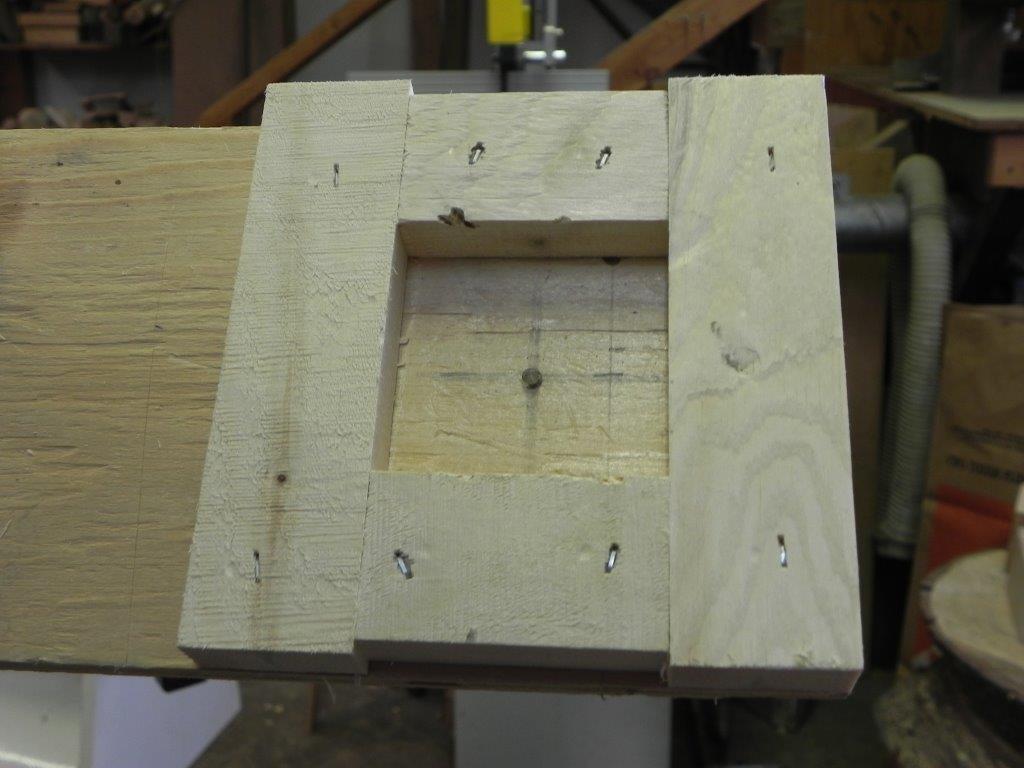
The floor is a good spot for long stock and the bed of the lathe is a good spot for short stock, basically somewhere with a solid base.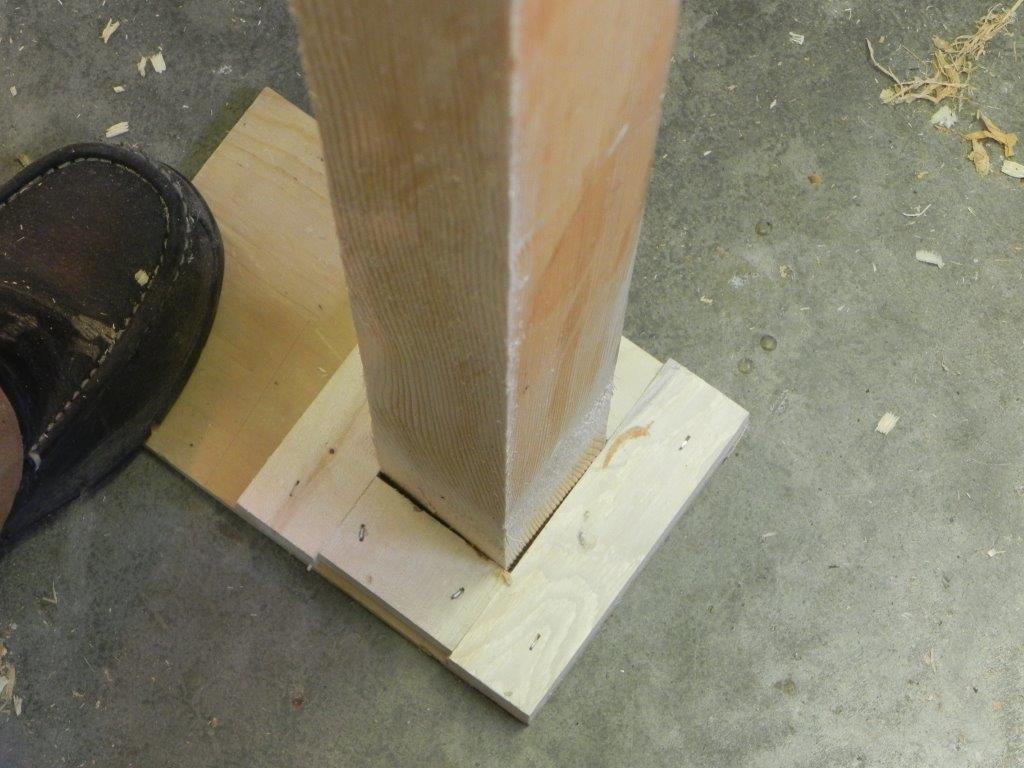
Step 2.
In the case of these stair spindles, the turned portion is in the center leaving square stock (pommels) at each end for fixing to the stair runners and railing. Always measure from the same end, marking the turned portion and the end of the pommel cut. These marks will appear as a solid lines when the stock is spinning.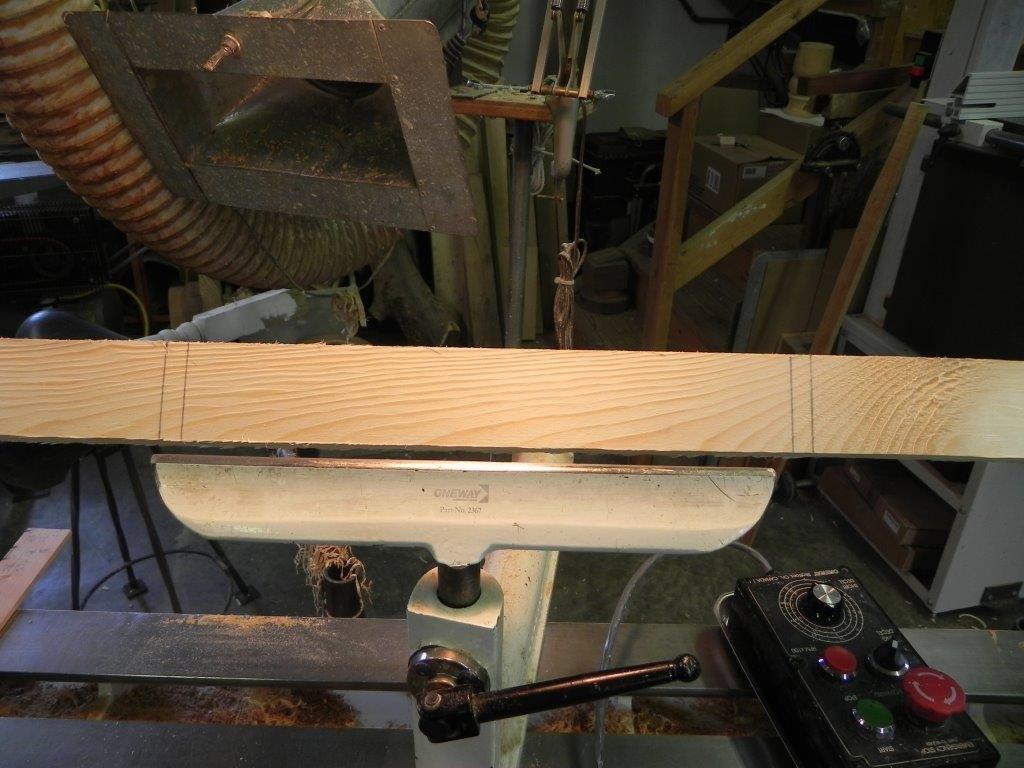
Step 3.
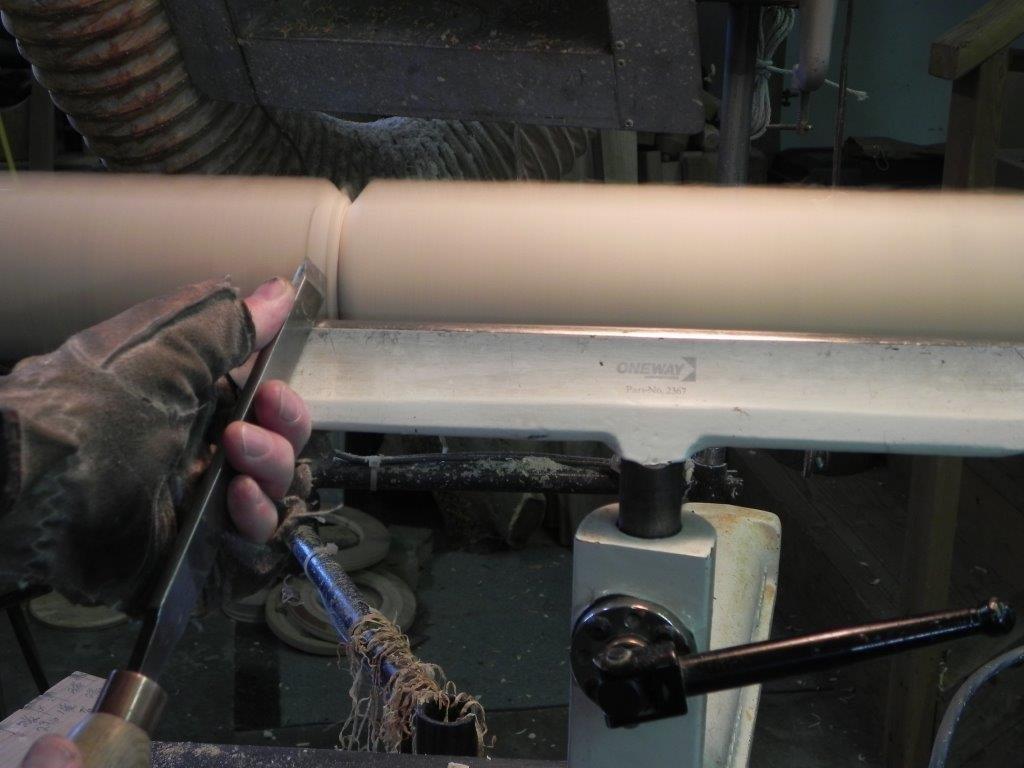
Make a relief or clearance cut with a skew or spindle gouge to allow the tool room to make the pommel cut — in this case a half bead. There are many shapes used for pommel cuts, which are simply a transition between square and round portions of a spindle. The relief cut should be as deep as the major diameter of the stock and does not have to be measured because that is the point at which the stock becomes round.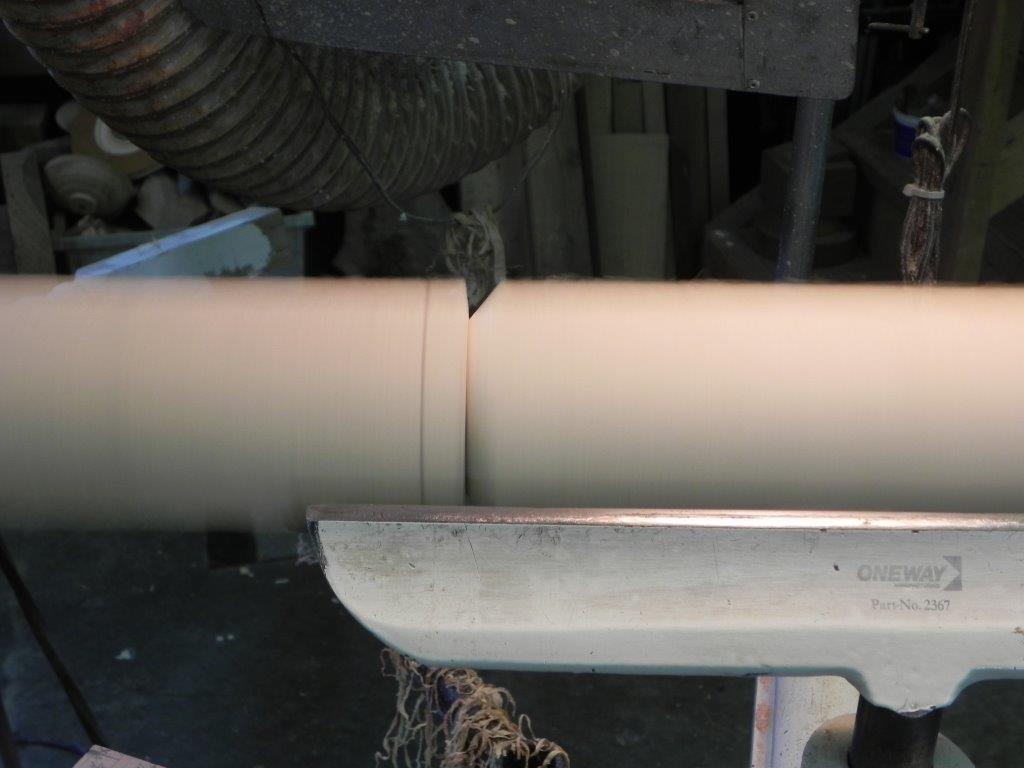
As you can see in the photo below, the relief cut allows the skew to make the cut while the waste easily clears the cut. Not seen in the photo is my index finger locked under the tool rest for absolute position control.
 Step 4.
Cut the pommel cut with the toe of the skew. The heel can also be used for this cut, this just happened to be my preference with this particular skew.
Once both pommel cuts are made, defining the ends of the turned portion, the stock can be rough turned then the major diameter sized with a parting tool and caliper as in the photo below. The caliper used on this project is a “direct read” caliper showing the diameter as it is being cut. It’s very handy and fast but a bit expensive and limited to a range between about 3/4″ and 2 3/4″, which is fine for most work.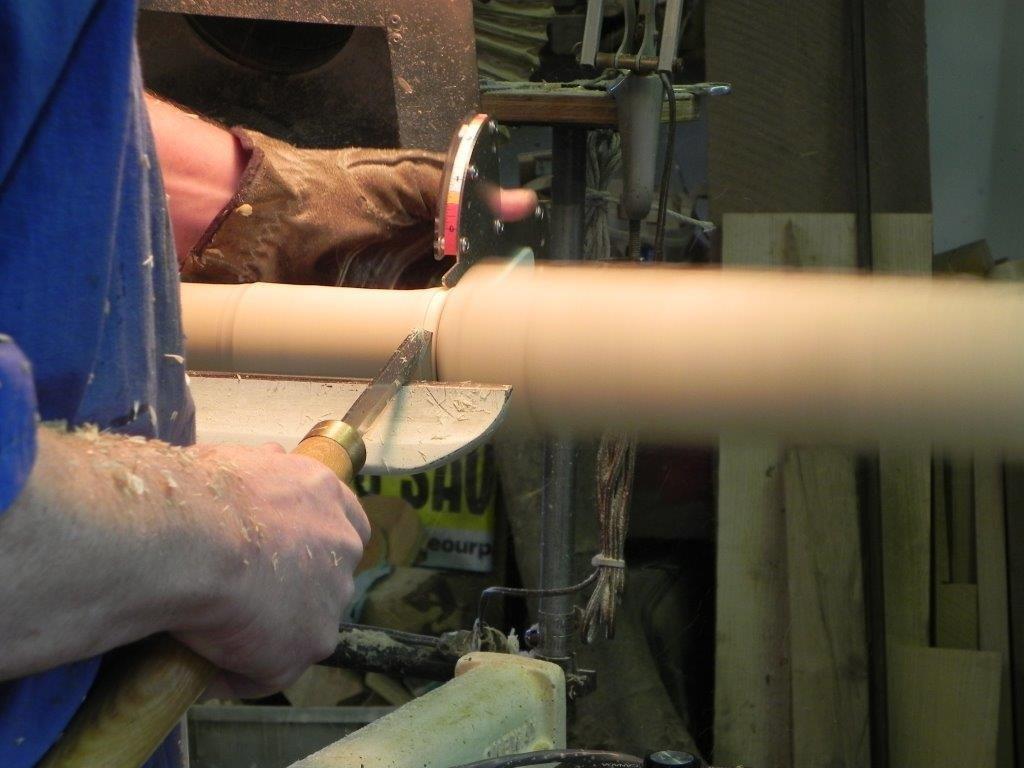
In the photo below you can see the left hand used as a traveling steady rest to support the cut. This is often required in long and/or slender spindles to prevent or at least reduce vibration. The spindle roughing gouge is held securely against the body, along the forearm and guided by the bevel, freeing up the left hand for support.
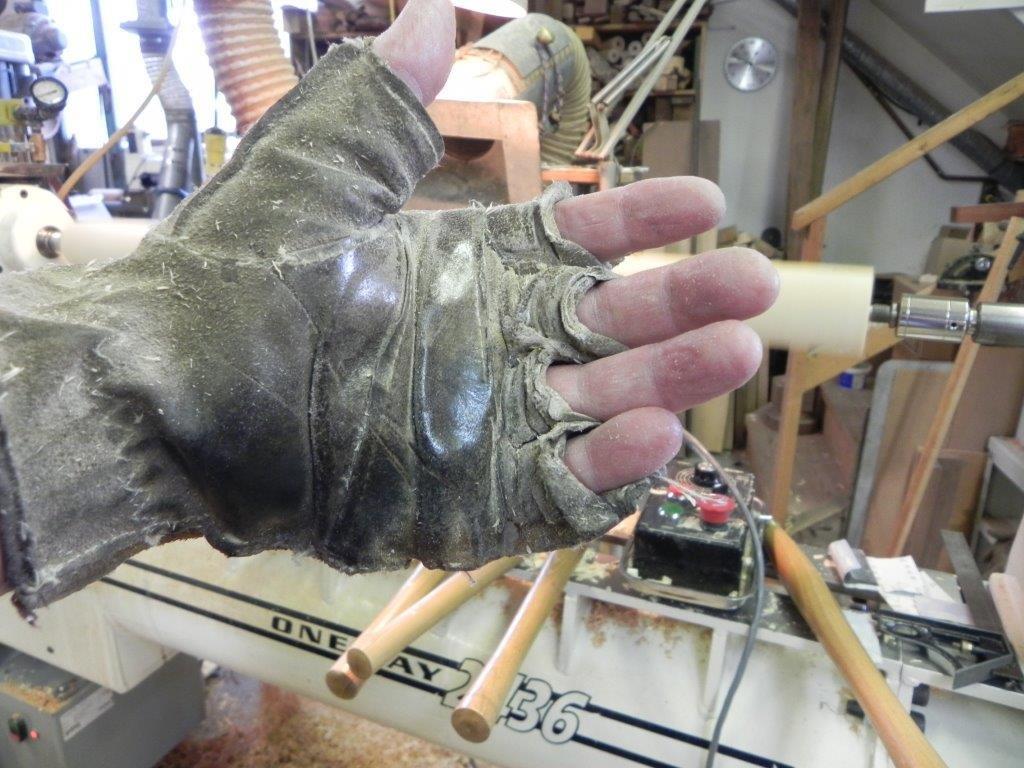
Normally gloves are listed as one of those things NOT to wear when turning. This glove is fingerless for proper control in other operations and thick to prevent being wrapped in the work and resist wear. Note that the hand resists the thrust of the tool on the opposite side but but does not wrap the work.
An alternative to the direct reading caliper used on this project is a separate spring caliper for each size (usually two or three at most). In this case it is wise to turn a cylinder with the “master” diameters to regularly check the calipers since vibration can slowly change the setting. Using a single spring caliper for all settings is very time consuming, frustrating and typically introduces a lot of errors.
Sometimes for a short job I will use my vernier caliper because it is fast to set and reset, very accurate, but awkward to use.
 Note the polished surface of the glove after much use. I doubt the palm of my hand would fare as well. It is imperative that the fingers do not come into play, wrapping the cylinder. Wrapping the cylinder could cause your hand to be drawn into the work and cause significant injury. Not to worry, once your fingers start to burn, you quickly get the hint to keep them free of the work.
 Step 5.
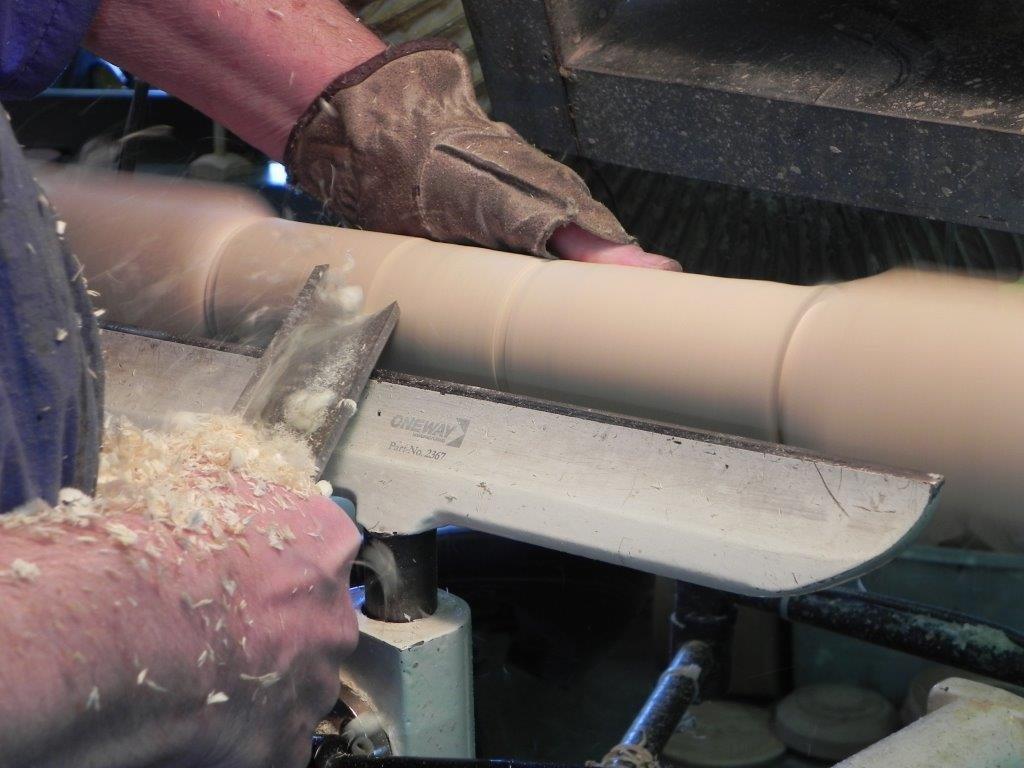
Once the main diameter is turned, it is possible to use the story stick to mark all the major linear dimensions. The shading on the stock in this photo indicates which side of the lines the sizing cut will be made. After a few pieces, these shading marks are not required.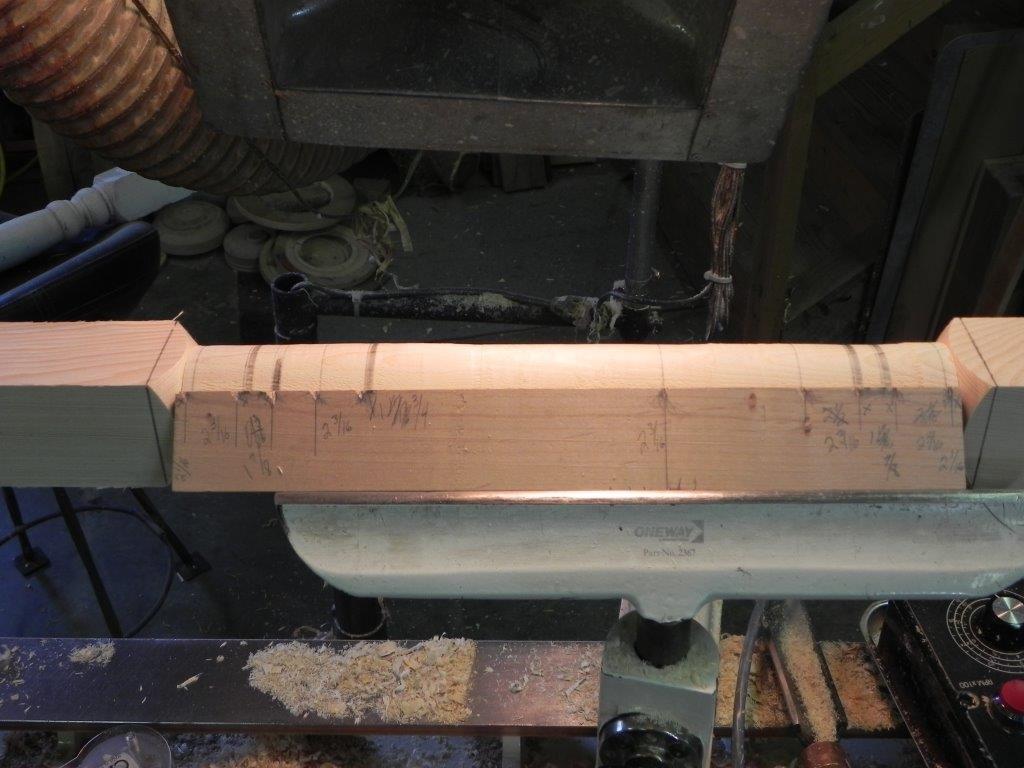
Note the “V” cuts in the story stick to ensure the pencil point is put in the same place every time. Even a 1/16″ error in the height of the elements can be picked up by the eye from a distance. The “X” marks which side the sizing cut is made and the diameters are noted. Once the “beta” piece was turned a couple of the dimensions were changed.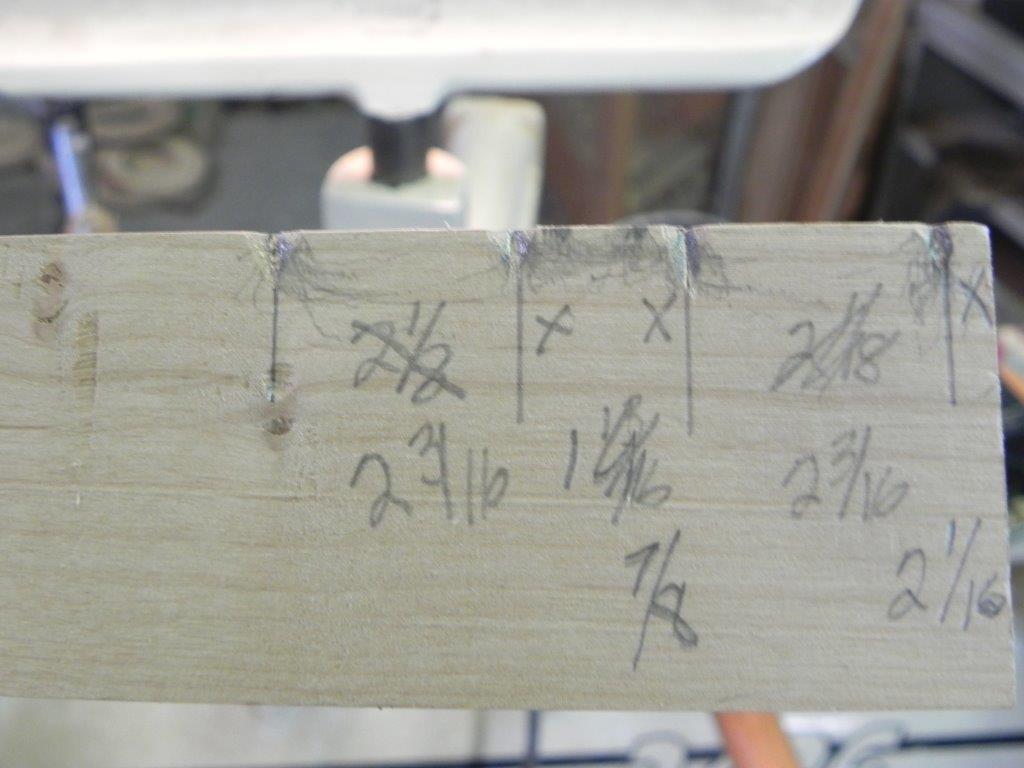
Step 6.
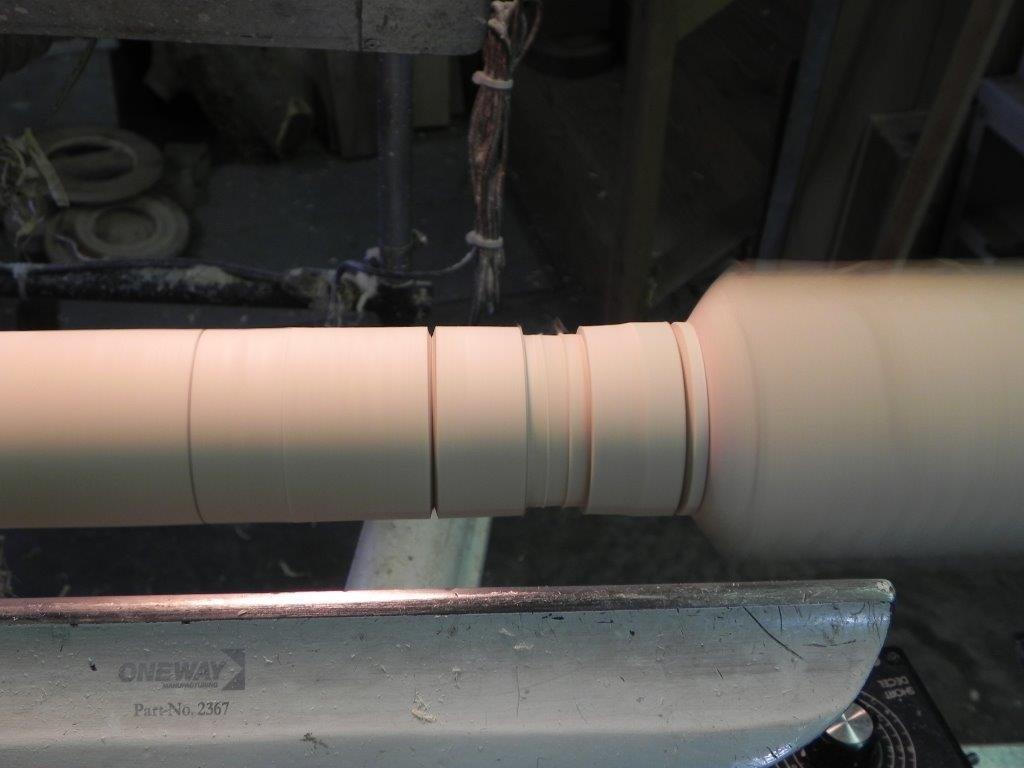
Once the dimensions are marked, sizing can be done and waste removed. In the photo below, the cove’s major diameter is cleared between sizing cuts and a relief cut has been made on each side of the two large beads. The depth of the cuts is measured by the consistent depth of the tool in the cut. Practice and experience will allow you to make these cuts very accurately and the same every time.
 Step 7.
After making a few pieces you begin to alter your procedure as required. In this case, I started working from right to left but quickly determined that if I cut the top end of the cylinder first, working left to right, the skew could be run against the waste wood of the bead rather than running into and marring the completed bead. Always be on the lookout for ways to reduce time by making the work flow better.
Note the heel of the edge is used for making this cut. Rather than a simple straight planing cut using the center of the cutting edge, this is more like cutting a bead (note the shape at the top of the cylinder in the next photo) so as the depth of cut increases, the heel of the edge comes into play.
 Step 8.
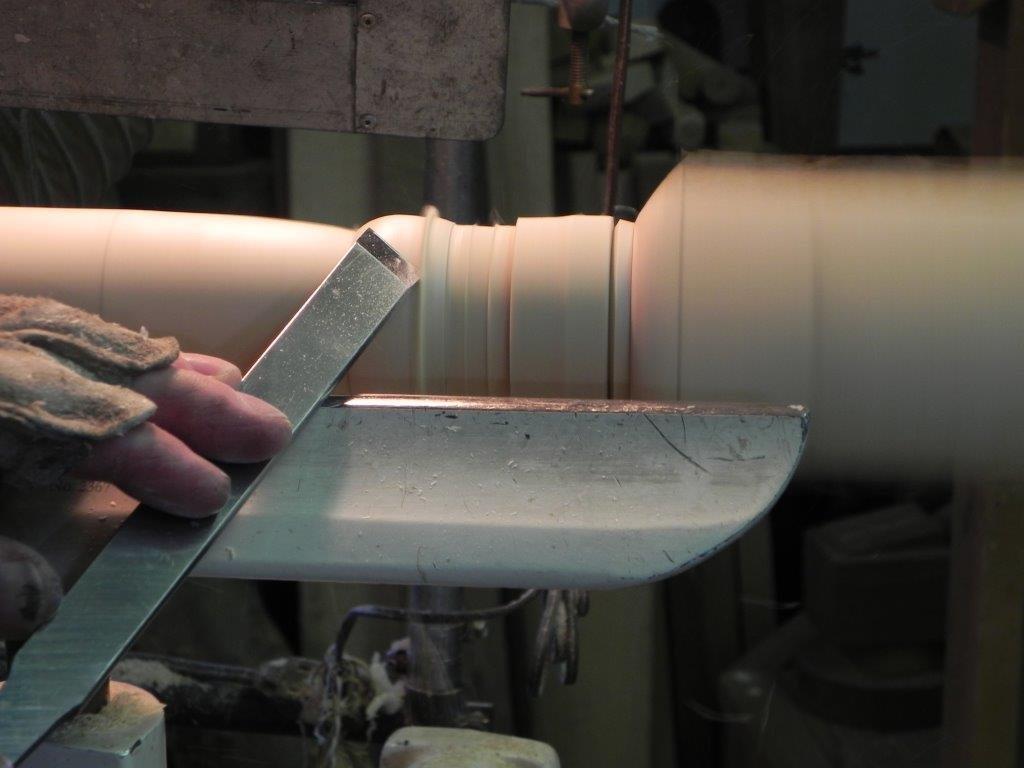
The beads are next, using the heel of the skew again to cut the bead from larger diameter to smaller, both ways from center. This allows you to cut with the grain rather than against it.
For smaller beads the cut is made with the gouge square to the work and rolling the wrist only. For broader beads like these the tool is angled slightly away from center before rolling, angling farther for broader beads. I keep my thumb on the top of the tool handle at the start of the cut allowing a comfortable grip through the roll. If the cut is made with anything but the heel, you will cut a straight taper rather than a curve.
A rough cut and finish cut were made on each side of center. By making this cut the same way every time the shape of the beads will all be the same. After making a few, the eye will know the shape and any necessary adjustments are easily made.
 Another change in procedure: I typically cut a cove then trim the sizing cuts with a slight taper using a very small skew reserved for just that job. I found that I had room to make the trimming taper with the skew immediately after cutting the beads with the larger skew I was using, thus avoiding picking up a second tool for the job. Cutting the cove after this operation was backwards to my normal routine but everything worked just fine.
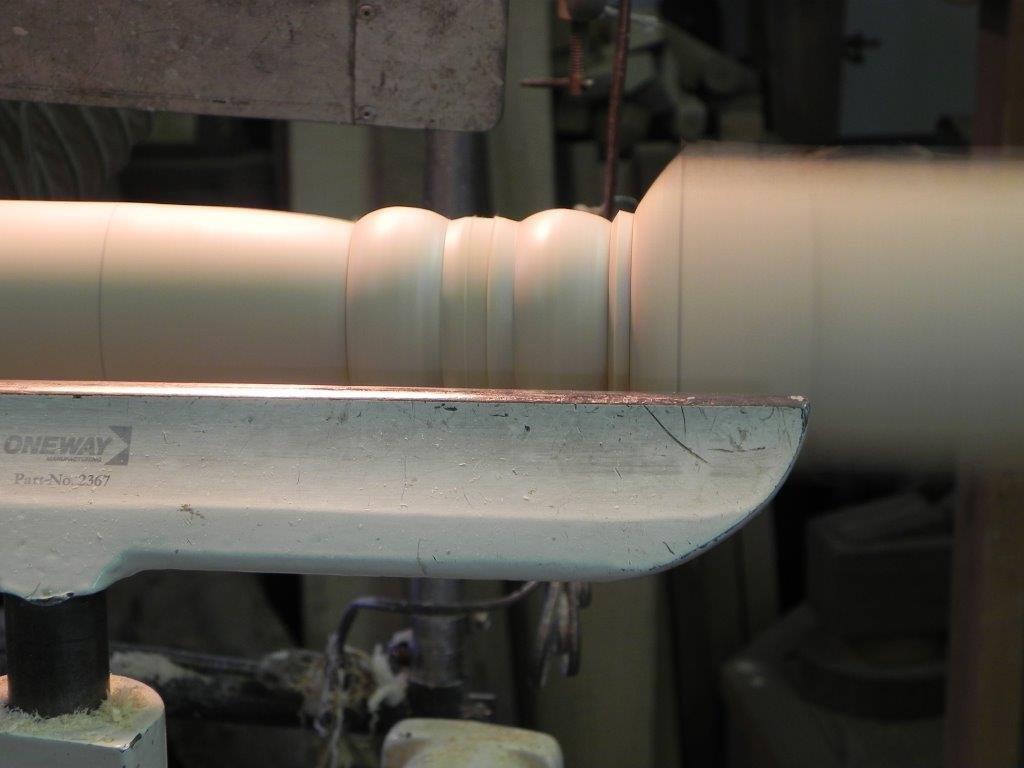
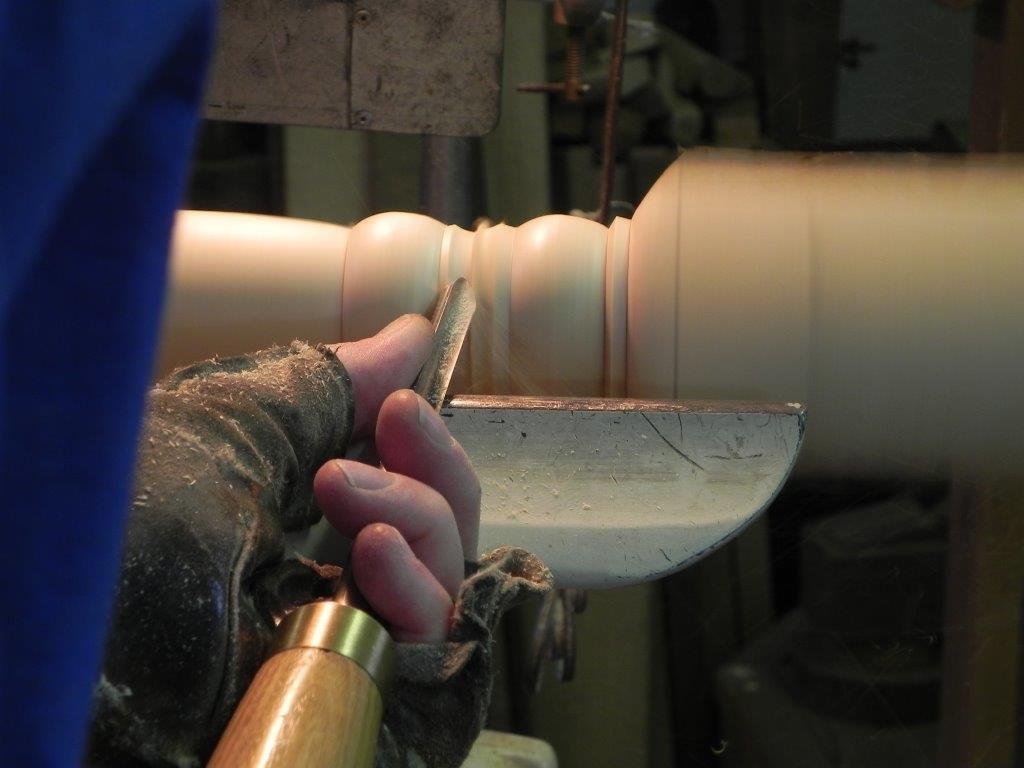
Like beads, coves are always cut from larger diameter to smaller diameter from each side. Note that the cove is first roughed out for relief with either a scraping or peeling cut with the nose of the gouge.
Like the bead, the cut is made with the gouge square to the work and rolling the wrist only, starting with the flute completely closed (facing toward the center of the cove) and ending up completely open (facing up). In this case, I keep my rear thumb on the side of the handle at the start and end up with it on the top. The cut is made only with the sides of the very nose of the gouge (say, 11 and 1 o’clock).
Once the cut is complete, there is often a small raised line left at the bottom of the cove. I always try not to have one, but it is easily sanded away. If it is present and you try to cut it away, you end up chasing from one side to the other, eventually cutting the cove far too deep. By making this cut the same way every time, they will always have the same shape and depth, so they won’t require measurement.
 Step 9.
Note the small tapered flats on both sides of the cove and at the pommel cut in the photo below. Cutting this taper is a better and quicker way to eliminate the torn wood from the sizing cut than sanding such a small space. Not only that, the taper highlights the separation in a far more appealing way than a simple straight flat. Sandpaper never touches this completed surface. It may be a matter of taste, but I think you will find it not only far easier but visually superior. A crisp line at the junction of the bead and cove visually separates the two. If not accomplished at the completion of the cut, just a touch with the point of the skew (or completely closed gouge) does the job.
The pencil line on the cylinder to the left in the photo below is the point at which it tapers both ways. It is easily sanded away.
 Step 10.
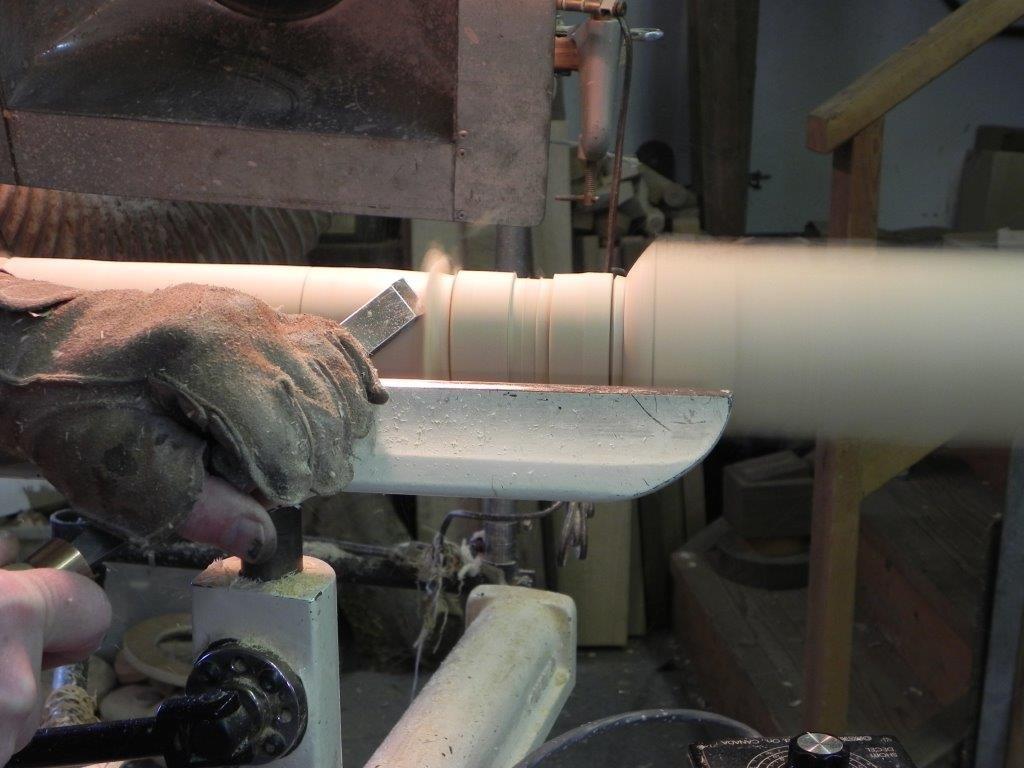
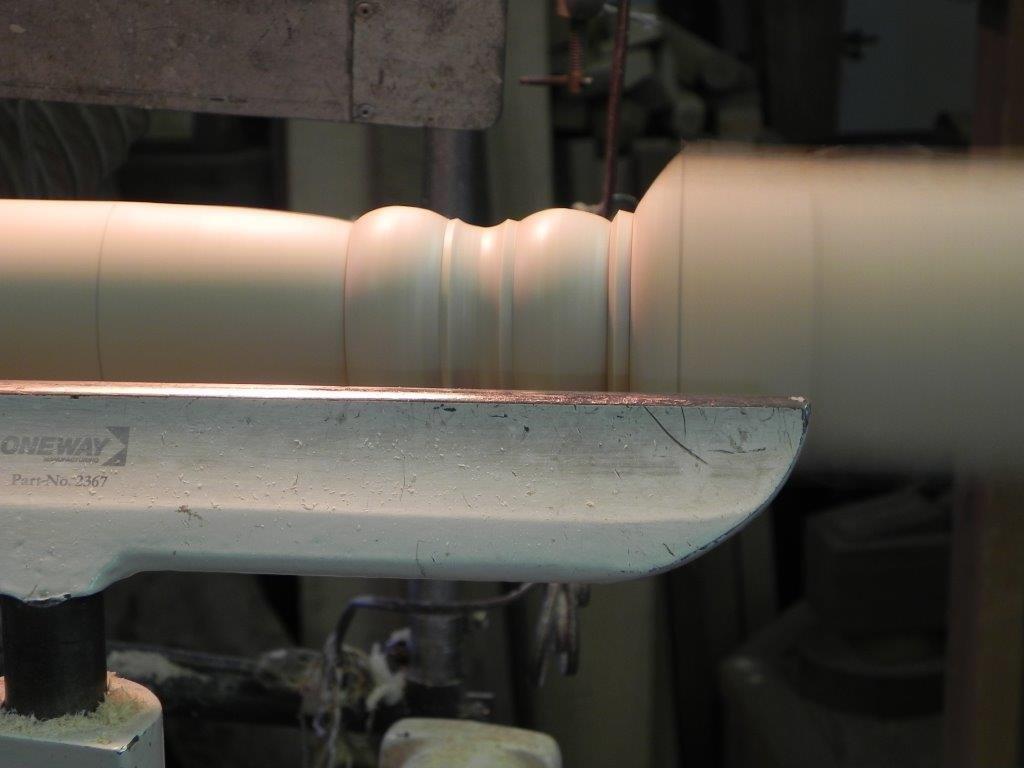
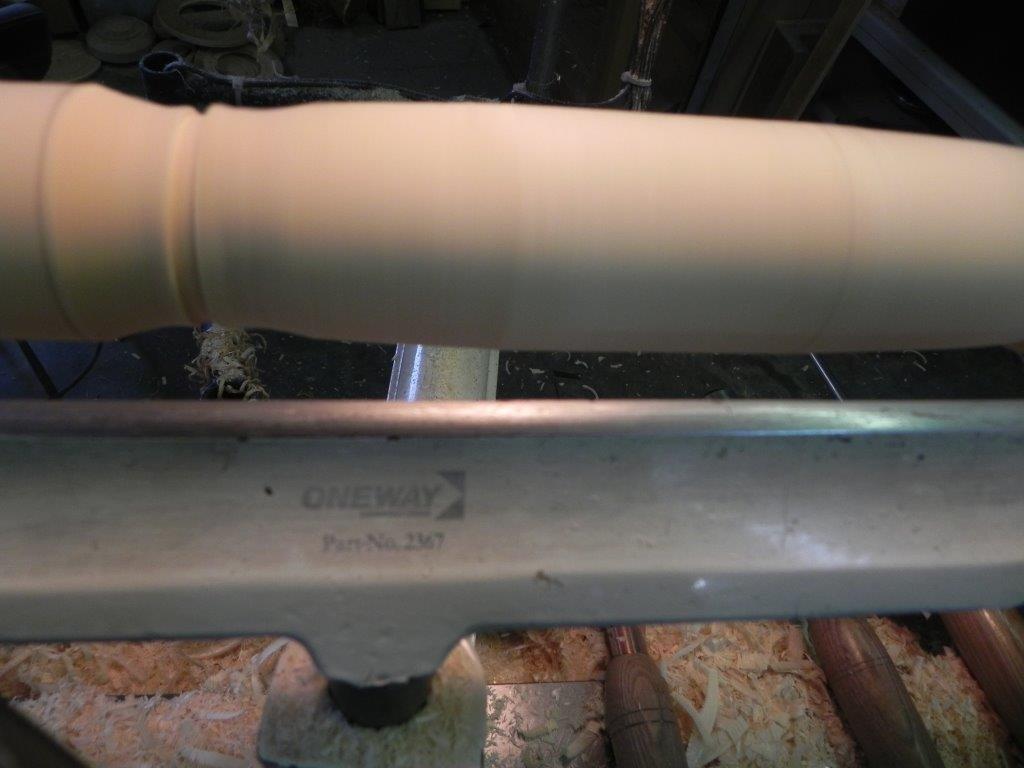
The photo below shows the sizing cut for the minor diameter of the tapered cylinder. The shaping was done with a roughing gouge then finished with a skew planing cut on the long taper and a planing cut with the roughing gouge on the large half cove. It is very important that your tool rest is not only clean and smooth, but also waxed for most of this work but for long cuts in particular. Wax completely removes the tendency of tools to grab as they slide along the tool rest. This momentary hesitation shows up drastically on the turning. This is a great trick for all your turning.
 Step 11.
It’s time to sand. Sandpaper can be the enemy. Make sure you don’t eliminate the crisp edges in your elements. Those crisp edges are what make the turning so attractive. Note the shaped block for the cove below and folded edge for sanding into the line between the bead and cylinder in the next photo. The use of both helps prevent any crisp edges from being sanded away. The tool rest is absent in this operation.
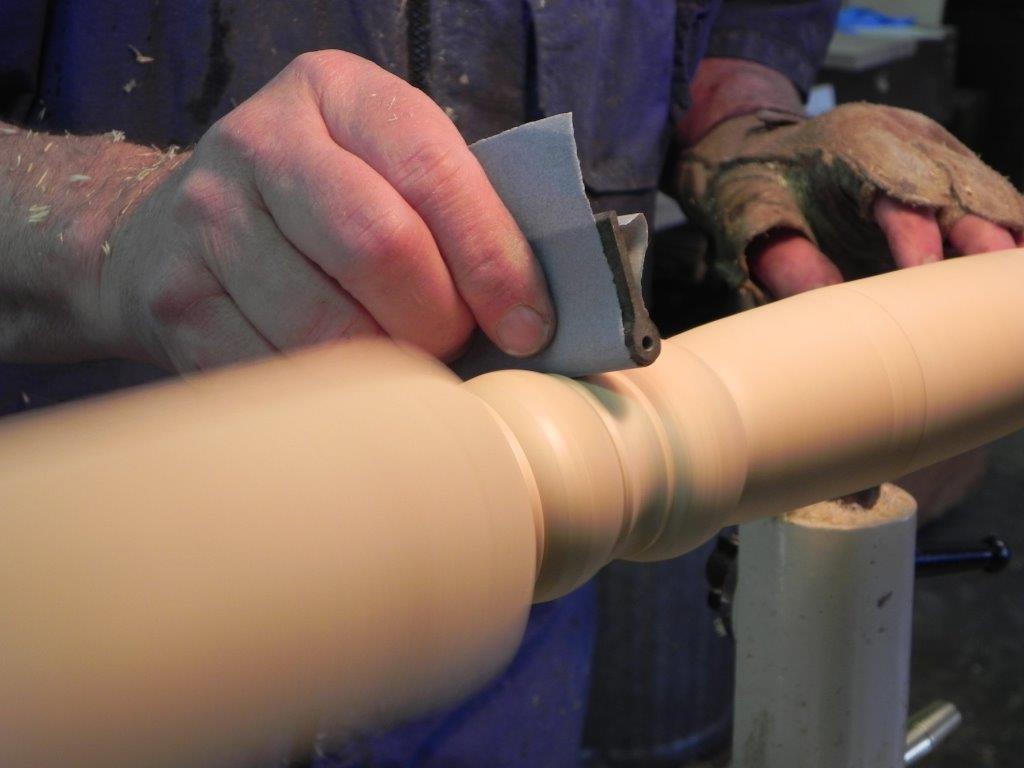 Carefully sand the center of the cove to maintain crisp detail.
Carefully sand the cylinder next to the bead to maintain crisp lines.
Finishing
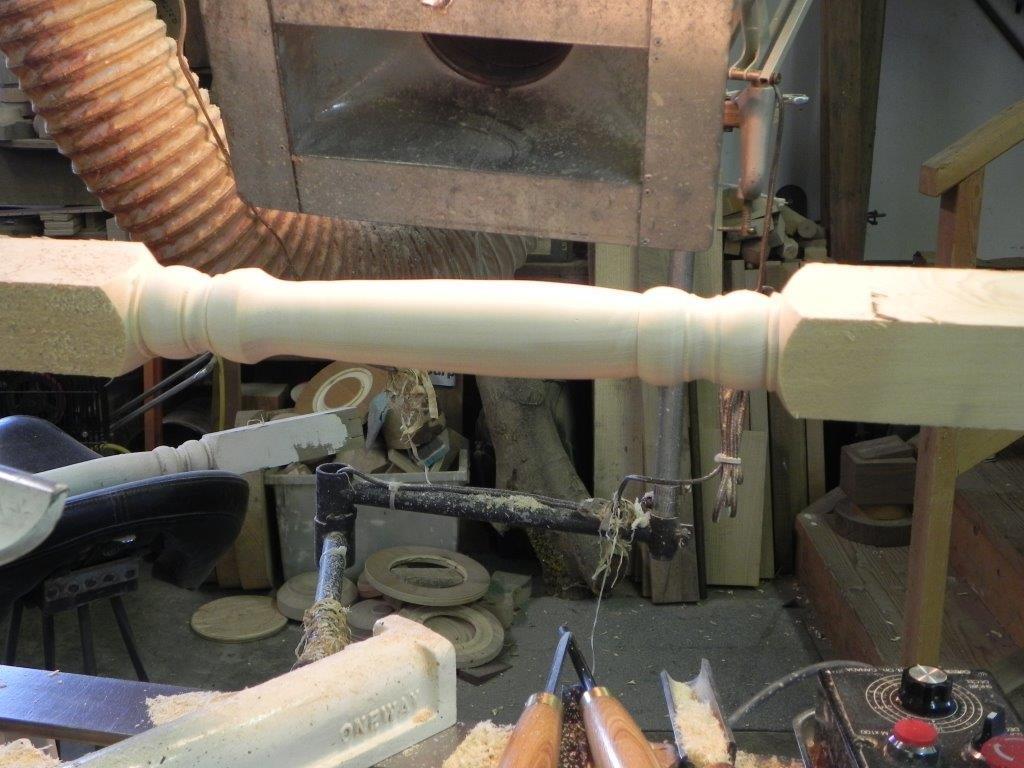
This is the finished product in the photo below. Two places you will not sand are the tapered flats between the beads and coves and the shoulders of the pommel cuts. At this point, your cuts should be clean enough that the objective is to eliminate minor tool marks and burnishing from the bevel, giving all the large surfaces a uniform texture. If you are trying to clean up tear out, you’ve been scraping instead of cutting. The polished, clean cuts from the skew on the very narrow flats and pommel cuts are not noticeable, therefore it’s not necessary to sand them.
It usually takes me between six and 10 of something for me to hit my stride. By then I’ve ironed out the kinks, found the best way to proceed through the process, found the best place to lay my tools and calipers, memorized the sizes of the various diameters and their location, then the time drops dramatically. These took me about 20 minutes each because the stock was green and very long. As a result, there was a lot of vibration if I made heavy cuts. The first few took me over half an hour each as I plodded through my discoveries, so don’t be discouraged if you attempt a few of something and it takes you what seems an eternity to turn each piece.
People often comment that production turning must be boring. I find it anything but boring. In fact, I find it meditative. Focusing on one thing to the exclusion of all else is exactly what meditation is. If I have a significantly large number of pieces to do I will break it down into manageable chunks. Because I had the time, I did these in three sets of 14 and even though I was tired at the end of each session, I felt satisfied. I then did something else with the rest of my day rather than plunging in to the next set. That being said, because the wood was tough to work with, I was glad to see number 42 on the third day.
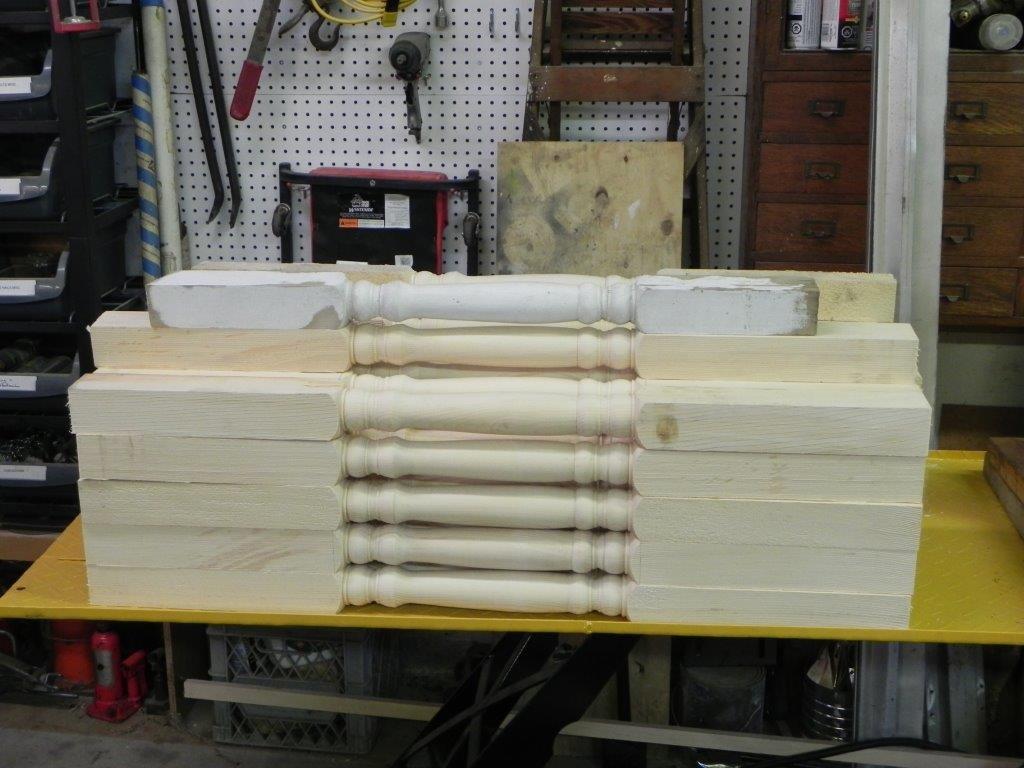
 Stacked with the original, these spindles are ready to be put back on the pallet on which they came. Each one will differ minutely from the next but as my dad used to say, “A blind man running for his life would never notice.”
I’d like to think the differences — if noticeable — would indicate that they are hand crafted but crafted well.
Interested in learning more? Check out Ed’s Interactive Remote Demonstration (IRD) for Replication Made Simple, and others.