Another colouring class

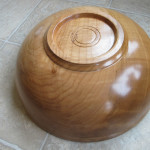
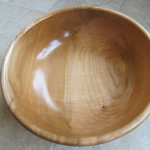
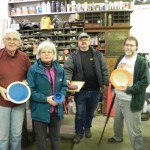
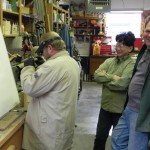
Sunday class with finished projects

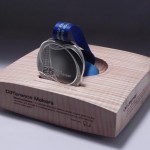
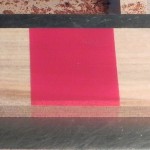
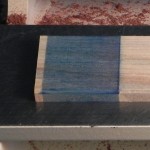
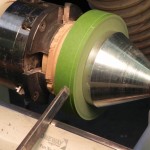
This past weekend I hosted eight students from the Fraser Valley Wood Turners Guild; four on Saturday and four on Sunday. As they say, a good time was had by all. We covered various ways of altering the colour of wood: dyes, lime/tint waxes, chemical treatments and faux finishes.

The class was mainly hands-on but we started with a power point presentation of several pieces representing many of the main methods and subtle twists used to create  the more unusual pieces.  After that, many test pieces were used to practice all the various ways in which dye can be applied as well as a day-long project applying lime wax properly. Probably the most important thing learned by all was the extent of preparation of a piece that is required. Everyone brought a previously turned piece prepared for colouring, so time was spent doing a little more sanding than was expected. Flaws are magnified exponentially by dye and liming, so we had lots of fun sanding tools marks and tear out. 🙂 Lunch was included so that made up for the extra work. 🙂

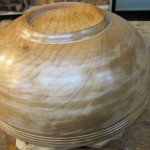
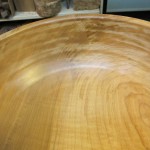
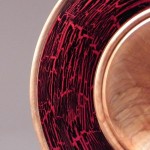
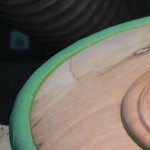
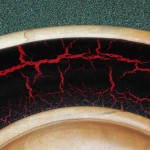
So this is what ring-porous wood looks like.

The main focus was on the use of dyes because that is where the most interest lies. We covered using a single colour and combining multiple colours – all on figured wood to enhance the shapes of the various types of figure. There was also considerable interest in lime waxing. This is one process that is greatly misunderstood so the record was set straight for a few folks. The use of ferrous sulphate and ammonia-fuming to ebonize woods containing tannin was something that most had never heard of or at least never seen before. To understand how to colour wood one must understand a lot about the methods, but also about wood itself. That was a surprise to some.

All in all, I think everyone’s ability to take their work to another level was greatly improved, which makes me very happy. One fellow from my previous class has progressed beyond all expectations. In fact, the student has become the teacher. Nothing could make me more happy than to be a catalyst in the progression in any turner’s journey.

As always, all comments appreciated.

Posted in Colouring wood, Finishing, General | Tagged , | Comments Off on Another colouring class

My Collaborator

My mentor, benefactor and collaborator helping me take a break from turning.

When I speak of the wood turnings that I do I usually refer them as “our” pieces. I feel that there is equal input from my wife Arlene in almost every piece. Often that input makes the difference between a so-so piece and one that really hits the mark. Some of them would never have been produced without her inspiration. At the very least I query her on my decisions regarding colour, form and texture to confirm that I am on the right track.

Arlene considers herself “not an artist”, but I beg to differ. Her understanding of colours and the way they work together indicates that she has a keen visual preference. At first, she didn’t understand the difference between a good and not-so-good form. I would bring pieces in that I felt were off in some way – perhaps a flat spot in a curve or a bottom that made the piece look heavy. By and by she began to understand the significance of form and now I can’t get away with anything. 🙂 Often when I am stumped on a design or technical snag, I will ask her opinion. I have found that she is what I like to refer to as “not all messed up by convention”. That is to say, as a non-wood turner, she doesn’t know that this or that can’t be done. Often my response will be, “No. That won’t work because … but… Hey. Wait a minute. You’re right. I could just…”. It’s often the fresh perspective that gets me over the hump. Her mind has even reached the place where she will say, “You know what you should do…”. Not bad for a non-artist.

Absolutely the most important part of our artistic partnership is her gift of time. And not just simply time itself, but the freedom of mind that lets my mind go where it has to to come up with the things that I do. In my past life I was unable to allow myself the time and freedom to engage an idea long enough to have it take flight. Our relationship is such that we are both unencumbered by any negative issues between ourselves, so there are no distractions. My time is free because my mind is free. What a  gift! For my part, when she is clearly suffering from cabin fever, we’re off to the pub for lunch or head out on the bikes for a  ride. Turning can wait in those cases. Not a bad trade: I win either way. 🙂

My freedom extends to my lathe. I love my lathe and only have it because she insisted that I get what I needed to do the job correctly. Her part of the bargain was that whenever she said she wanted to keep a piece, it was hers. Hence the “That’s Not Leaving The House” series. 🙂

I enjoy  wood turning and what we have accomplished together. I wouldn’t even be close to where I am without my “collaborative assistant”. I love my wife and my life. Thank you for everything, Arlene.

As always, comments and critiques are welcome.

Posted in General | Comments Off on My Collaborator

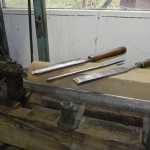
Now THAT’S a gouge.

2 1/2″ and 1″ gouges and 2″ skew (sharpened straight across). Note the lathe: 16″ by 10′ capacity.

Sounds like something Crocodile Dundee would have said if he was a wood turner. 🙂

My Grandfather was a wood turner and we had a huge lathe in the shop upstairs in our barn. I rescued it about 20 years ago. It’s now well over 100 years old and still operational, although I use it only rarely. I also have two gouges and a skew (sharpened straight across) that he used as well.

Recently I was contacted by email through the GVWG guild website  by Robert Walton of Robert Sorby Tools in England. He was searching for any magazines, periodicals and retail outlets in Canada that he didn’t have on his list. His list was obviously pretty complete because I couldn’t offer him anything he wasn’t already aware of. While I “had him on the line” I mentioned that I had some Sorby turning tools that were at least 100 years old. He said he would be interested in seeing them, so I sent him these and other photos showing him what I had (I am still amazed sometimes at our ability to communicate around the world like that).

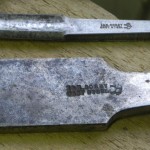
I&H Sorby

He replied saying that he hoped that I wouldn’t be disappointed but that they weren’t actually Robert Sorby tools. They were in fact made by I&H Sorby who was actually another member of the Sorby family who also produced edge tools. They weren’t in business that long and were absorbed by Robert Sorby. How could I be disappointed since they were obviously relatively rare.

Robert was very kind and sent me a wee pamphlet on the history of the Sorby company the included a little bit about I&H Sorby. I am always in awe of old world countries and their rich history,  records of which predate the formation of our own country.

Big lathe, little lathe, big gouge.

A big thank you to Robert Walton of Robert Sorby Tools. I thought I would include this here for interest. The tools are displayed on my large lathe that I salvaged from the elements in a crumbling barn. The large gouge is also displayed on my Jet mini lathe just for perspective. I can assure you that it takes a real man to handle a real gouge like that. 🙂

As always, I welcome your comments.

Posted in General | Comments Off on Now THAT’S a gouge.

Something architectural for a change

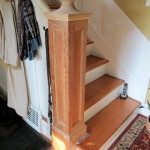
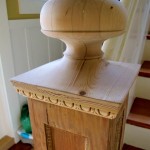
The old and the new. Paint definitely required.

For many years my stock in trade was architectural projects. One-off replacements, one of a kind pieces and whole spindle jobs, one of which was the most unique design (with every spindle being slightly different than the rest) that the particular architect involved had ever seen.

A recent customer contacted me through the this website, looking for a wood turner to turn a new top for her newel post. They are renovating an older house in Vancouver and were unable to find anyone who had the tools and the skills to make a replacement for whatever had been on the top before.

I ran a couple of designs past her; one traditional and one contemporary. They picked the contemporary design which was also my personal choice, so that always helps the job along.

The piece called for some very large wood. In days gone by, large pieces of tight grain fir

The embossed moulding was a good find, tying the new to the old.

were readily available. This is a key requirement, eliminating any problems with cracking. Newels and legs of this size were always turned from the outer heartwood of trees no less than 4 feet in diameter. The grain lines at that point are almost straight so lend little stress to the equation; inner stress being the cause of all cracking and checking as the wood dries  (which  takes many years in this large dimension).

I had a project of my own years ago where I turned 7″ x 7″ columns (22 of ’em) for a house that I built. I bought some used Glue Lam beams  and had them milled into the material I required. The newels posts were made from the same material. Being laminated wood, anything made from it is paint grade only in most cases. I had some of this stuff in my storage (you never get rid of that sort of thing) so made the newel cap from that. Because I wasn’t turning the whole newel post I had to attach the cap to the post so needed something to hide the joint. The cap was made in two pieces, the first being a transition piece from square to round having a round mortice to accept the cap or crown. This  was screwed and glued to the post inside the mortice. The actual top had a round tenon that fit the mortice and  was glued in with some killer glue that basically made the two into one piece of wood. I was able to get some quarter round with some embossed beading that matched the quarter round in the panels on the post, tying the whole thing together.

Thanks, Helene, for the opportunity to tackle a project that took me back to my roots.

As always, comments and criticisms are welcome.

Posted in General | Tagged | Comments Off on Something architectural for a change

Keeping up… or, go big or go home as they say

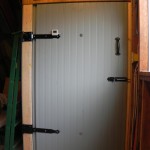
Door. Note huge hinges and internal temp monitor.

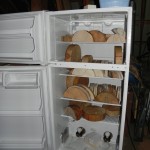
My little fridge works pretty well for drying blanks and rough turned pieces but doesn’t quite have the blast for large volumes of stock, so I decided to build a kiln.

I had a bunch of thick styrofoam, a box of old freezer hardware (thanks, Dad), some random plywood and a couple of studs laying around. Ted Lightfoot offered me some steel clad 5″ foam  composite freezer panels he was going to throw out. All I had to buy was some adhesive and caulking foam. Basically my kiln cost $30 to build. The dehumidifier to run the whole thing cost $160. Naturally I had lots of angle iron around for mounting the dehu as well as some racking to make shelves (haven’t used that yet because everything I put in was too big to go on shelves.

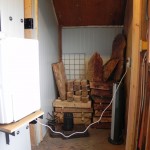
I started by cleaning out one corner of the upstairs of my shopDehu on the door. Swings away to allow free access inside. – a very major undertaking. I sliced the foam with an electric wire heated by a battery charger into the thickness I needed to insulate the outside wall and rafters. I used Ted’s panel for the back, other side and door. The panels are self supporting so only had to cut them to size (and shape) and anchor them in place. I attached framing material to the edges of the panels to join them at the corner and provide something to attach the door hardware to the wall. The small portion over the door was framed in and insulated with the foam.The space is about 4 feet square and is insulated and sealed better than any house. Rocco (my wood guy) suggested I not get it too tight so I didn’t provide any gasket around the door except at the top.

Door away, allowing free access. Racks in back will be handy for small piecesAs you can see the hinges are huge and have no problem taking the weight of the dehu (it’s heavy), so keeping it off the floor to save space. I wired in a box from a neighbouring plug for internal power. I provided a drain through the wall for the dehumudifier.

The dehu generates a fair bit of heat, so raised the temp to the high 20’s (80F+) on it’s own. I put a fan in to circulate the air and just today I added a small space heater to bring the temp up a couple more degrees in the dead of winter.

I loaded it on October 6th. The first few days the humidity being driven off made it smell a little musty so I cracked the door until that settled down. I got a remote temp and humidity monitor from Costco so can check on things from the office. How cool is that? 🙂 At the present time the humidity is running around 38 – 40%: down from 60%. The temp is about 30+ degrees (90F+) with the heater providing a bit of a boost from the high 20’s (80F+).

The first load was really wet maple burl and semi-dry curly maple. I borrowed a moisture meter from a friend and the semi dry maple is now at 15% after two weeks. The burl is still off the scale but I weighed it and it is dropping as well. Rocco says his dries wood in about five weeks, so time will tell.

The amount of wood I can out through this kiln is definitely enough to keep up. 🙂

I had put the fridge in the guild newsletter to sell it, but I have changed my mind. It is very efficient and is excellent for roughed-out pieces and bowl blanks. Now to find a place for it. 🙁

Posted in General | Tagged | Comments Off on Keeping up… or, go big or go home as they say

Trying to keep up

Beer fridge? Nope. I can vary the bulbs to adjust the temp.

Recently I came upon a new wood supplier – or rather he came upon me. The burls that were the subject of a recent post are an example. I have at my disposal an endless supply of figured maple of the highest quality for about a third of what I usually have to pay. The only hitch is that it is all green. To that end I recently converted a fridge to dry bowl blanks and although it works fairly well, three months to dry is now too long. Between this incredible opportunity for beautiful wood and the increased volume of work that I am having to put out, it would seem that  I am going to have to find another means.

Considering that, I picked up a dehumidifier the other day and made plans to build a dry kiln using it as the drying mechanism. I should be able to build the kiln and have it in operation in a few days. Hopefully I will be putting wood through at a rate that I can have what I need when I need it..

As always, any comments or criticism are welcome.

Posted in General | Comments Off on Trying to keep up

Thinking Outside the Circle

I was approved several months ago for a personal showing at the Circle Craft Gallery in November 2012. I never dreamed that I would be accepted but just in case, I made sure that I applied for a time slot quite a while in the future so I had time to prepare. The month before Christmas wasn’t a bad choice either. 🙂 Fortunately, in the mean time the store has been renovated making the Gallery much more prominent as well as making it obvious the space is a gallery rather than  an odd corner of the store.

Even though I applied for the gallery spot, I had no idea what having a show entailed or what my expectations should be. After seeing a few showings it occurred to me that it could be anything that I wanted. I decided to make it an opportunity to not only challenge myself, but challenge the average person’s understanding of wood turning as an art form.

My work in general is a challenge to the established view of what wood turnings should be. The bold colours that I use and the fact that my work is almost exclusively “non functional” by most standards (I believe that pleasing the eye is a “function”) is a start. The thought that I should have a theme for my show never occurred to me until I was asked to put something in the monthly Circle Craft newsletter about my show: title and artist’s statement. If I had a title I needed a theme. Since my outlook is generally one of challenging the norm, I felt that everything that I would put in the show would be as far from what the accepted idea of woodturning could be. What better title than “Thinking Outside the Circle”?

A perfect theme for me and with the time I have to prepare, I believe I can pull it off.  Obviously all items will have at least one turned element or part of a turned element. I have plans for a couple of things that will not look turned at all and still others that will be clear they are turned, yet otherwise depart from the norm in some way.

I hope to incorporate multi-centered turning, textured surfaces, colour – of course – that will include outright painting, deconstructed and reconstructed pieces but most of all I want to produce pieces that live on the wall rather than the shelf. I suddenly realized that I had become very limited by the place that turnings were expected to be displayed. I have also come to understand that there those people who don’t consider something is art unless it hangs on the wall.

I have been turning for what seems like a lifetime – and it almost has been that long. Only recently have I been producing work worthy of display and sale in a gallery but already I feel like I need to move on. This will be my opportunity to engage the abstract, completely alter my perspective and let ideas take me where they will.

Sounds pretty lofty, but I’m up for it. I have several pieces planned and have started working on those that I feel will be the most time consuming. I feel refreshed already.

And yes, all that wood I have been buying will come in very handy. Thank you , Rocco.

As always,  I encourage your comments and questions, so please refer to the tag line at the bottom of the article to post a comment.

Posted in General | Comments Off on Thinking Outside the Circle

The wood junkie does it again.

More than 90 board feet of burl, in the flesh.

“You know what, Colin? I have literally tons of turning wood at home. I just don’t see myself getting any more. I don’t know where I’d put it”.

Yes. These were my exact words to my friend Colin on our way home from an Avalino Samual demo at the GV guild hall yesterday. I was serious, too. Dead serious.

Fifteen minutes after I got home I got a call from my new maple bandit (actually, he has one of only two valid permits in BC for cutting maple on crown land) saying that he had just cut some bird’s eye maple and was on his way by. Would I like to have a look at it?…..long pause…. “OK.”

One of the caps.

Half an hour later he pulled into the yard with a load of the best burl I have ever seen. And big, too! One hundred percent perfect burl. How could I say no? My resistance just got up and went. Before I knew it I had a pile of the most beautiful burl in my driveway. My pocket was lighter but not by much considering the haul. I got it for about 1/3 of what I would pay at my regular supplier.

The best part; he called one of his regular purchasers first but he wasn’t home. He was at the demo, too, and I had been sitting beside him all day.  Sorry, Rich. You snooze, you loose. Shouldn’t have stopped for that pint on the way home. 🙂

Hard to see if you aren’t a wood junkie, but this is the best burl you will ever lay eyes on.

Now to rearrange my loft yet again to get this stuff stored and prepared for turning. 🙁

As always,  I encourage your comments and questions, so please refer to the tag line at the bottom of the article to post a comment. And if you are Rich S., don’t bother to call to whine. It’s all mine. 🙂

Posted in General | Comments Off on The wood junkie does it again.

DO NOT premix Procion MX dyes

After receiving a few questions regarding the chemical make up of Procion MX dye, I did some research. Besides finding out the actual chemistry involved, I also found out something that I had been doing that is incorrect. I copied a portion of the information from a website (below in blue) that deals with the chemistry in great detail. The information that is most relevant is regarding premixing. Previously I have premixed dyes in small 8 oz. plastic bottles. This would last for several project so was quite convenient. I haven’t had any problems, although I did have a question from a friend who was having a difficulty with black actually being very dark blue. It is not uncommon for blacks to actually be very dark blue so I felt he may have had some other brand on hand and mixed them up.I suspect the premixed black had possibly reacted with the water he had used, making it turn blue over time.

It seems that Procion MX dyes should NOT be premixed with water. You will note below that the very thing that makes Procion MX very durable for washing (when used in fabric) also makes it not suitable for premixing. The Procion H dyes  referred to – unlike the MX dyes –  require heating during the dying process. MX does not require heat, part of which makes it so suitable for using on wood.

Moral of the story: when using Procion MX, mix only what is required for the job at hand. A small price to  pay for something that brings out the chatoyance in figured grain so well.

Procion MX dyes are described as dichlorotriazine dyes, while Procion H dyes are less reactive monochlorotriazines. Here are the full chemical names and/or structures for several Procion MX dyes. Note the cyclical structure with two chlorine atoms on it: these are the reactive sites that react with -OH groups on the cellulose fiber to create the strong covalent bonds that are responsible for the dichlorotriazines’ extremely high washfastness. Procion H or monochlorotriazine dyes have one, rather than two, of these chlorines, for a similarly strong bond, but higher heat requirements due to their reduced reactivity – which also makes them store well in water, unlike the Procion MX dyes.

As always,  I encourage your comments and questions, so please refer to the tag line at the bottom of the article to post a comment.

Posted in Colouring wood, Finishing, Woodturning Tech Talk | Tagged , | 1 Comment

Burning workshop at Art Liestman’s studio! Fire department late to scene.

Art and class in Art's studio

Last weekend was a special day in Art’s shop. Eight of

Sample of a pyrographic sampler

us shared his space while he led us through a progressive approach to learning pyrography. We all had burners but had had little success in the past with the process. Art showed us several different types of tips to make various shapes. For each one he showed us various ways to apply the tip to get several more shapes from each tip. We all seemed to gain quite a bit of confidence and ability due to the progressive way in which Art took us down the path. Starting with a straight line, we progressed to keeping that line strength consistent, making curves, small circles and then branded shapes.

In addition to pyrography, Art showed us his brand of colouring using acrylics to highlight grain patterns. It is the same method as I use when employing dyes and then sanding back to expose the figured grain through the colour. Everyone tried the technique on various pieces of figured wood with some very satisfying results.

Mystery instructor

Bullwinkle learns to burn.

Before we started, Art asked each one of us what we wanted to learn in the session and wrote the answers down. He then proceeded to make sure that each concern was covered to our satisfaction. I was very pleased with what I learned about pyrography and also pleased to learn a new way of making an impromptu lesson plan.

Lunch – always a highlight – was delivered by Art’s wife, Jan. Picked up at their favourite Lebanese restaurant, the meal was not only delicious but ample enough that after we were done, we were all ready to curl up like a boa constrictor for a five day sleep after downing a calf.

The gang of eight plus one.

Very possibly the highlight of the day was learning how to shoot elastic bands faster and more accurately than I ever had before. Only a mathematics whiz could devise a method of putting a spin on the band to better control its flight. Who knew?!

As always,  I encourage your comments and questions, so please refer to the tag line at the bottom of the article to post a comment.

Posted in Finishing, General, Woodturning Tech Talk | Tagged | 2 Comments