
Originally written for Craftsy by Ed titled: A Small Woodturning Project you Can Whip Up This Weekend.
When describing woodturning to someone “browsing around” for a new hobby, one of the first points I like to make is that it is possible to create a finished piece in an evening or Saturday.
The turned box below is a good example of one of many small woodturning projects that can be completed in just one session. This project is admittedly more suitable for a turner capable of using the bevel as a guide when making interrupted cuts, but it is worthy project for a novice turner who’s up for a challenge. Creating job-specific jamb chucks for final steps defies detection of any means of work holding to the casual viewer.
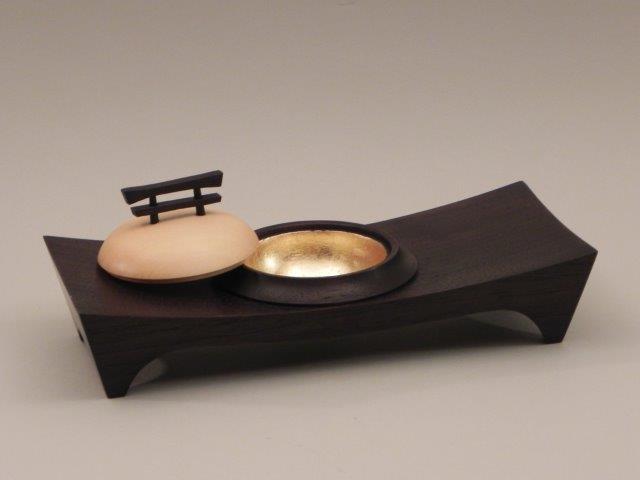
Turned box with lines inspired by Oriental architecture.
Inspiration
In the above example, my inspiration was informed by classic Oriental architecture. I have an affinity for the sweeping roof lines seen in many older buildings as well as the often solitary gates seen in gardens or entrances to enclosures. I enjoy contrasts and surprises, so chose to make the body with black walnut then ebonize it to make it almost black. The black walnut contrasts nicely with the very light yellow cedar lid. The gold leaf in the bowl form offers a surprise when you open the lid. The body and handle compliment one another and reflect the sweeping lines of roofs and gates to work together to imply a feeling of comfort.
How to make a turned box
Step 1: The body
The body is turned from a rectangular blank with the sides relieved at 15 degrees. I find that is an appealing angle that can be cut on a table or band saw, then sanded to completion at that point. When turning the curved top of the body, the sides will automatically generate sweeping lines on the sides and ends.
Mount the blank in the lathe on a small faceplate or screw chuck so that you can turn a tenon on the bottom to mount in a chuck. If using a faceplate, be careful to use screws only where wood will be turned away later.
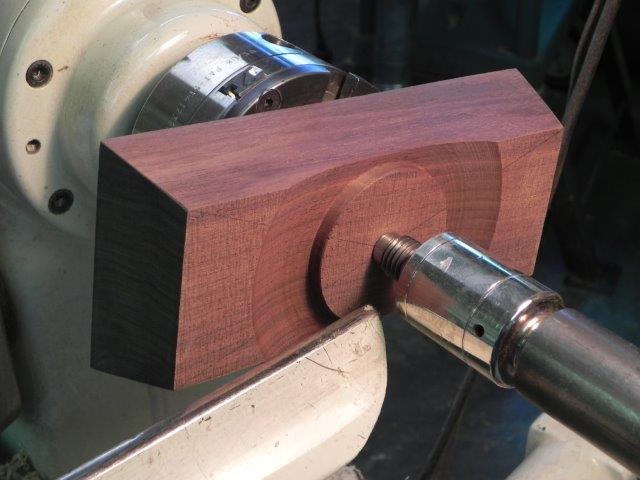
Turning the tenon on the bottom. Blank mounted on a screw chuck
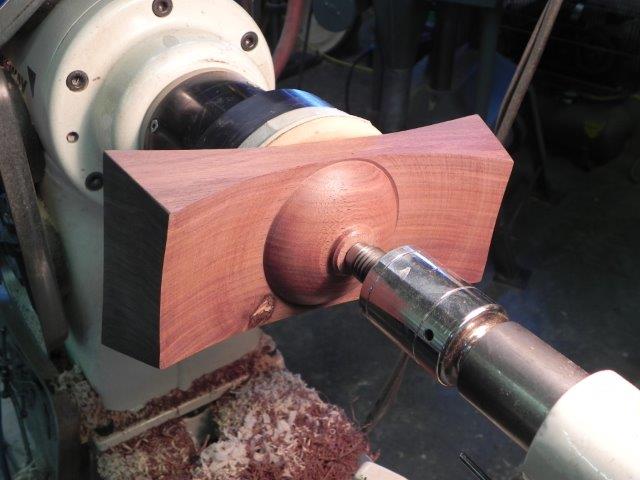
With the bottom tenon mounted in a chuck, you can now turn the curved top surface and the bowl of the box.
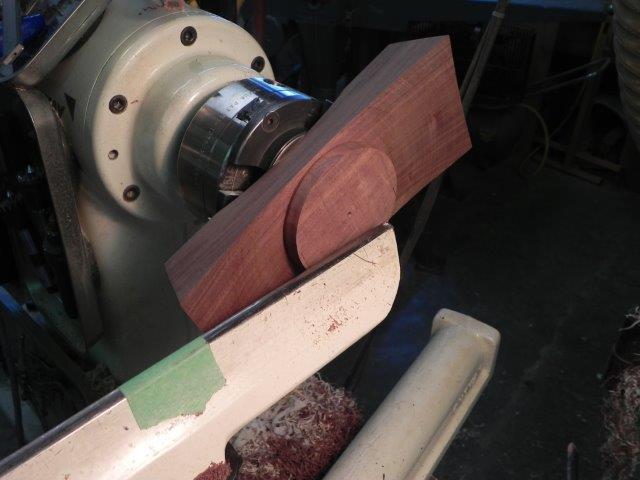
Turning the top surface. Note the blank area for the bowl portion and the tape on the tool rest indicating the finger “no go zone.”
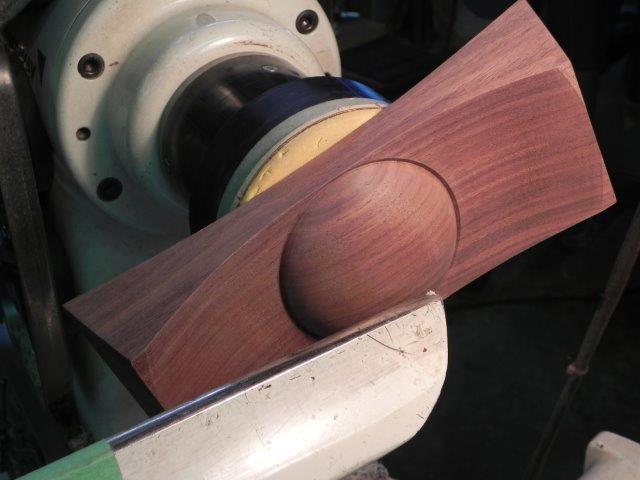
The bowl form is simply a bowl, so standard bowl turning technique is required. I chose to create a rabbet in the top of the bowl form to receive the lid, but you can leave it flat and have a rabbet only in the lid. If you chose the second option, the sides of the bowl should be as close to, if not completely vertical, to allow the lid to fit well.
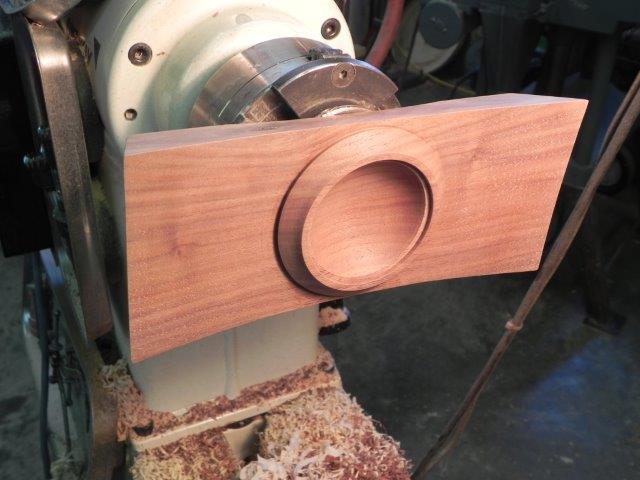
Turning the bowl of the box.
Turning the piece around and mounting in a suitable jamb chuck allows you to turn the bottom of the body to match or compliment the top curved surface. Once complete, carve away the center left by the tail stock by hand.
Turning the bottom surface using a jamb chuck and tail stock.
Even better, the use of a vacuum chuck allows you to turn the bottom completely.
Using a vacuum chuck allows you to turn the bottom completely.
Turning the two curved surfaces of the rectangle is unlike turning a fully round project. When turning the wings of the body, it’s better to keep the speed quite high, making light cuts with a slow, steady feed using the bevel as a guide since less than 50% of each revolution presents wood to the tool. The rest of the time the tool is unsupported in the air. Be as steady as you can and use only a very sharp bowl gouge. Do not attempt to sand this portion on the lathe. Sand the wings only by hand.
Turning the bottom reveals a sweeping line from end to end, but since it is a rectangle the cut either does not penetrate the ends or penetrates only minimally. You can leave this flat so the box has two wide legs or cut an arc in the ends later, creating four legs. The whole body will require quite a bit of hand sanding.
Step 2: The lid
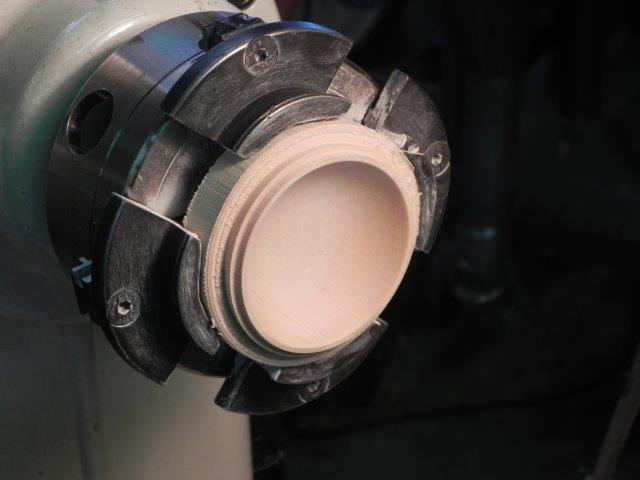
Cut a blank for the lid and mount it in a chuck so that you can turn the inside first. Turn a rabbet to fit the body using the body itself as a gauge before turning the inside shape. The lid should not be tight, yet it should not be a sloppy fit. In other words, just right. A very slight taper in the rabbet will allow the lid to fit on easily yet still seat without too much play.
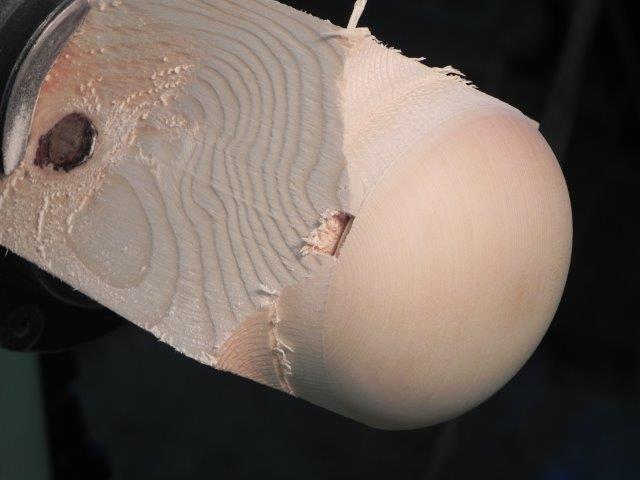
The inside shape is your choice but I prefer a concave form that reflects the shape of the outside of the lid. Sand the inside shape. Turn the outside diameter and at least a small portion of the outside shape at this point — this prevents chipping of the edge of the lid when turning the outside shape.
Turning the inside of the lid.
Create a jamb chuck for the lid, then turn and sand the outside shape of the lid. Note that in this case, there is a channel cut in the chuck to allow you to easily pry the lid from the chuck or blow it off with air pressure. The latter works well and leaves no marks on the wood — as long as you’re a good catch!
Turn the outside of the lid in a jamb chuck.
Step 3: The handle
My objective in the handle was to reflect both the color and theme of the body so used ebonized black walnut. The uprights are turned on the lathe but the cross beams are carved and sanded. Rather than drilling holes I used a power carver with a small bit to shape the holes in the beams and lid because they are tapered and mounted at an angle rather than vertical, requiring tapered holes at an angle.
By applying masking tape to the lid, it is possible to mark the holes out without marking the lid. By leaving the tape on during the glue up, any squeeze out is removed with the tape. With a linear handle such is this, take care to align the handle with the grain of the lid. If you do not, this final step could totally distract the eye from all your good work up to that point.