
Originally written for Craftsy by Ed, titled: “Working Under Pressure: Vacuum Chucking on the Lathe.”
Chucks are commonly regarded in the woodworking world as the go-to method of holding work on a lathe when creating a bowl or platter. Typically they are four-jaw, self-centering devices that grasp the work by a tenon or recess. They hold the work very securely and are quick to use, however they mar the work in some way that must be repaired, usually requiring a jam chuck.
Jam chucks offer the ability to hold work without marking it, but they take yet another piece of wood and require sometimes a fair bit of time to create. The best of both worlds, vacuum chucks hold the work without marring it and the work can be set up as quickly as a normal chuck.
Better yet, can you imagine how the natural-edge bowl in the photos below could be held by any other means while working on the foot?
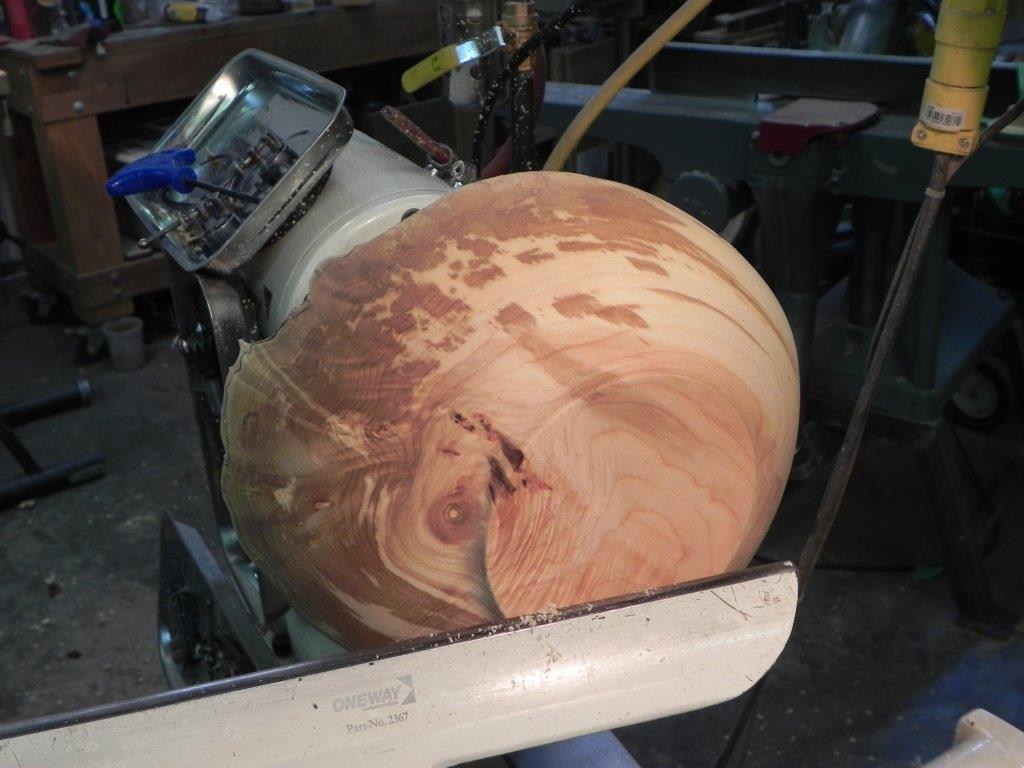
I know of at least one woodturning artist who uses vacuum chucks exclusively for his multi-centered pieces, not just for holding a piece to finish the foot, switching rapidly between placements. Vacuum chucks are capable of holding work that requires serious wood removal. Creating a jam chuck to hold this bowl to finish turn the foot would be very involved and probably take longer to create than the bowl itself.
Putting the pressure on
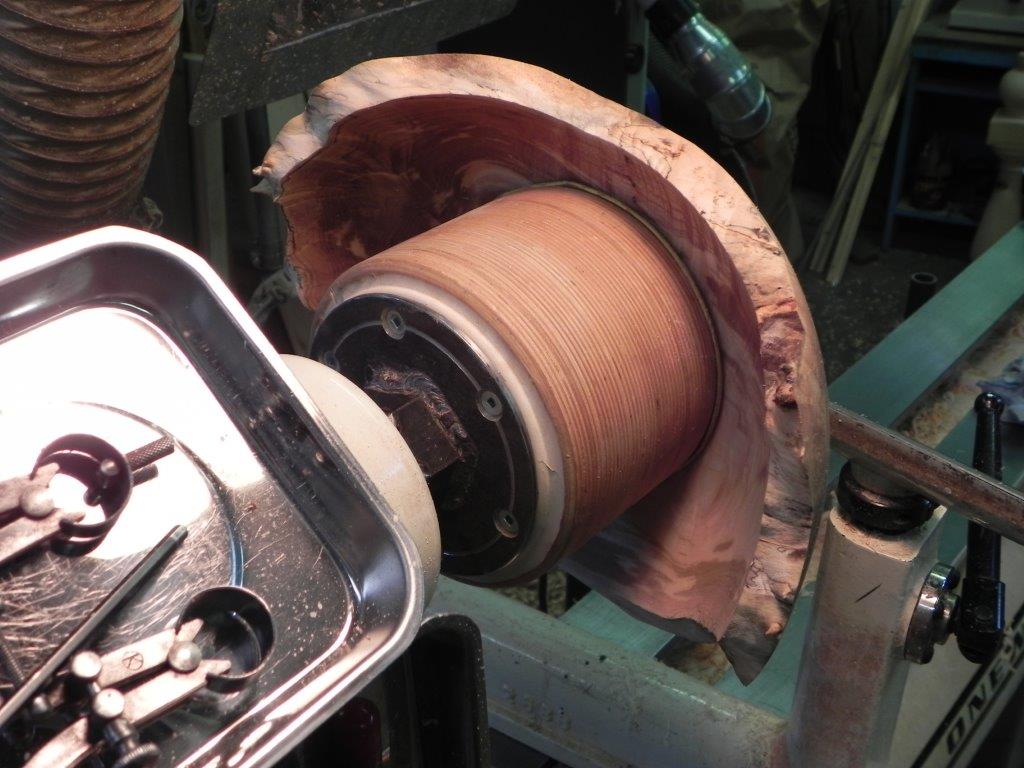
Vacuum chucks hold the work by using atmospheric pressure to force the work against the face of the chuck by creating a vacuum inside the chuck. The face of the chuck is covered in a soft, closed-cell foam that conforms to the surface of the piece and provides friction to help drive the piece.
Considering that atmospheric pressure is 14.7 psi at sea level, it’s not hard to calculate the holding force available. The chuck in the photo has a 4.5″ inside diameter and therefore has a frontal area of almost 16 square inches. Using 14 psi as a round number (it’s tough to get a pure vacuum), 16 x 14 psi = 224 pounds of force over the entire area holding the bowl to the chuck. That’s like me with heavy boots sitting on the bowl to hold it in place. I could make some pretty serious cuts if required.
Extrapolating that, if a 10″ chuck is used, a mighty 1,100 pounds of force will be holding the work in place. That’s like parking one wheel of a loaded pickup on the piece, so some restraint must be used if it’s a thin platter. Not to worry, we can do that. It goes without saying that you folks in Colorado will have to use a smaller number for atmospheric pressure than us folks on the coast, but you still have to be pretty tough to haul that bowl off the chuck.
Working down the line
We know our vacuum chuck has the oomph to hold the work. Working our way back from the chuck, the next thing that is required is a means of transmitting the vacuum through the rotating spindle. Stubby is at least one brand of lathe that has a connection already provided in the headstock, but for the rest of us, a rotating connector must be added to the outboard end of the spindle to connect the vacuum hose. Oneway Manufacturing provides one for their lathes that can be adapted to any others with outboard threads.
Another type uses the vacuum itself to hold the rotating adapter to the end of any spindles that only have a metal hand wheel. The hose doesn’t have to have an internal metal helix, but it has to be stout enough to prevent air pressure from flattening it like a macaroni noodle. I use a fairly heavy duty air pressure hose and it seems to be fine. Again, it’s all about the surface area.
That leaves the pump. A pump is required to produce a vacuum. These are available online or you can make one yourself.
Too much of a good thing
I mentioned that in some cases the force applied by a vacuum on a piece can be great enough to cause damage, either deflecting the piece or actually breaking it.
In the case of deflection, if the piece is thin enough that it deflects inward during turning, the shape created will distort outward when the vacuum is released. Typically, a bulge in the finished bottom is the result. To eliminate this and the danger of breaking the piece, a valve in the vacuum line is necessary to regulate the amount of suction. Almost always, there is enough leakage through the end grain in the wood itself to help, but the valve allows you to control the level of suction. In the picture below, there is a filter to prevent any gritty bits from reaching the pump. A vacuum gauge in the system is very useful to indicate how much suction is present and when a seal is failing while turning.
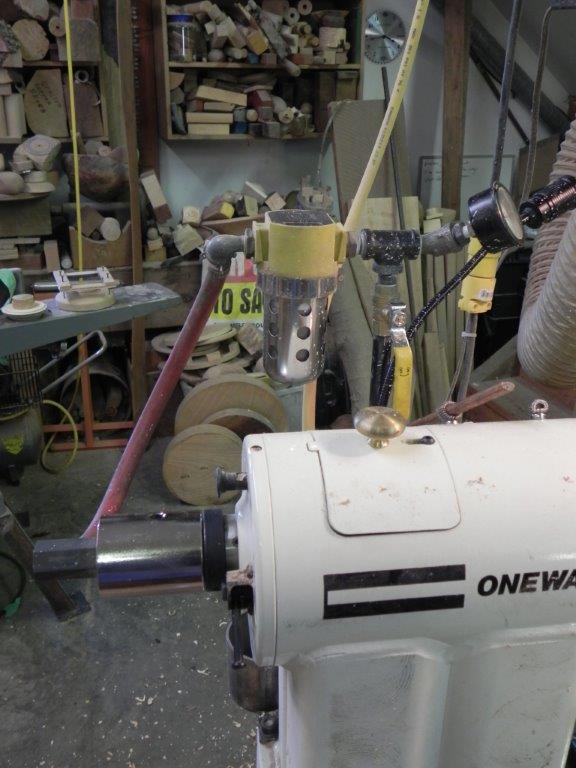
Below you can see a valve, filter, gauge and rotating adapter used to transmit and control the vacuum for the chuck.
Plugging the leaks
Leaks are detrimental to the success of the whole operation, but it is possible to deal with them. Leaks in the system itself will be limited to connections, and of course the rotating adapter that connects the system to the lathe. All of these are simple to identify and repair as required.
Sometimes the wood is porous enough that there are significant loses through the end grain areas. Leaks in the wood are easy enough to limit by applying masking tape to the piece wherever air is leaking through. It is easy to feel because it actually feels sticky, to the point that sanding dust adheres to the surface. Sometimes the dust will improve the seal. A gauge will indicate the effectiveness of any taping or other jury rigging.
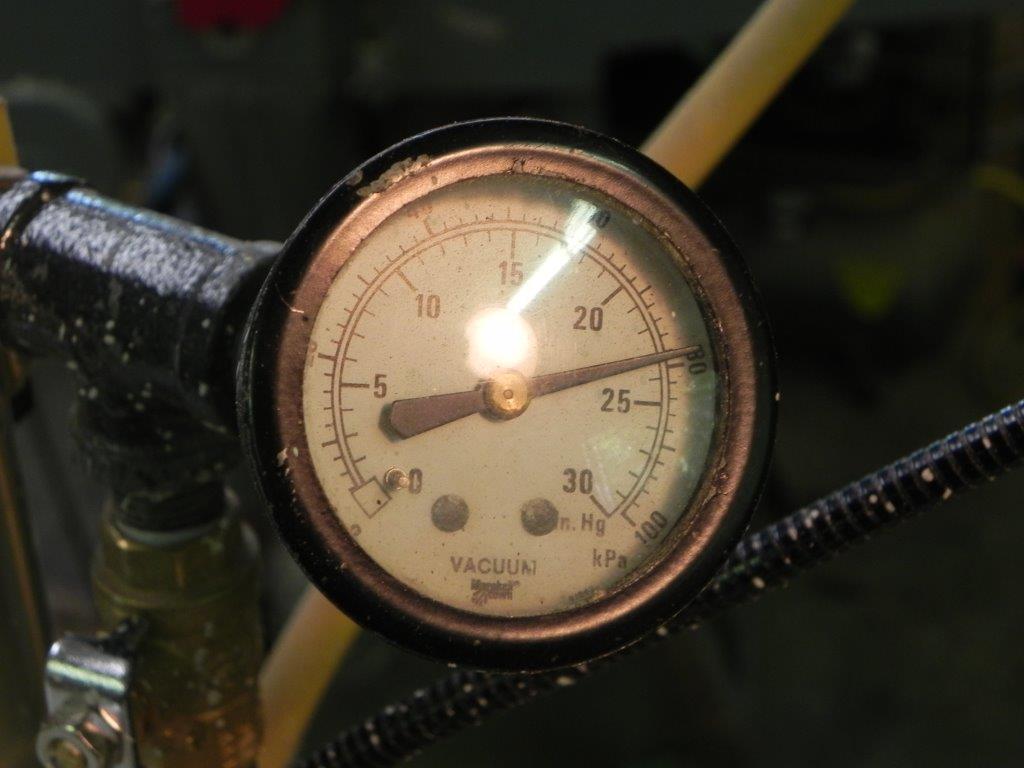
Below is a vacuum reading before taping the end grain. Note that the gauge reads in both inches of mercury and kilopascals. Normal atmospheric pressure is about 30 inches of mercury (30 in. Hg)
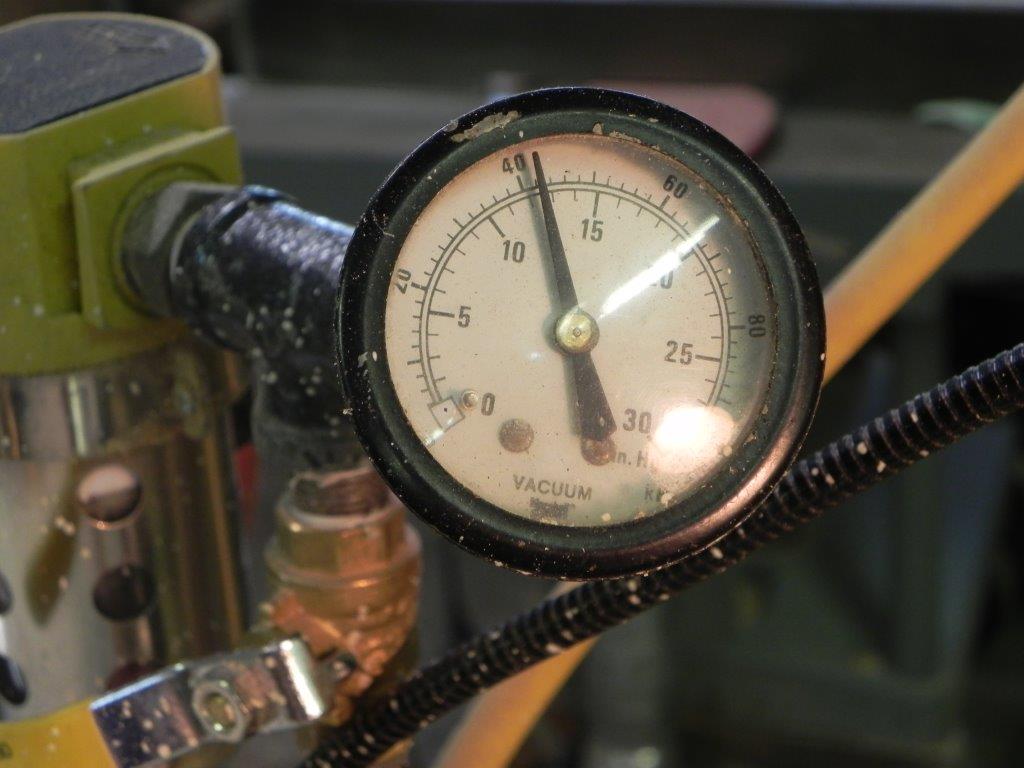
Below is the gauge reading after taping the end grain, effectively doubling the vacuum. This reading indicates a holding force of about 175 pounds.
Vacuum chucking can be a very worthwhile addition to your arsenal. Full systems are available but can be very expensive. Remember: the lathe is the cheap part.
If you are unable to manage the cost of a system, but are at least a little handy, it is possible to make the essentials using basic plumbing and air handling hardware and material from your shop. Stay tuned for posts on making a pump, assembling the necessary piping and the chucks themselves.