Originally written for Crafty’s website by Ed, titled “The ABCs of Woodturning: The Basics”
ABC. What topic doesn’t have its “ABCs”? Following the A, B and C of woodturning basics will give you the ability to control any tool to get the direction and depth of cut that you want to produce the form that you want. Tool control is everything in woodturning.
A is for anchor
Your objective is to hold the tool so that it is stable without having a death grip that will tire you and actually prevent the fluid movement that you need.
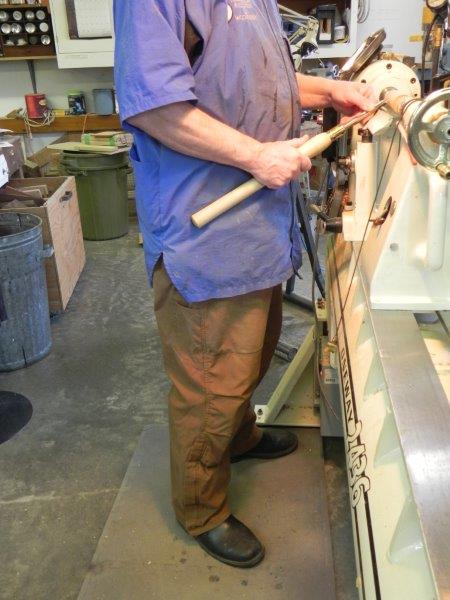
Anchor the tool by placing it on the tool rest and securing it with your body by keeping your elbows against your body, the tool handle (such as a long-handled bowl gouge) on your hip, and your feet about shoulder-width apart. There are times (i.e. start of a cut when hollowing a bowl) where you aren’t able to keep your arms close to your body. In that case, hold the end of the handle to increase your leverage on the tool.
B is for bevel
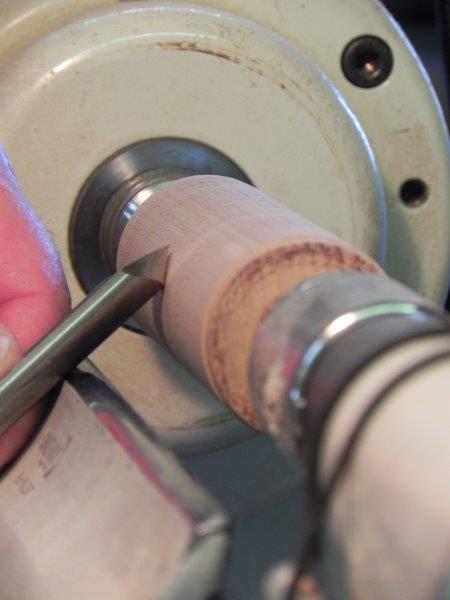
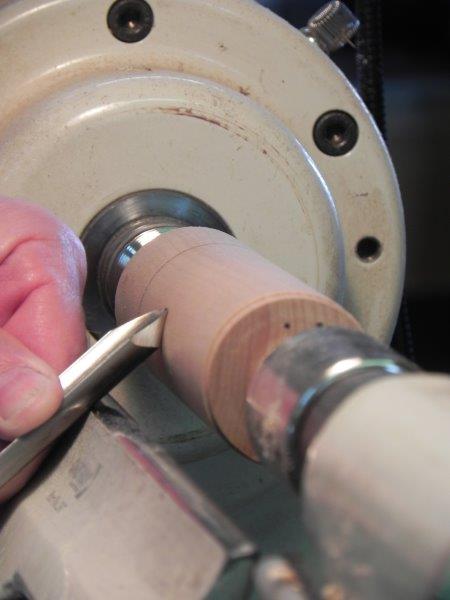
Keeping the whole bevel rather than just the cutting edge in contact with the wood is the secret to controlling your cut. Place the heel (opposite the cutting edge) of the bevel against the wood first as in the photo on the left above. While resting the heel on the wood, bring the tip (cutting edge) up to the wood until you see light dust coming off the edge as in the photo on the right. The bevel is now completely supported on the wood and the tool is stable. In this position you are using the bevel as a guide to “point the way.” Test your new skill by slowly tracing the surface of a round piece with the tool “in cut” (dust coming off the cutting edge) but not actually removing wood.
A dull tool will cause you to lift the bevel off the wood to make it cut, which makes the cut unsupported. Use only sharp tools.
C is for cut
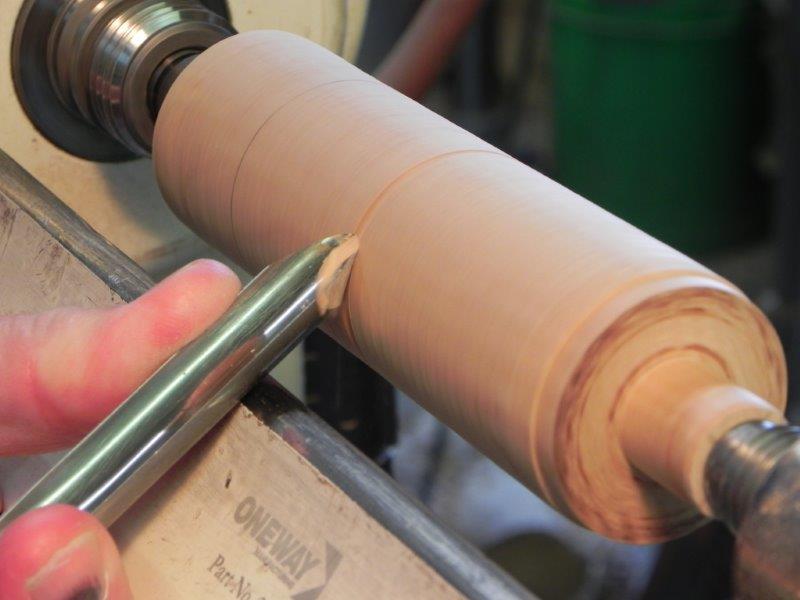
Changing the angle of the bevel to the wood at this point will allow you to start the cut. Do so by rotating your body very slightly or rotating the tool in your hands. Once you move forward in the cut, the bevel will continue along the line described by the bevel. You are now controlling your cut. The hallmark of a controlled cut is a smooth surface rather than a “rutted” surface where the tool moves in and out. This is much like a bulldozer traveling on its tracks controlling the path of the blade on the front.
When cutting a curved shape (almost every shape you cut will be a curve), simply rotate your body in that direction. Do not move your feet (remember: anchor). Instead, shift weight from one to the other by moving only at your ankles, knees and hips. Prior to making the cut, place yourself in a comfortable position at the end of the cut, then without moving your feet, move the tool to the start of the cut. It stands to reason that the more off-balance you get, the less stable the tool becomes. Better to be less comfortable at the start, becoming more comfortable as the cut progresses.
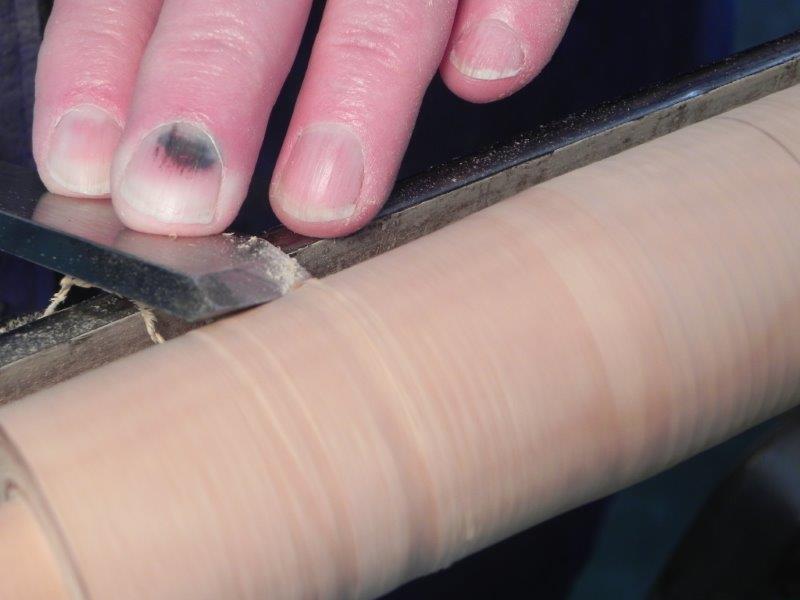
The acid test
The skew is the great equalizer. If you follow the ABC of tool control you, too, will be able to tame the dreaded beast.
Remember, keeping the bevel in contact with the wood will not let the edge dig in, thus causing that spectacular “catch” for which the skew has become so maligned. The instant you either lift the heel off the wood or present the edge to the wood before the heel, the edge digs in. This forces the tool to twist and dig in even deeper, supercharging the catch. Always present any tool heel first. If starting from the end of a piece, turn a small portion (1” or so) from the opposite direction to make a clean flat at the end as a starting point wide enough for the bevel of the tool.
Practice any cut by turning the wood by hand and holding the tool against the wood as described. Watch the action of the tool and get used to keeping the bevel on the wood in that controlled manner. With experience, the action of heel-then-toe will morph into one fluid motion.
Interested in learning more? Check out Ed’s Interactive Remote Demonstration called Beyond ABC. Click here for more information.

