
Originally written for Craftsy by Ed, titled “How to Make Amazing Scrap Art: Turning a Multi Axis Vessel”
Typically things turned on a lathe are round because they are shaped while they rotate around a single center. While I always have enjoyed the shapes that are produced on a lathe, I also find using a single center constraining. Why limit yourself to something that is purely round when you can incorporate many circular elements in your design by using multiple sets of centers? I enjoy creating shapes that look like they were made on anything BUT a lathe. Let’s have a look at one method of creating such a form.
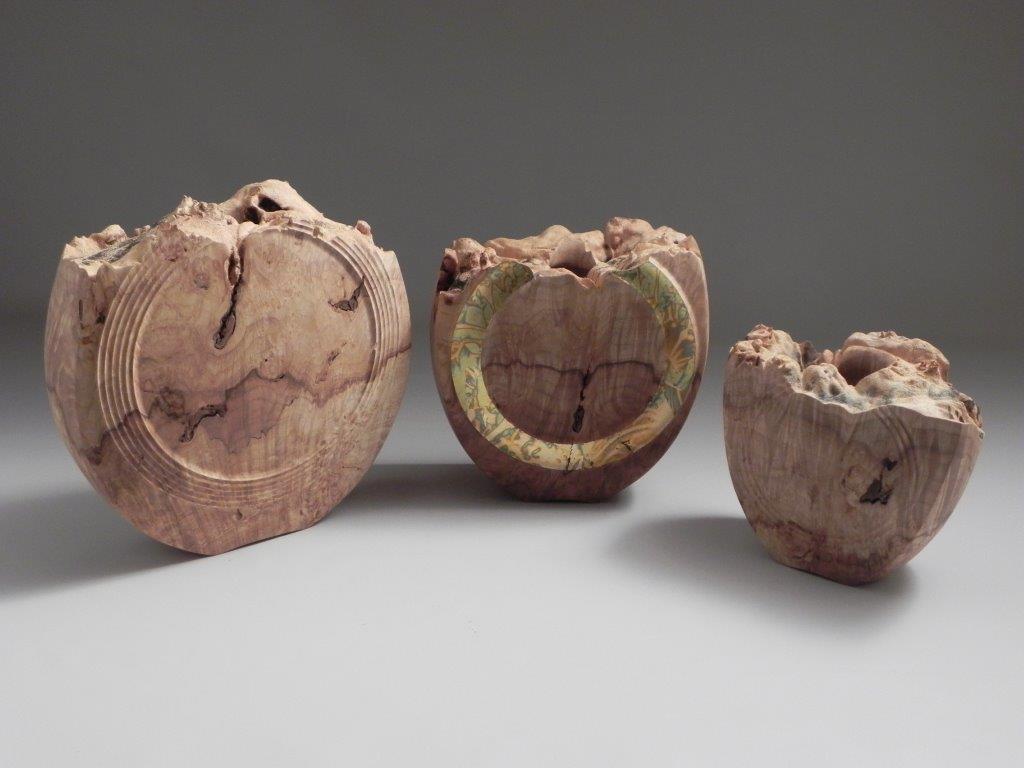
The pieces above were the first in a series I call “Another Man’s Treasure” (because I found the blanks in the “dollar bin” at a local wood supplier… one man’s junk is another man’s treasure). Clearly they are a success because they are now part of my wife’s “that’s not leaving the house” collection.
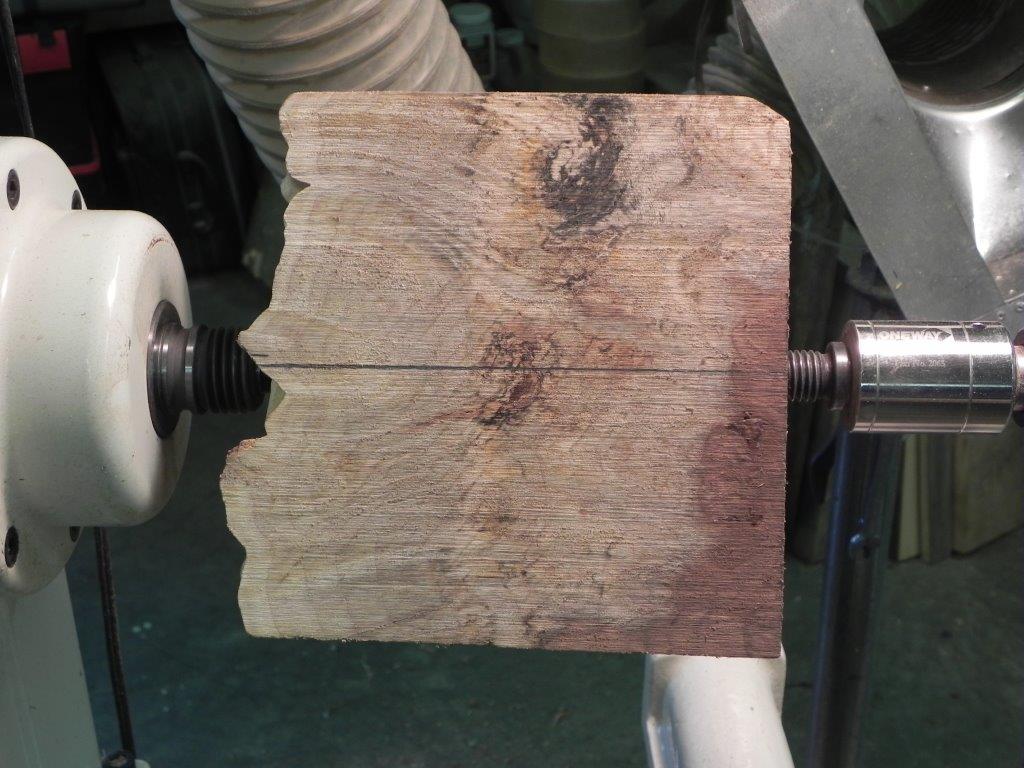
They had wonderful grain but the orientation was such that if I turned a bowl from them the beauty would be gone. They sat in my shop for months before I figured out how I was going to make something that would present the grain in the best way and also have an interesting shape. Ideally it would also be nice to keep the natural edge of the burl. Minus the pencil line, this is what I had.
Turning a multi axis vessel
I knew I wanted to present the piece vertically to show off the grain but to do so meant that I would lose most of the wood if I turned a small round cylinder. Make three or four small cylinders? Not appealing. Lay it flat in a bowl form? It wouldn’t look much different than any other bowl and the natural edge would be gone. The answer was presenting the broad face vertically by orienting centers in a different plane and using more than one set of centers.
Step 1:
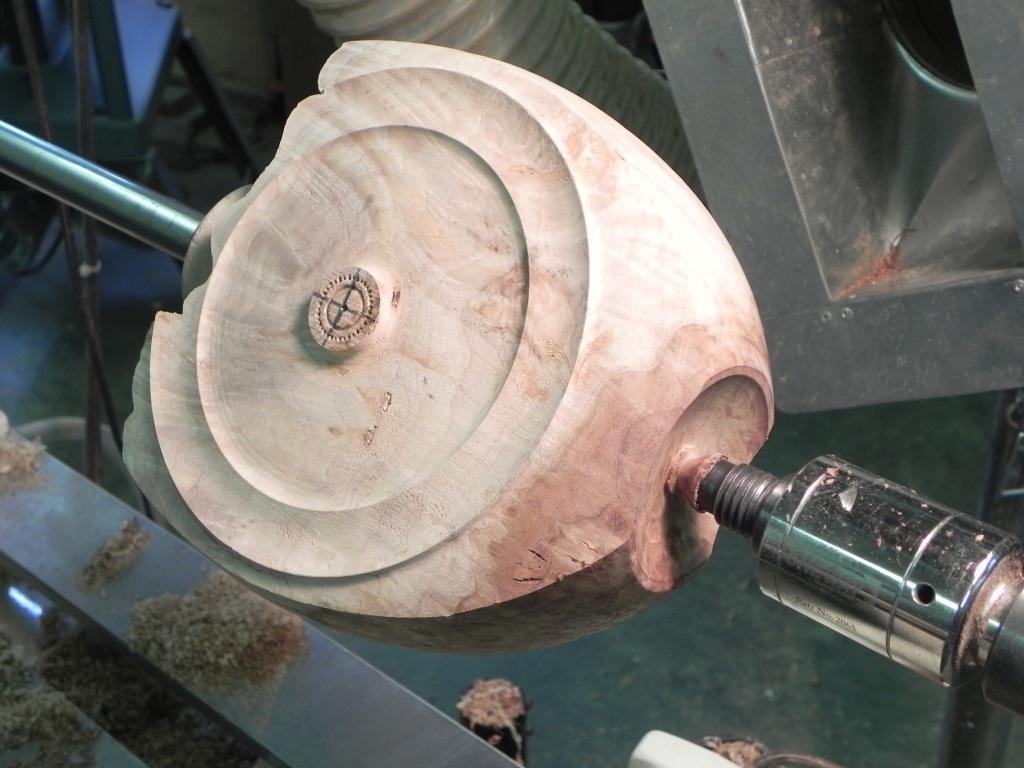
Keeping the natural edge meant placing a center on that edge. To do so on such a convoluted surface meant placing a spot face with a Forstner bit large enough for the drive center I would use. Turning the piece on these centers allowed me to create any form I wanted. I wanted a small foot for a lighter look and to keep as much of the natural edge as possible. Joining the two with a curved line seemed a good choice.
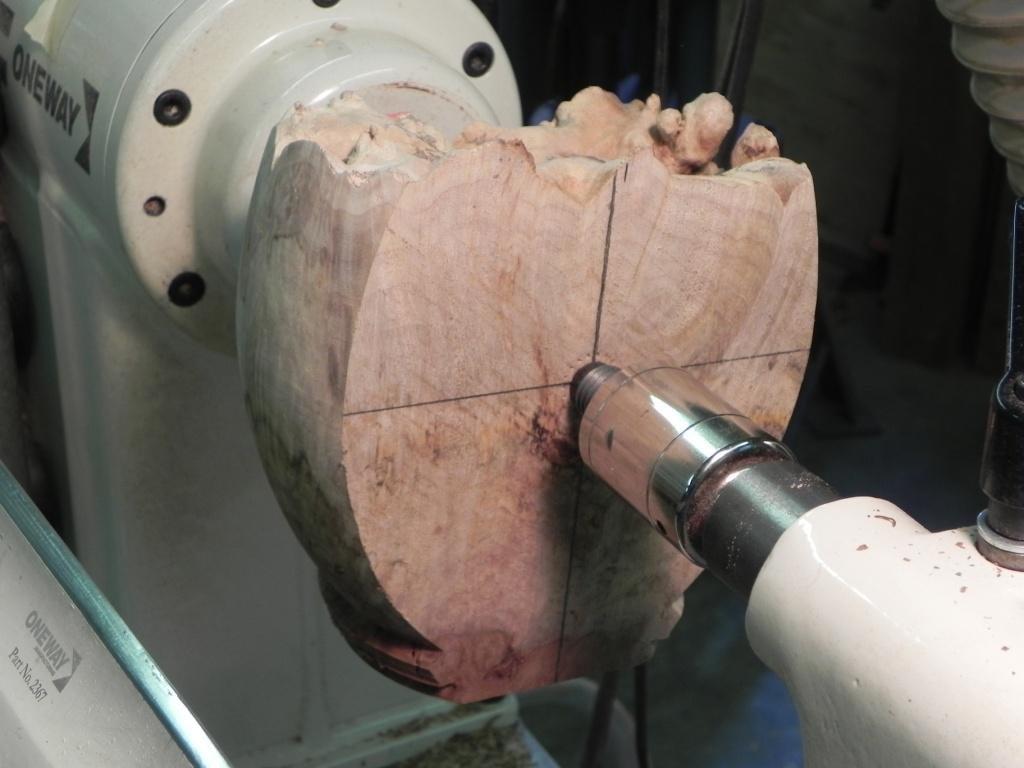
I wanted to eventually hollow the piece a bit from the top to remove some weight to make it more stable and also to remove the spot face and marks from the drive center. To do so I created a tenon to hold the piece with a chuck, hence the chunky bit on the bottom. Within that ugly tenon lies an elegant little foot. Notice that the bottom of the blank at the tail stock end has been trued up square to the axis. This is needed for determining the next set of centers.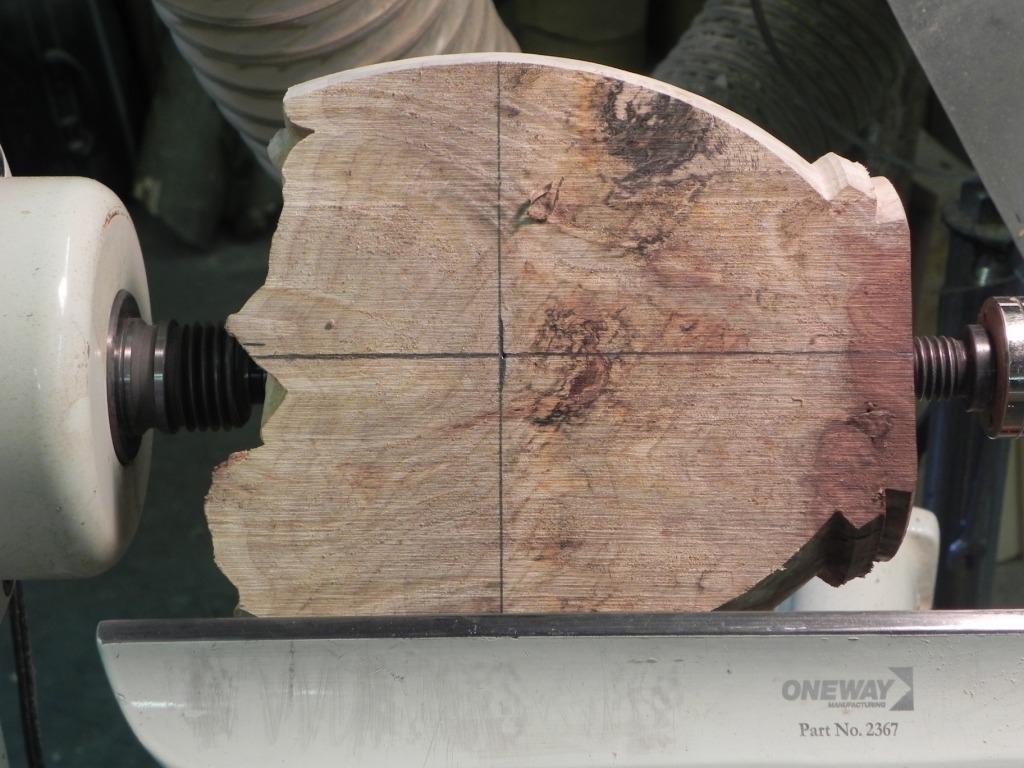
Step 2:
With the basic vertical profile established I needed to turn the the vertical faces. On the first piece I finish turned the faces with a simple, lens-like curve but that looked kind of bland. To correct that in this piece, I opted to incorporate a circular element to add interest. I oriented the center so the circle would be interrupted by the natural edge to avoid to creating a “bull’s-eye” look.
To find the vertical center I had to mark the horizontal center on both faces. I chose to align these squarely across the original center but you could make them independent of each other. To keep the centers the same height, it’s a simple matter to measure from the squared bottom to find the centers on both sides. If you chose to vary the height of these centers it would begin to get quite complicated to turn, however, it would result in a very interesting design. I opted to keep the centers at one height, keeping the axis horizontal at this point because I wanted the faces to be parallel to one another.
Place the piece in the lathe using these centers as in the photo below and turn the face with whatever design you like. As I noted earlier, in this case I chose to incorporate a circle that was interrupted by the natural edge. The center mark has to be carved away later by hand, so enough wood was left to do that.
Because I wanted to have the same shape on the other side I marked a center line on the profile surface by rotating the piece by hand and measuring off the tool rest set square to the bed of the lathe (I’m sorry I have no photo of this). Using sharp dividers I measured from that center to the edge of the turned face then stepped off each point on the opposite, unturned side. I then connected these “dots” to create the finished shape as a guide.
Turn the piece around on the same axis and turn the second side. By turning the second face so that the edge of the cut matches the line drawn through the dots you will replicate the first face. This is far easier than you might think. If you make light cuts, stopping the lathe to check your progress after each cut you will have no trouble matching the shape. Alternately, you may choose to have different shapes on each face.
Step 3:
Now you have the main profile (except for that ugly tenon) and the two opposing faces finish-turned. It’s time to get rid of the ugly spot face on top and hollow the inside of the form. This is where the only rule of woodturning comes into play: The inside diameter must not exceed the outside diameter. Remember that the inside diameter must be smaller than the narrowest width of the piece, so the hollow inside shape cannot reflect the outside shape of the piece as in a normal hollowform. Then again, a hollowed inside form that interferes with the outside form, creating a hole in the face, will create yet another design alternative. Something worth exploring in a piece of wood where the figured grain isn’t the highlight.
Note that the width of the tenon is much less that the width of even a single jaw. Engaging a single jaw on each side would be equally as strong as the method on the photo. I chose to engage two jaws on each side of the tenon because it was easier to keep it on center than if I tried to find the center of a single jaw.
Use normal hollowing techniques in this step, however, be cautious and use light cuts. It is safe, but you can see that the mounting of the piece is not as stable as in most hollowing situations.
Step 4:
Now to get rid of the tenon and create a clean foot for the piece. Mounting is shown in the photo below. I made an arbor for the express purpose of mounting thin-walled hollowforms to finish-turn the bottom. It has a Morse taper to fit the spindle, long enough to engage the bottom of the hollowform and a sliding tapered collar to center the hole in the top. Although not visible in the photo, a split collar holds the taper tightly in place. You may not have have such a device but because this is a robust piece, it is a simple matter to mount a piece of waste wood in the chuck and turn a taper as a jam chuck to fit the top hole. Bring up the tail stock to secure the piece.
Remove the wood that was the tenon, completing the shape of the profile.
I prefer to have a slightly hollowed bottom creating a little shadow line at the foot with two feet rather than simply leaving a flat bottom. The slightest shadow line gives the piece a light look, as if it’s floating off the table. The nub left by the tail stock is easily carved away.
Also in the photo you can see the center left on each face. This is easily carved away as well. In this case, remember to leave enough wood so that the center point doesn’t leave a hole in the face.
This is a photo of the completed piece with a finish and a bit of gold leaf. Not bad considering that the material for this cost a buck.