
Originally written by Ed for Craftsy as “How to Sharpen Woodturning Tools Using a Jig”.
A sharpening jig for woodturning tools pays for itself in two ways. First, metal removal is almost nil with each trip to the grinder. Second, and most important, your turning experience will be far more enjoyable using sharp, consistent tools. In this post I’ll explain how to sharpen woodturning tools using a jig.
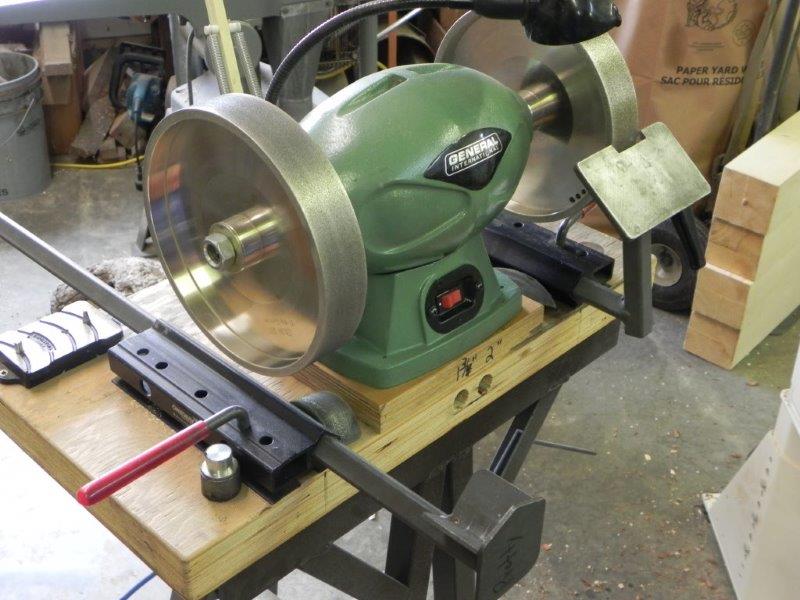
8″ grinder with basic jig setup and CBN wheels
In my last post, I talked about the importance of having sharp tools to be able to turn properly and that a sharpening jig for woodturning tools was one of the most important accessories you could buy. Choosing a jig is the first step, learning to use it effectively is the second.
The Wolverine jig from Oneway Manufacturing is the standard in the industry. There are a few others available that are “the same only different,” so the descriptions here are quite universal. The Wolverine has an accessory tool holder called a Vari-Grind jig that is required if you are sharpening bowl gouges with an “Irish” or “swept back” grind. It also makes sharpening a “fingernail grind” on spindle gouges a piece of cake.
First, a bit about your grinder
In my last post, I commented that your grinder be limited to 1725 rpm. 3400 rpm grinders are less expensive, but the speed causes balancing issues, which causes excessive vibration. Also, the heat generated by a 3400 rpm grinder can destroy the hardness of carbon steel tools and damage even high-speed steel tools. The tool rests on all grinders are inadequate for sharpening woodturning tools, making an after-market sharpening jig a valid consideration.
An 8″ grinder is ideal and recommended. 6″ grinders are acceptable, however, as soon as the wheel starts to wear, the arc of the concave or hollow grind is too severe, weakening the edge. Jigs are designed for 8″ grinders while 6″ grinders need to be shimmed up to make the geometry work.
The type of wheel on your grinder is important. Gray stones are too hard, so do not dissipate heat readily, burning your tools. White stones are very soft, keeping your tools from burning, however, they wear down very quickly. Blue stones are the Goldie Locks of grind stones for sharpening. They last a very long time, while still being soft enough to not burn your tools. CBN (cubic boronitrate) wheels are steel wheels with an impregnated abrasive. I love mine because there is no vibration, they are always true, they virtually never wear out, and heat seems to be a complete non-issue. I run an 80 grit wheel for reshaping and grinding scrapers and a 180 grit for all general sharpening. Many folks like 80 and 100 or 120, which are fine.
Setting up
I will explain how to sharpen woodturning tools using a jig, however it’s important to understand that a jig provides control over the angle of the grind but not the shape of the grind. Any jig will come with detailed instructions about setting up the base plates on your grinder base and how to adjust the components to get the desired shape. Once you’ve turned with those basic shapes, you will develop a preference for finely-tuned shapes through experience.
The Wolverine comes with a long extension arm and a flat tool rest. The long arm is used for supporting the Vari-Grind jig and though it can be used to support some tools directly, I don’t recommend it. Any tools that I sharpen other than spindle and some bowl gouges are supported by the flat tool rest while sharpening.
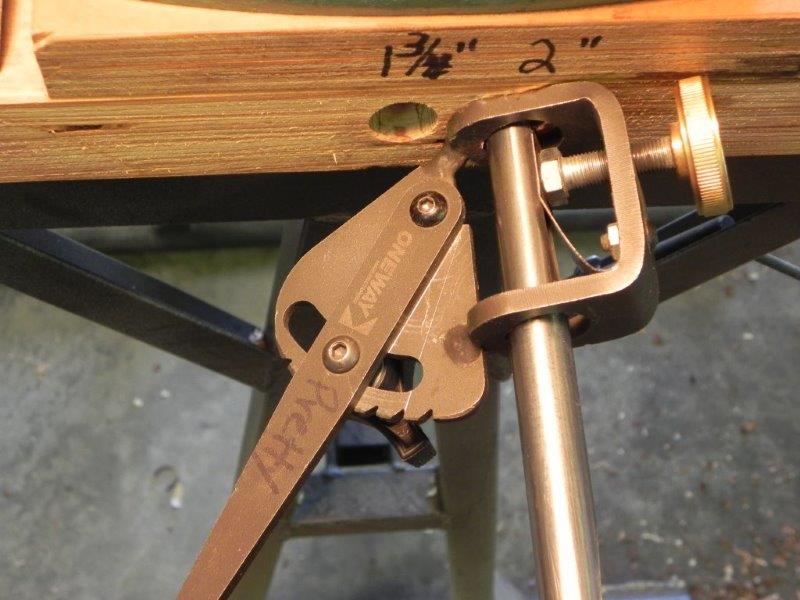
Vari-Grind jig showing tool and arm adjusted to constant settings
Vari-Grind jig
The “stick out” of the tool past the jig must be constant, typically 2″. Drill a hole in the base or mount a stop block to make that measurement accurately and quickly. Adjust the arm and mark the position with a line so that it can be repeated consistently. I use two different settings, some people use only one. Set the extension arm at a constant distance from the wheel surface. Because the wheel wears down you cannot measure from the clamp base. Make and use a jig to repeat that measurement.
When sharpening a gouge, work the sides of the grind first because that’s where the most material is to be removed, then carefully work on the curved front of the “fingernail.” It is very easy to remove too much metal at that point. This method offers more control than trying to sweep from one side all the way around to the other side in one pass.

Gouge set properly in jig and jig set in extension arm
Extension arm
The only thing I use the extension arm for is to support the Vari-Grind. You can get an accessory that attaches to the extension arm to sharpen skews. This isn’t worth purchasing and will limit the number of shapes that you can apply to those tools to one. The extension arm is not for sharpening spindle and bowl gouges directly from the pocket. It will only produce a sharp point on the tool.
Flat tool rest
The flat rest is very versatile. I recommend that you either buy or make jigs that allow you to set the rest at the various angles you require accurately. Again, it’s all about consistency.
Never, never, never, adjust the flat rest while the grinder is running! If it binds the wheel, something will break – including the wheel – and you could be severely injured.
Spindle roughing gouges and traditional grind bowl gouges are sharpened in the same way. Holding the tool perpendicular to the wheel face, rotate the tool from one wing through to the other wing until the full bevel has been ground completely. It’s OK and sometimes useful to have a very slight angle on the sides of the tool by holding it at a very slight angle to the wheel, but it’s important to keep the tool square to the wheel while grinding the rounded portion.
Skews can be sharpened with a straight grind by holding the tool flat on the rest with the skewed edge of the tool in line with the axis of the grinder. Of course, use a jig to set the grind angle you prefer for your skews. Grind both sides evenly then hone both edges as described in my post on sharpening woodturning tools. To produce a curved cutting edge, simply place the tool as before but place your thumb on the tool and use it as a center point to rotate the tool in the desired arc. I prefer that the top of the curve is just less than 90 degrees from the top edge of the tool – emphasis on “I prefer.”
Scrapers are the easiest to grind. Simply set the flat rest at the angle you prefer for your scrapers with a jig and follow the shape of the scraper or reshape it as required.
It’s fair to say, “the lathe is the cheap part.” Like anything else, it’s all the goodies that can break the bank. Being able to sharpen your tools is not an option. Using a jig is an option, however, one that will pay you back in dividends of enjoyment of turning as well as reduce the cost of your tools over time.