
Originally written for Craftsy by Ed, titled “Breathe Easier With These Tips for Workshop Sawdust Control”
A lathe easily contends for top spot for dust production in your shop. Your only hope of having any control at all is to capture as much as possible at the source. To do so effectively you need to have your system working as efficiently as possible and have an effective means of directing the airflow to the right place.
How large is large enough?
That’s a tough question because a pen turner will produce a tad less dust and shavings than one who turns and sands large salad bowls. The easy answer is to “go big or go home” unless you absolutely will never turn anything but pens. Referring to my bible on the topic, Woodshop Dust Control, by Sandor Nagyszalanczy, a small lathe requires 400 cubic feet per minute (cfm) and a large lathe requires 750 cfm. My recommendation is to think only in terms of “large.”My system has a 1200 cfm blower and I think 750 cfm would be a bit on the low side for me considering the speed that I turn and the size of most my projects (itty-bitty handles aside). Not to despair if you have a smaller system — even a shop vac — we’ll talk about making any system as effective as possible.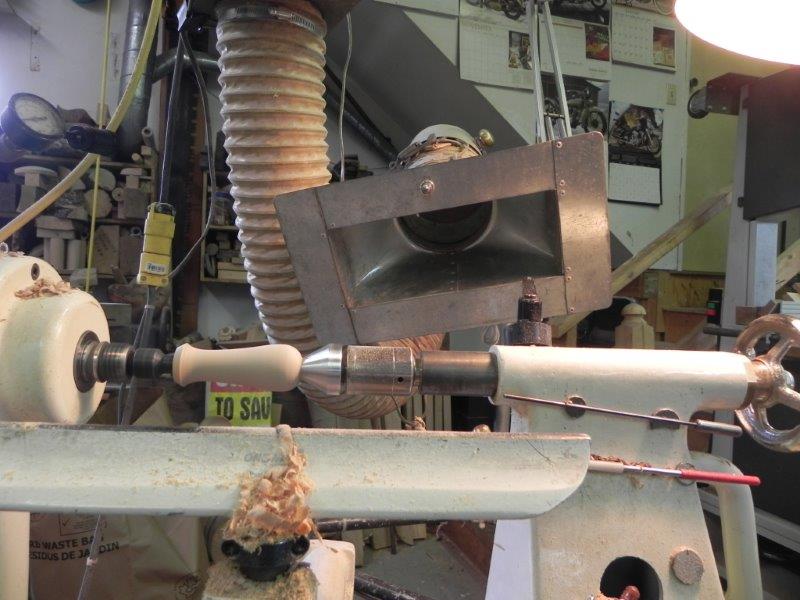
Making your dust collector collect more dust (and shavings)
Most dust extractors come with one or more 4” ports on the blower, so the tendency is to build a system using 4” duct. Unless you have a very small blower, you just choked your machine to about half (or less!) of its capacity. If you look closely you will see that there may be a reducer from 6” or even 7” down to one to three 4” ports. This means that 6” or 7” should be the size of your main duct. Any reductions should be made as close to your machines as possible. The friction loss through ducting that is too small won’t allow your blower to draw the volume of air that conveys the dust and shavings. Tight 90-degreebends also greatly reduce the flow due to turbulence. Make all bends with large radius elbows or two 45-degree elbows.
At times I see folks using flexible duct instead of solid duct. The friction loss in flexible duct is much greater than clean, straight metal or plastic because of its rough interior.
Duct openings at some machines are built in and the stream of chips is directed right into the duct. A lathe does not offer that opportunity because of the varying lengths and diameters involved. In Woodshop Dust Control, Sandor recommends installing a rectangular or cone-shaped “boot” at the end to increase the collection area rather than a simple open-ended duct. More importantly, as in the photo above, install a frame around the opening to block wasted air from being drawn from behind and further cut losses. The frame itself on mine doubled the airflow across the work. Being able to place the duct in the best place for each job is important rather than simply fixing it somewhere near the lathe. If you look closely at the picture at the top of the post you can just make out a bit of dust right at the sanding point. Rather than blowing around from the draft off the spinning wood, it streams rapidly toward the duct opening. By the way, the flex duct in the photo is 5″.
To review: Make sure your ducting is of adequate size and type, use large radius bends, keep flex line to a minimum and construct a duct opening at your lathe that restricts losses from behind the opening.
Recommendation: Get a copy of Woodshop Dust Control. It will pay huge dividends.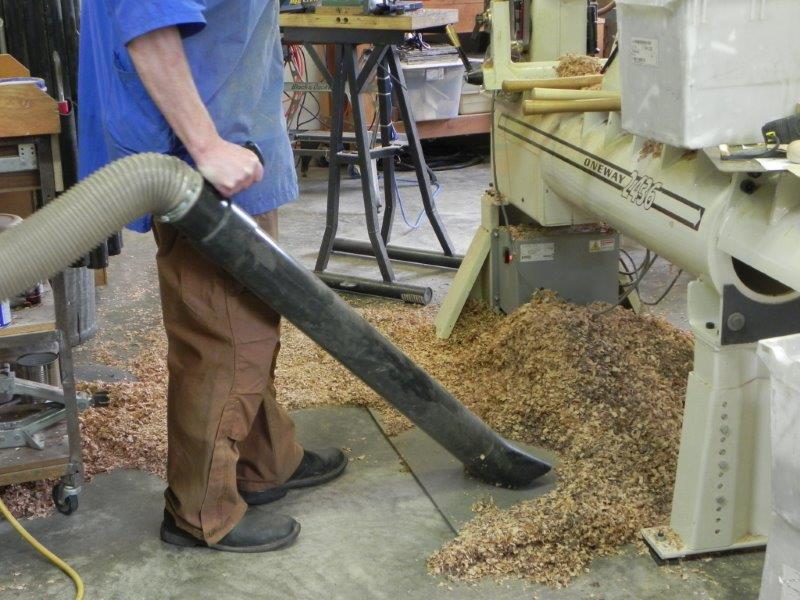
What about the stuff on the floor?
No matter how hard you try, a lot of shavings end up on the floor. In my experience at least half the dust that escapes into the air is created by scooping and sweeping those shavings then dumping them into a bag or can. Walking through them as you work also throws more dust into the air. The best way is to “vacuum” the shavings so that no dust escapes while you pick them up. The more often you do that, the less you kick dust into the air as you work.
By building a shop-sized “central vacuum system” you can pick up large quantities of shavings quickly and easily. I obtained a super-flexible 4” hose made by Rockler Woodworking specifically designed for this use. It’s much more flexible than standard flex line and includes a “wand” to pick up from the floor and a “dusting brush” for general clean up. Simply connect it into your ducting with a 45° wye and you’re in business.
The cool thing is that you very soon get used to not wading in fathoms of shavings which encourages you to clean up more often. It’s also a slick way to find lost tools because it picks up shavings but not a small hone or caliper.
Of course none of this precludes the use of proper respiratory protection. By all means, continue to use good quality respiratory protection at all times.