A little bit about dyes

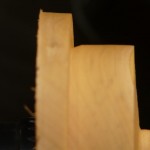
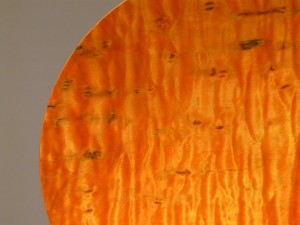
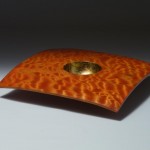
Tortured Sun Detail

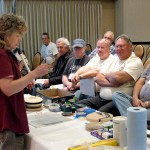
I was queried by a few turners at the West Coast Roundup about the materials I use when colouring wood, so promised I would put something up. My plans for the future include posting something on coloring wood so I already had something in mind. Because it is a very extensive topic I would imagine it would best be presented in a series of smaller posts, so lets consider this the first post in a series that will stretch out over time. The best way to follow it will be to refer to the site map in the main menu.

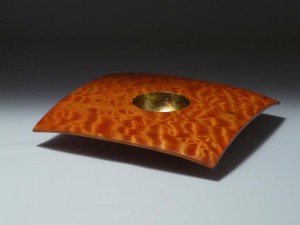
First, I use dye for it’s transparency and occasionally paint if I am looking for something opaque. Dyes are totally dissolved in the carrier so do not hinder the passage of light the way a pigmented stain or ink will. Basically, dyes penetrate into the wood where pigmented colours remain on the wood. To emphasize this, the pigment settles to the bottom of my bottles of ink and stain while the dyes stay totally dissolved. For that reason dyes punch the chatoyance of figured wood and generally provide more vibrant colour while still letting the grain show through. “Tortured Sun” is a good example of that, however the effect still can’t be fully represented in a static photograph because the pattern changes dramatically depending on the angle of viewing.

Here are a few quick crib notes about dye.  Aniline, dichlorotriazine and metal based dyes are most commonly used in colouring wood. I am presently using the Dichlorotriazine dyes (Procion MX) because of it’s vibrancy but am slowly switching over to the metal acid dyes because of their superior light fastness. More about that in a bit. Natural dyes like crushed blackberries and so on sound cute and “back-to-the-landy” but are not colourfast in the least and quite honestly are very dull. Aniline dyes are organic based (read: petroleum based oxides). They at one time were used with an oil base as a carrier and gained a reputation for not being coloufast for that reason. The bottom line is this (and this from an on-line retailer of some very good colouring products): there are apparently very few aniline based dyes being used now. The vast majority are dichlorotriazine or metal acid dyes and he says that those that are touted as aniline are in all likely-hood one of the other two anyway anyway, simply because “aniline” is more familiar to most folks. I will look more into this.

Dyes are dissolved typically in water or alcohol. Both have advantages and disadvantages depending on what you’re trying to achieve. In other words they both are good mediums …depending. I prefer water because it is free and non flammable. As a matter of fact I recall using copious amounts to put fires out when I was a firefighter (sorry, couldn’t resist that). I can dilute it on the piece with more (cheap, non flammable) water if I want to. I can safely heat it to dissolve the dye more easily. Some folks get all bent about the fact that it raises the grain. So raise the grain first with some water, sand it off (not a bad idea anyway) then apply the dye. Once you raise the grain, it doesn’t happen a second time. I very often use more than one colour, sanding back all but the last application, so it is a non-issue in that case. I  also use some premixed dyes that are alcohol based and like them very much, so it’s not like they don’t perform satisfactorily. In the safety department, remember that  alcohol flames are very nearly invisible. Alcohol is also a very volatile liquid (vapourize [evaporate] very easily) with a broad flammable range. For all you non firefolks, that means it produces lots of vapours for fuel (only vapours burn), catches fire very easily and there is no warning that it is actually on fire. Other than that, no worries. 🙁

Dye concentrates come in dry and liquid form. The liquid is very easily mixed but the dry is not that bad either – just not super quick.  You can vary the intensity by mucking with the concentrate/water (or alcohol) ratio. When combining colours you can premix dyes or mix them on the wood depending whether you want one colour or varied colours. The latter is where things get really creative and takes practice to get what you want. An interesting thing to have to deal with is the fact that the wood itself has a colour. That means you are combining colours whether you like it or not and it isn’t always what you expected, so you have to compensate for it.

Although not the most light fast dye (it’s still very good) I prefer Procion MX dyes for it’s brilliant colours. It is designed for colouring fabric and is actually a Dichlorotriazine dye, not metal acid or metal complex. When dying fabric there is a very involved process of stopping and fixing baths using salts, potash and other stuff which isn’t required for wood. The most important thing is that it is compatible with cellulose, which of course is what wood is comprised. Basically, put it on and you’re done (except for finishing). It is available through Opus but I get it at Maiwa, a fabric and fiber arts dealer. I would suspect that other art supply stores have it as well. I have recently discovered Wood Essence in Saskatoon. They are on line and the owner, Jeff Richardson, is very knowledgeable. I put Maiwa and Wood Essence’s URLs in the “links” in the sidebar. Wood Essence sells  Colour FX liquid dye concentrates (and other neat stuff). The best thing is that they sell the only “black” black dye that I have found other than leather dye (awesome black but too hard to sand back – long story, wait for later). The significance is that blacks are usually very dark blue, so when combining colours on the wood using the “sanding back” technique, you don’t get the second colour with stunning black highlights. What you get is purple when applying red and green when applying yellow along with black highlights whereas with true black you get the true second colour that you added after the black. On the other hand if you are trying to get some rich, varied browns, using the blue-black then red and yellow (with selective sanding back between applications) you get some magnificent combinations on figured wood.

So there you are – quick and dirty. A few tidbits on colouring using dyes, however not much on application. Understand that applying the finish is also a large part of the process in bringing out the Wow! factor, so there is much more to this story. I hope you will find this interesting and watch for more on colouring wood some time in the future. In the meantime, try to find a book called Colouring Techniques for Woodturners by Jan Sanders. I picked it up more than 15 years ago from Lee Valley Tools but is out of now out of print. I have seen used copies available on line, however.

As always, I encourage your comments and questions, so please refer to the tag line at the bottom of the article to post a comment.

Posted in Colouring wood, Finishing | Tagged , , , | 13 Comments

A few quick pointers on using a chuck

Today I was working on a hollow form when the lathe started to growl – first when I was cutting the end grain then getting progressively worse. I checked the chuck to make sure it was tight on the lathe and the piece itself by trying to move the whole thing. I checked the tightness of the jaws. Everything seemed fine.  I did the same with the handwheel on the outboard end. Everything still seemed fine. It certainly seemed like it was originating in the arbour somewhere; I even checked the motor and arbour pulleys.  After some head scratching I thought I should double check the chuck mounting to the arbour. My lathe has an arbour that has a locking groove that accepts locking set screws in the chuck. When I loosened them I realized the chuck was slightly loose. Obviously I had dropped the ball last time I installed the chuck. The set screws had eliminated any play but the chuck wasn’t firmly seated against the arbour. I retightened things and the noise went away.

This made me think I should discuss a few things that should be considered when mounting a chuck on a lathe and when mounting a workpiece in a chuck.

Obviously, the chuck should be properly seated against the arbour face. Some turners like to slam the chuck home, some even turning the lathe on to run the chuck in, which certainly tightens the chuck but over time damages the threads and certainly makes it un-necessarily difficult to remove the chuck, which is also hard on the machine. When I was an apprentice machinist I had my knuckles rapped (literally) for doing this. It was pointed out that as long as the mating faces are clean (so make sure you wipe the faces) and the chuck is firmly seated, the job is done. I’ll admit it may seem like a fine line between the two but there is quite a difference. Of course, if you have locking set screws, tighten them as well: they are a backup in case things come loose, as in my case.  Ideally, a firm push with a wrench (or the chuck wrench if no flats on the collar) against the spindle lock is far more effective than the “slamming home” technique. In some cases this will actually make it tighter. This is especially important if you have a reversing feature or are turning a very large diameter piece where the momentum can loosen the chuck when stopping the lathe.

This also brings to mind an accessory that I see available for supposedly making it easier to remove the chuck from the lathe. Some catalogues list a plastic ring that slips over the arbour and cushions the chuck-to-arbour joint so that the chuck doesn’t lock on when jambed home. First, this is treating the symptom, not the problem; the problem being that the chuck has been over-tightened. Second, a metal face to metal face connection provides a solid joint whereas a plastic ring in between makes things a little mushy by comparison. Solve the problem by not over tightening the chuck in the first place and save yourself a couple of bucks at the same time.

When mounting work in a chuck it is a good idea to tighten the chuck gradually using all the chuck key holes progressively. This balances the lateral play in the scroll, distributing the force equally between the jaws (another old machinist’s trick). It is not necessary to overtighten the piece but it must be solid. Do this by using firm, equal pressure on the chuck wrench  each time until you reach refusal. If you are turning wet wood, stop the lathe and recheck the jaws frequently at first and less often once you are sure things are stable.

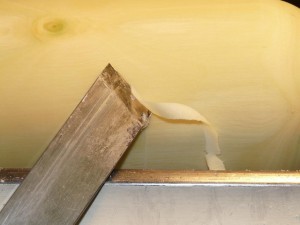
Even with clean-cutting Arbutus, the difference between scraping and cutting is evident

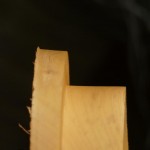
Preparing the work for mounting in the chuck is important. I am not a fan of using the dovetail method of chucking unless I absolutely have to. Wood is strong in compression but weak in tension. An expanding  chuck in a dovetail socket puts the wood in tension and therefore increases the chance of the the wood breaking and the piece departing from its moorings. Not a good thing. Some turners argue that wood is lost by using a tenon and that they either like the dovetail socket as a feature or they can easily turn it into part of the foot. With proper planning, there is no wood lost when using a tenon either – I do it all the time. In contrast, the maximum holding power of the chuck can be put to bear when using a tenon and as long as you plan the diameter of your tenon to be within the line of your form, the foot of the vessel can be completed on reverse chucking the same as a dovetail. When making a tenon, make sure it is suitably large enough (and the jaw diameter large enough) for the workpiece. A 20 inch platter needs more than a 2 inch diameter tenon. When preparing a tenon it is important to cut the tenon rather the scrape the tenon (or dovetail). A scraped tenon has two  areas of tear-out 180 degrees apart that can be weak and mushy so the jaws cannot provide equal pressure. Depending on the orientation in the chuck and the degree of tear out, the worst scenario being that only two jaws are doing all the work.  A cut tenon is far more equal in hardness around its circumference (plus it is actually round) so is much more stable with equal pressure on all 4 jaws. The real holding strength of a chuck is where the axial face of the jaws meet the face of the work (90 degrees from the tenon). Therefore, whether a dovetail or tenon is used, the adjacent face of the work must be clean, flat and 90 degrees to the axis of the work. If you err, err on the concave side so that the jaw face bears  cleanly on the face. Also, make sure the inside corner is clean and sharp for the same reason. Check your jaw profile. My Oneway requires a straight tenon 90 degrees to the work piece. I have some Technatool chucks for a couple of mini lathes that require a dovetail on the inside end of the tenon (which has proven to be a lovely stress raiser causing the tenon to sheer off at that point). Whatever your jaw profile is, make sure you cut the tenon to match rather than counting on the jaws to crush their way into the wood. It may seem as though the jaws are really biting into the wood  but this will not allow the jaws to seat firmly against the wood on the tenon or the face. 

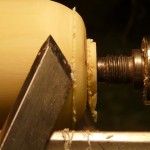
Even a small nub like this can prevent proper seating

A straight, 90 degree, cleanly cut tenon ready for a Oneway chuck.

A relieved, 90 degee, cleanly cut tenon ready for a Technatool chuck.


As always, I encourage your comments and questions, so please refer to the tag line at the bottom of the article to post a comment.
Posted in Lathe Safety, Lathes and Tools, Woodturning Tech Talk | Tagged , , , , | 2 Comments

West Coast Round Up Woodturning Symposium

West Coast Roundup 2010 demonstrators

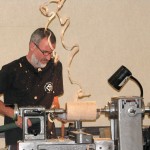
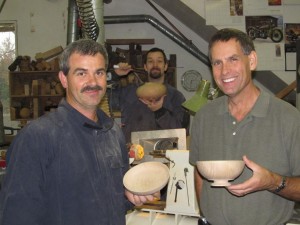
 Well, it’s done. Our guild, the Greater Vancouver Woodturners Guild, hosted the West Coast Round Up September 10 -12 featuring Nick Cook, Dale Larson, Marilyn Campbell, Graeme Priddle, Michael Hosaluk, Allain Mailland, Jason Marlow and our own Art Liestman. Our team of 16 led by Bruce Campbell has worked steadily for the past year to get things ready and it appears that the whole thing was a resounding success. We heard no complaints (other than a small lunch issue) and had many, many compliments on the demonstrations, the audio visual services, the instant gallery, the handbook, the trade show, the venue and above all, the hospitality. Our aim was to put on a first class event and I believe we pulled it off. 

Graeme Priddle doing some fine detailing 🙂

 Surrounded by world-class turners, we were able to choose from 44 sessions in 11 rotations. Not only that, we could choose from seven extra workshops in the days before and after the symposium. The symposium topics ranged from basic turning techniques by professional bowl turners to the techniques used by cutting edge abstract artists. I don’t think there was a rotation that didn’t offer something that any turner at any level wouldn’t find of interest. I can say that because I was able to suggest many excellent choices to a few friends who are rank novices (they were very pleased) and even though I have a few years under my belt, I had difficulty choosing from all the new material right up to the last rotation. 

Dale Larson

 Smaller regional symposia like ours have the unique ability to offer a more relaxed, intimate atmosphere allowing direct interaction between  attendees and presenters. The fact that all of the world class turners present are really everyday, ordinary people makes for an incredible opportunity for the average turner to engage in conversation with them. None of the presenters let an opportunity pass by to chat with anyone at any time; something they were able to enjoy that doesn’t happen at AAW symposia. It is a good deal all around for everyone. 

Jason Marlow

 I was fortunate enough to obtain the book “New Masters of Woodturning” in the silent auction. The significance of what we had achieved hit me when I realized that of the eight outstanding presenters I had sat with, shared a drink with, laughed with and learned from  on a regular basis during the past week, four of them were “New Masters”. I am still not quite sure the whole thing really happened. Michael Hosaluk turned me on to a whole new way of looking at wood turning and art back in the late ’80’s and still does to this day.  He stayed in our home and shared his views on art and life as if he had known my wife and me for years. I also spent two full days in workshop with Marilyn Campbell learning her techniques and sharing views on art in one-on-one conversation. How will I ever top this? 

Marilyn Campbell

 I encourage any turner – no matter what your level – to participate in a symposium. If it is the annual AAW symposium, a regional symposium, if it is local or if you have to travel to get there (even better) then do so. Your level of turning will automatically take a leap up. That may sound improbable but I speak from experience. In 1999 I attended the AWW symposium in Tacoma, Washington. Immediately after that my turning changed. Unfortunately I was not able to pursue it for the next few years starting in 2000 but I remained hopeful because I was inspired. In 2007 I attended the second West Coast Round Up in Richmond and my turning took off in an entirely new direction. This time there are already things stirring in my brain that had not been there only days before. As Graeme Priddle said, take the course, attend the symposium, buy the tool; it’s only money. And I say if you wait, saying “I’ll catch it next time”, next time may not come and then you really will be the poorer for it.

As always, I encourage your comments and questions, so please refer to the tag line at the bottom of the article to post a comment.
Posted in General | Tagged , , , , , , , , | Comments Off on West Coast Round Up Woodturning Symposium

The other end of the spectrum

The last post was about a huge lathe by most standards. This one is about work produced at the exact opposite end of the scale.  

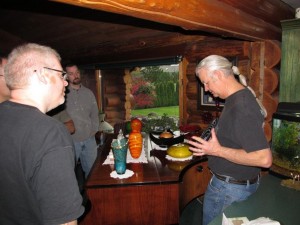
Yesterday I attended the “open shop” for Art Liestman’s new shop/studio at his home in Coquitlam, BC. Art is an internationally acclaimed woodturner who just happens to be one of the guys. Great shop, great event, great cookies. Thanks, Art!  

It only stands to reason that an open house at Art’s new shop would draw all of our guild luminaries and among them was Maarten Meerman. Maarten (Max) has defined for himself a very unusual niche: nano turning. Maarten first came to us with scale models of satellites he designed and worked on in his day job as a Space Mission Designer. I would say that this clearly qualifies him as the guild’s only rocket scientist. Gradually his scale models morphed themselves into tinier and weenier turnings until his standard became 1/144 scale. That’s small.  

It works!!!

Maarten had with him a 1/144 model of a pole lathe that he copied from the real thing as a challenge, then he challenged himself to make it a working model. Note that I said “had with him”. Not that many turners can produce their latest endeavour from their pocket. When I saw Maarten, not having seen him for a couple of months, I asked him “What’s up?” He produced his usual tiny clear acrylic pill bottle-like container with the pole lathe inside. By comparison, the massive stand that the lathe perched on was the size of a large button. I quietly admired his work trying very hard not to gush too much about how he could not only produce such high quality work but also have the patience to work in such fine detail. To listen to him explain it, it’s just that easy. Right, Maarten.  

If I were to admire only one thing about Maarten’s approach it is that his cost for tools and materials must be less than a good pub lunch – for a whole year!   As a matter of fact, he would get a lifetime supply of wood if he swept my shop floor once.  

Anyway, the best way I can describe his work is to direct you to his website http://www.nanotray.com/. Make sure you take the time to check out the You Tube video of his working pole lathe and also take the time to really explore the detailed nano world of Maarten Meerman.

As always, I encourage your comments and questions, so please refer to the tag line at the bottom of the article to post a comment.
Posted in General | Tagged , , | Comments Off on The other end of the spectrum

Bullmoose

Bullmoose. Not exactly ready for action.

Bullmoose takes up more than its fair share of floorspace in my shop. It’s old. I rarely use it. You have to be a millwright to preserve the babbit plain bearings and cast iron thrust bearing when you are turning. It represents so much of who I am and where I came from that I’d never give it up in a million years.    

This lathe was born around 1900. It’s cast iron parts were bought by my grandfather from a shipyard in either Vancouver or New Westminster. After renovating the bearings he made hand-hewn cedar timbers for the ways. When I was growing up it lived in the workshop on the second floor of our barn. All powered equiment in the barn was run by water power from a pelton wheel on the ground floor. A huge leather flat belt drove a mainshaft that  ran most of the length of the barn. Smaller belts ran from the mainshaft to jackshafts that distributed the power to the various pieces of equipment; Bullmoose was one, although it didn’t have a name then.    

The timber-framed barn began a slow demise as the elements crept in through the unmaintained roof and I began to worry about nothing other than the big, old lathe. One day a friend who shared a common affinity for stuff that is old lent me a hand (and a strong back) to get it out of the barn before it was too late. It was a treacherous journey across rotting beams and flooring but determination and rash behavior carried the day. It lived in my friend’s shop for a while until I finished my own, providing a more secure home for the treasure.  Not long after while renovating a machine shop, I found a pattern for making molds to cast the curved nameplates for Bullmoose forklifts. The pattern looked pretty cool and the name “Bullmoose” seemed to fit my lathe so I “liberated” it.     

The business end of Bullmoose. Note the belt dressing and oil can filled with very HEAVY oil.

New life was breathed into the old beast after I made a new jackshaft to accept a drive from an old electric motor. I turned a few things every now and then pretending I was a turner just like my grandfather, regularly adjusting the thrust bearing and oiling the main bearings on the headstock. Once during a guild BBQ, three of us turned at the same time on a small log – the long tool rest giving us plenty of elbow room. The biggest job I ever used it for was to turn 22 porch posts for a house that I built for our family on a ski mountain. All the houses on the hill had to be of Victorian design which, as a woodturner, pleased me very much. With few retail suppliers of trim and accessories it wasn’t hard to see the similarities among them all. I vowed ours would be different so needless to say, there were many one-of-a-kind spires, finials, beaded screens, some truly unique dentil moldings and of course the heaviest porch posts on the mountain. The largest porch posts available were 5″ x 5″ and looked wimpy compared to the ones on the house where I grew up. I bought a large laminated beam and had it milled into posts, then planed them to  7″ x 7″ in my thickness planer (also in the picture). At  9′ long, they weighed 100 pounds each. When I turned the lathe on for the first time with one of those posts on it, to say that I was intimidated would be a huge understatement. I got the job done but only after several days of tweeking bearings, manhandling a ten pound gouge for roughing (in the picture on the 6″ x 6″ blank) then detailing what seemed like miles of tapers, beads and coves. I gained a tremendous respect for the turners in my grandfather’s day and hoped he would have been proud.    

These days Bullmoose resides under heaps of turning wood and a blanket of dust but it is safe for now. It’s a survivor and has earned it’s rest.

As always, I encourage your comments and questions, so please refer to the tag line at the bottom of the article to post a comment.
Posted in General | Comments Off on Bullmoose

How I got here from there

One of my very first turnings, circa 1958. Still going strong.

On my welcome page I commented that I got started as a turner when I was 9 years old. To some that might seem a bit improbable but you would have to know the environment in which I grew up. We lived in the country – some would say the bush 🙂 – and out of necessity had to be self-sufficient. Everything was approached with a “can-do” attitude so learning anything was taken in stride no matter how young we were. At any rate, my uncle showed up one day with a Beaver lathe and told me I could have it as long as I learned to turn. My father was an excellent turner so introduced me to the basic skills. There was no stopping me and I quickly cornered the market on file handles among my family and my father’s employees. The photo of the handle on the slotted spoon was one of my first turnings and was a request by my Mom to replace the broken plastic original.  

I remained interested in the craft but of course school and girls got in the way so I didn’t progress past file handles and the odd set of legs for stools. My basic skills were exactly that and when I left home for the big world, my visits home where for visiting, not learning more turning techniques. But I kept that lathe with me wherever I moved.  

Fast forward to the late ’80’s. I had begun to notice wonderful turned wooden bowls and other vessels in magazines and although I knew they were turned, I didn’t understand how they had been done. I yearned to learn, but there was nowhere to go to learn those techniques. One day when scanning the paper for lathes (my old one didn’t seem up to what I had in mind) I noticed an ad for Technatool lathes and the dealer promised to give little demonstrations for those that were interested: just show up. So I showed up. And several others showed up as well. We found that we had all been searching for the same knowledge and were all so pleased that we had found it. The dealer, Ian Waymark, was a woodwork teacher who had done an exchange in New Zealand and come back with the skills to not only turn wooden bowls but also the ideas behind some very interesting designs – like a wooden frying pan with two eggs all turned out of wood. I was totally hooked. The first and most important thing we all learned was how to cut instead of scrape. None of us have looked back since.  

The Gray Ghost. It's a "Hutchings".

Originally a  group of prospective buyers of Ian’s lathes, we decided to morph into the Fraser Valley Woodturners Guild in 1988 so we could learn more. Naturally Ian encouraged us as that would generate a market, but he remained a good teacher and opened a world of woodturning to us that we never would have thought possible. I moved forward rather slowly but gained skill by turning a lot of architectural work for renovations that I did on the side (I was a firefighter in real life). I picked up a fabricated lathe made by a very interesting fellow, Bill Hutchings, who made it in his basement: the “Gray Ghost” in the photo. Looking back it was a terrible piece of machinery but it turned what I needed and I got pretty good, learning more and more as time went by.  

I went through what I like to call a “domestic restructuring” starting in 2000 so I was out of my home and shop for three years. Upon my return, I was back with my now wife, Arlene, and a whole new take on life. She encouraged me to pursue the craft and accompanied me to guild meetings so we could be together and at the same time not miss meetings. She encouraged me to join the Greater Vancouver Woodturners Guild since it was a more progressive group and more knowledge was available. This exposed me to world class turners in the flesh several times a year. My interest grew even more and my hunger for knowledge couldn’t be satisfied.  

Upon retiring from the fire department I established a few goals for myself. One was to get my work into a gallery and I was successful on my first try. I was very pleased with myself and said to Arlene that I was proud of the fact that I could produce gallery quality work on the piece-of-crap lathe that I owned. Her response was “What could you do if you had a good lathe?”. To make a long story short I got my Oneway lathe for my 60th birthday and I haven’t looked back. Being in a gallery inspired me and motivated me to push my boundaries further than I thought possible. I had been playing with dyes for some time but now I was consumed by the use of colour in everything that I did. No longer could I bear to turn something “round and brown”. I had found my niche. Unfortunately the first gallery had to close but my work was quickly accepted by two others.  

My Oneway. The "blond" in the shop.

I refer to the work that I produce as “our” turnings – meaning mine and Arlene’s – and I am dead serious. I do the actual turning but I am constantly bouncing ideas off her and she responds with excellent input, valuable in it’s insight, un-influenced by woodturning convention. Most importantly, she has been my inspiration, always having confidence in my work and participating fully in what I do. She encouraged me to buy a lathe that I thought was far too extravagant, she has never once gotten angry when I drag shavings into the house and she never denies me the time to turn – as long as when she says “That’s not leaving the house”, the piece stays in the house, never darkening the  threshold of a gallery. I couldn’t refuse her.  She is my muse.  

I continue to push my boundaries and enjoy helping others learn what I have learned. This blog is part of that, so my hope is that others will contribute what they have learned along the way.

As always, I encourage your comments and questions, so please refer to the tag line at the bottom of the article to post a comment.
Posted in General, Welcome | Tagged | Comments Off on How I got here from there

Dust collector trick

In the picture in the previous post about cup centers you will note that the dust collector pick-up has a shroud or frame around the opening. When I upgraded from my dust distributor system to an actual dust collector system I purchased “Woodshop Dust Control” by Sandor Nagyszalanczy (yup, that’s spelled correctly) as a guide. In the book Sandor recommends surrounding any free openings (as opposed to a fixed pick-up as found on, say, a planer) with a frame to increase efficiency. The frame reduces the amount of air being drawn from behind the boot therefore increasing the amount drawn from the front – where you want it. This works exceptionally well; so much so that I am going to increase it from the recommended 2″ minimum to 3″ to see what happens. At times it gets in the way but moving it out of the way has never put it out of range.

If your dust pick up is simply an open ended duct, your collector is not being used anywhere near it’s capacity. The heating boot – which can be horizontal or vertical – probably doubles the volume of a simple duct opening (you can also go too big) and the frame doubles that. I highly recommend Sandor’s book which is available on line through Lee Valley Tools. My guess is that about 99% of the home-shop dust collectors out there are under-used due to undersized ducting (probably 4″ PVC, right?).  Units around 1000 – 1200 cfm (2-3 hp) will require 6″ horizontals with 5″ verticles. Elbows should be long radius (2-45’s will do) and tee’s should be 45/wye combinations. I took the time to build a cyclone to make it a two-stage system; it works so well that hardly any fines reach the filter. Rebuilding my system was the best thing I ever did. The time spent has been paid back many times in reduced clean up time, my shop is a much safer environment and it’s just a lot nicer to work there.

As always, I encourage your comments and questions, so please refer to the tag line at the bottom of the article to post a comment.
Posted in Lathe Safety, Woodturning Tech Talk | Tagged , , | Comments Off on Dust collector trick

Using a cup-center drive

Recently I had the opportunity to participate in a workshop led by Mark Sfirri. Mark is well known for his  multi centered turning resulting in some very unique shapes. Probably the most well known are his “Rejects from the Bat Factory” series. We turned everything between centers and because the centers were off-set, the workpieces initially wobbled wildly on the lathe, meaning we turned a lot of air until a fair bit of material was removed. Because of all the interrupted cutting that we would be doing, the possibility of a catch was inevitable. As for all demonstrators, safety is paramount, so Mark insisted that we all use cup-center drives when turning.             

The use of  a cup-center drive was originally pioneered by Del Stubbs who found it to be an adequate but much safer drive than the typical spur drive.  The friction drive provided by a cup center provided adequate driving force without the disastrous results caused by the spur drive’s more positive connection  during a catch. 

A cup-center drive is identical to the cup center used in a tail stock, ideally with a spring loaded center point, which is most helpful when turning multiple pieces (allows quick mounting and removal). You will notice the center point of the drive center is quite long. Because it is spring loaded it retracts into the center as the tail stock is tightened so the drive ring is then able to bear fully on the piece. A workpiece is mounted exactly as if using a spur drive, perhaps with a bit more end pressure than normal. As long as proper cutting practices are used, there is sufficient holding power to drive the work. If there is a catch, the work simply stops turning, then it’s a simple matter to re-tighten the tail stock quil and continue turning.  This is unlike a catch when using a spur drive where the wood continues to turn, increasing the drama with each revolution. There is a second major advantage that I can see: one tends to use proper cutting technique at all times.

A cup center was originally  supplied with my Oneway 2436  but I was skeptical that this would provide sufficient driving power: it ended up in my jungle drawer. During Mark’s workshop I found that it did, in fact, have sufficient driving power and I quickly became addicted to it. I  get very few catches but it is certainly nice to eliminate the excitement when one occurs. My cup-center drive now resides in my drive-center tray and gets used most often.

As always, I encourage your comments and questions, so please refer to the tag line at the bottom of the article to post a comment.

Posted in Lathe Safety, Lathes and Tools, Woodturning Tech Talk | Tagged , , , , | Comments Off on Using a cup-center drive

Mind and Matter Art Festival

After the Wood Coop Gallery closed down, we took our wares door to door and came upon the Arnold Mikelson Mind and Matter Gallery. Mary Mikelson felt my work worthy and accepted us into her gallery. At the same time she encouraged us to participate in her annual Festival of the Arts in July. To make a long story short we altered our summer plans, burned the midnight oil to produce a body of work large enough to enter the festival and got our display organized. As you can see from the photos it was an outdoor affair in a wonderful setting.

It was generally a poor year, with all the regular attendees complaining about low sales volume. We only sold three pieces but there were many who sold nothing. We learned a lot about presentation, what people liked and that people in fact truly admired my work. One lady had to be convinced that “Venetian Trilogy” was not  glass and another lady asked “What am I looking at?”. She was confused because some looked like wood, other pieces looked like glass and she couldn’t believe that the coloured, highly figured wood hadn’t been hand painted. She meant it as a compliment and I was most grateful. We got some very good exposure, had direct offers to show my work in two other galleries and one to participate in the Arts at Darts festival as a result. Well worth the time, I would say. Although we didn’t sell much (times are tough) I would still encourage any artist to participate in an art festival (not a craft show) simply because of the exposure and how much you will learn.

As always, I encourage your comments and questions, so please refer to the tag line at the bottom of the article to post a comment.
 

Posted in General | Tagged , | 4 Comments

Nice note on another blog

Just got home from a motorcycle tour of western Canada. Lots of email to catch up on and one caught my attention right away. A gal named Patti stopped by our booth at the Mind and Matter Art Festival just before we left on our trip and praised my work very highly. She is an interior designer and uses a lot of art to decorate her homes. She posted a comment on her own blog http://rentfluff.wordpress.com/2010/07/14/mind and matter/. Thanks, Patti

As always, I encourage your comments and questions, so please refer to the tag line at the bottom of the article to post a comment.
Posted in General | Tagged , | 4 Comments