Originally written by Ed for Craftsy as “Turn a Wooden Scarf Ring and Pin Set For Christmas”>
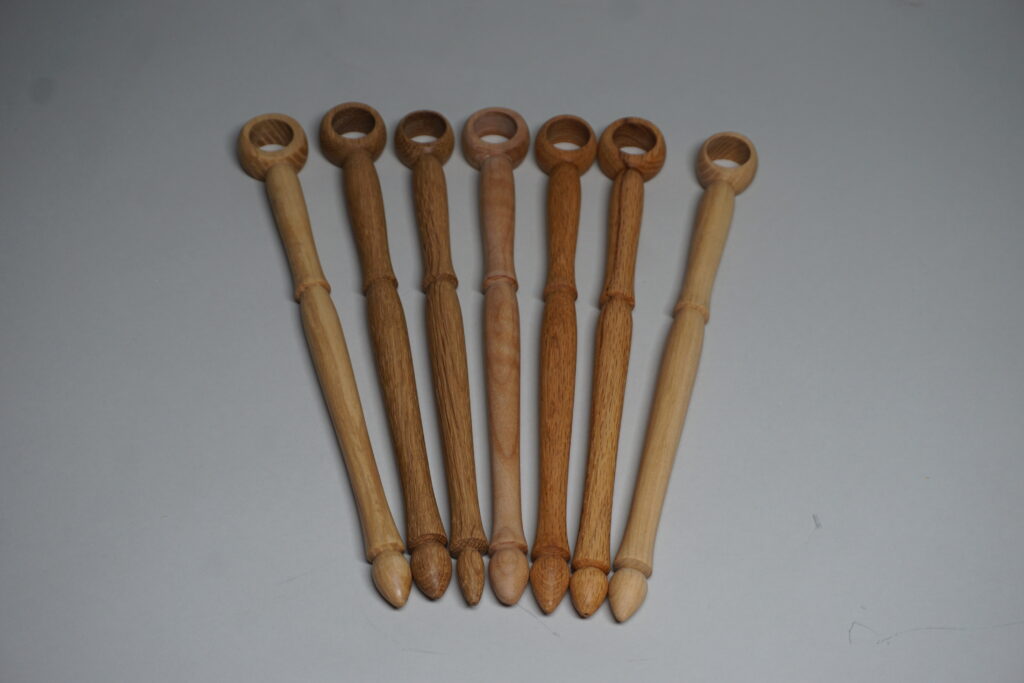
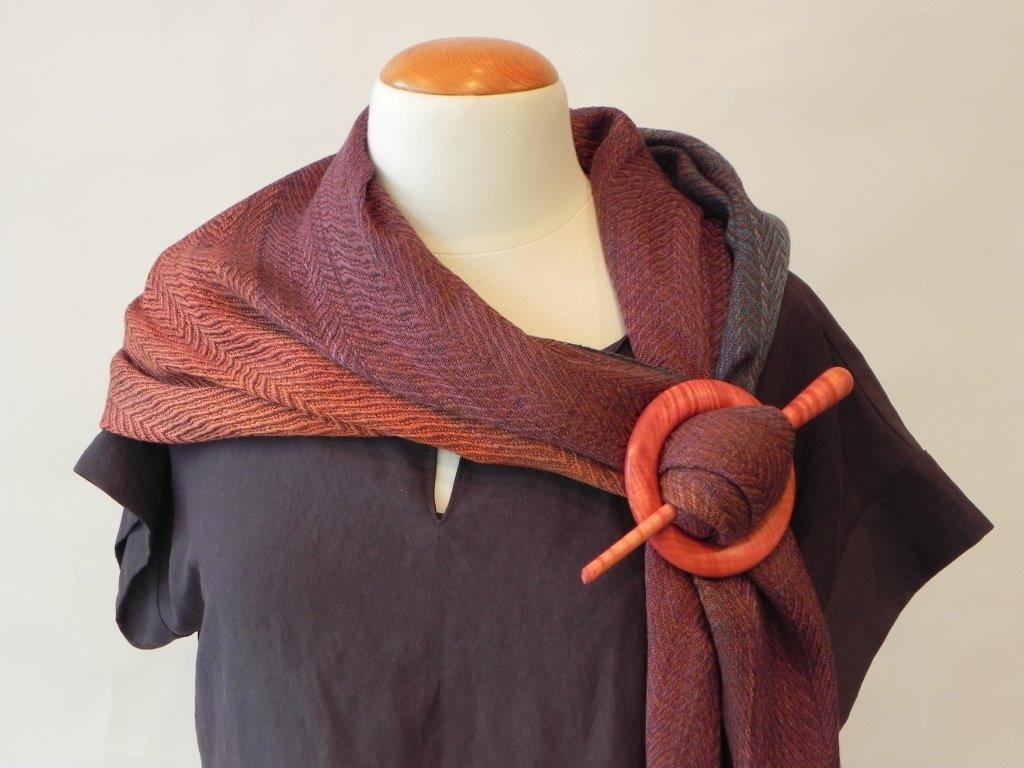
A gift made by hand is a gift from the heart. A turned scarf ring and pin set the ideal gift for a woman who wears scarves. Make these easily turned sets and perhaps color them to match any scarf in her wardrobe — or for you ladies who turn, for your own wardrobe.
An added bonus is that making more than one set improves your tool control skills by establishing muscle memory.
Let’s check out the process of turning a wooden scarf ring and pin set.
One nice thing about small projects is using wood that more than likely would end up in the fireplace or stove.
In this case, we’re talking about kindling. Figured wood is the best because it adds a bit of interest yet doesn’t take away from the scarf or the woman wearing it. Better yet, figured wood is the best for coloring since you will get different intensities of one color — one of the secrets that turns a piece of colored wood into a piece of art. Not to fear, if you are using wood with a simple grain, it will still be a subtle yet elegant piece.

Set up
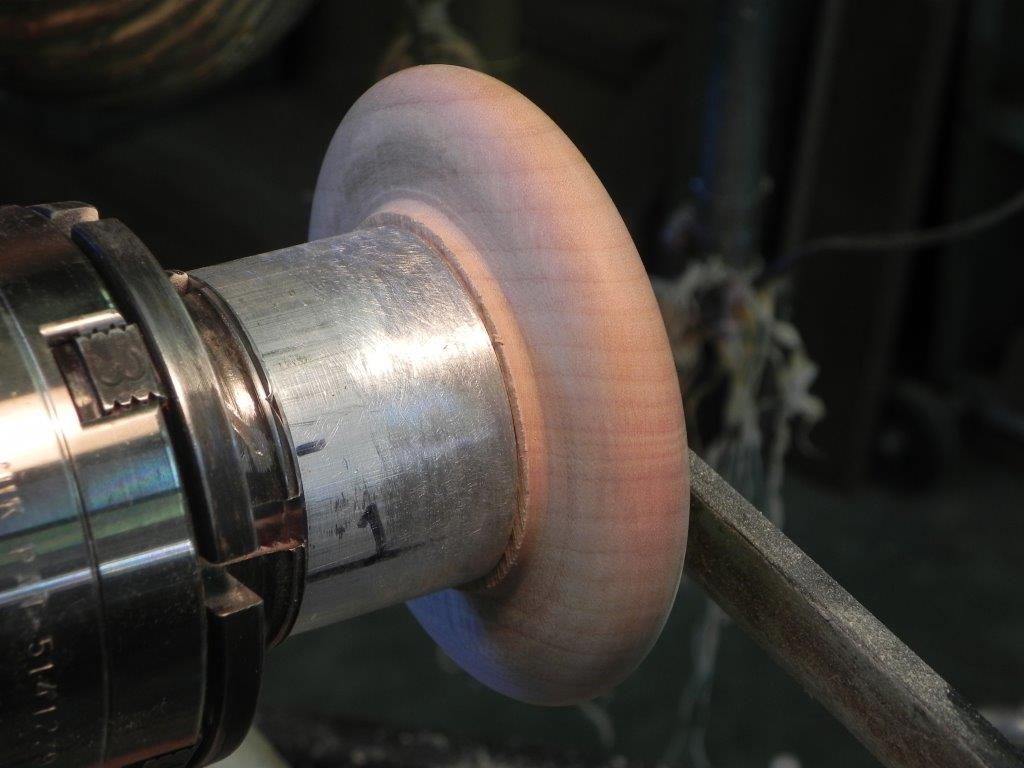
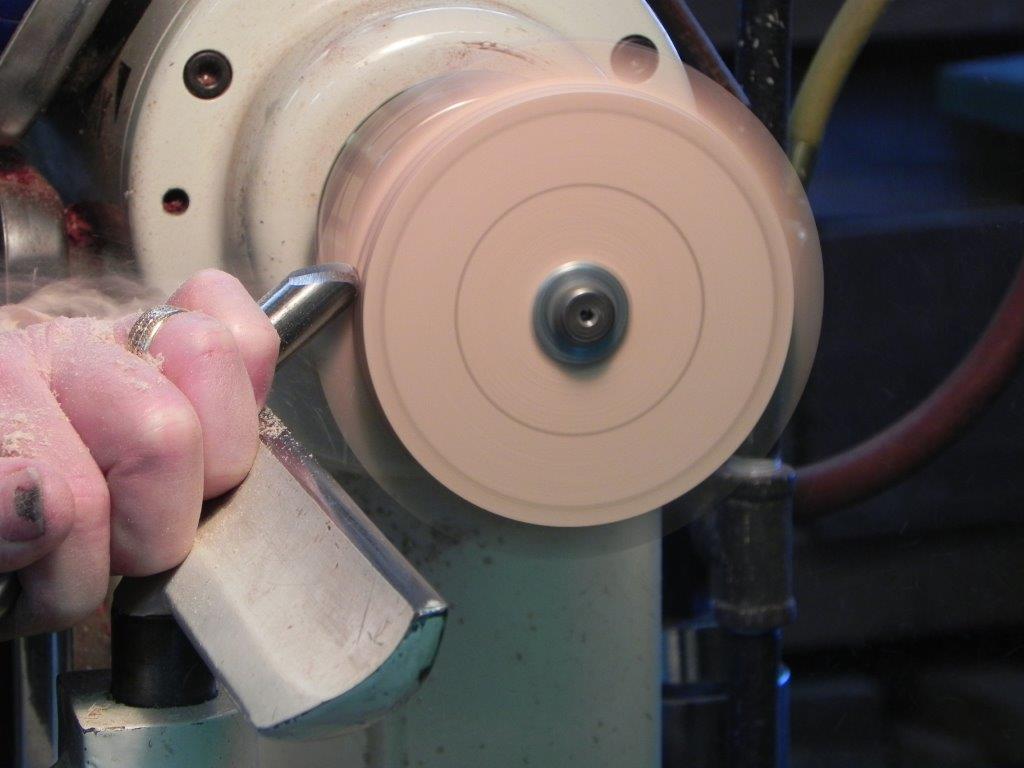
The ring in this set will have to be turned using a chuck or at least a faceplate with a specially made mandrel. The following description of the mandrel for a chuck can be adapted to a face plate. The pin is easily turned between centers.
Because I turn these sets 50 at a time, I have a special aluminum mandrel that I made for my smaller chuck to turn the outside diameter of the ring. No metal lathe? Just make a wooden copy of the one in the photos.
The smaller chuck diameter allows me to easily reach both sides of the outer radius of the ring without turning it over. The advantage of the aluminum mandrel is durability and consistent set up; it can be removed and replaced knowing the center will always be on center. A wooden mandrel will likely vary slightly every time it is remounted, however that isn’t a problem. The key features of the mandrel is a center hole tapped to fit a 3/8″ bolt and a maximum diameter slightly smaller than the inside diameter of the ring. A 3/8″ lag bolt in a wooden mandrel will do the same job.
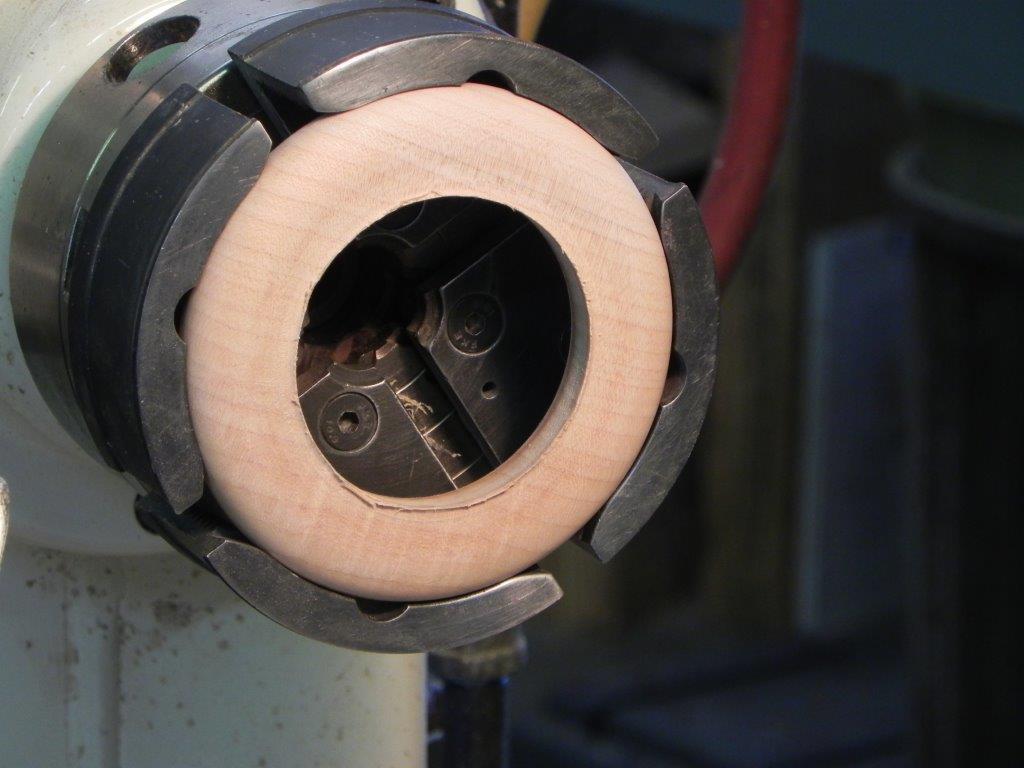
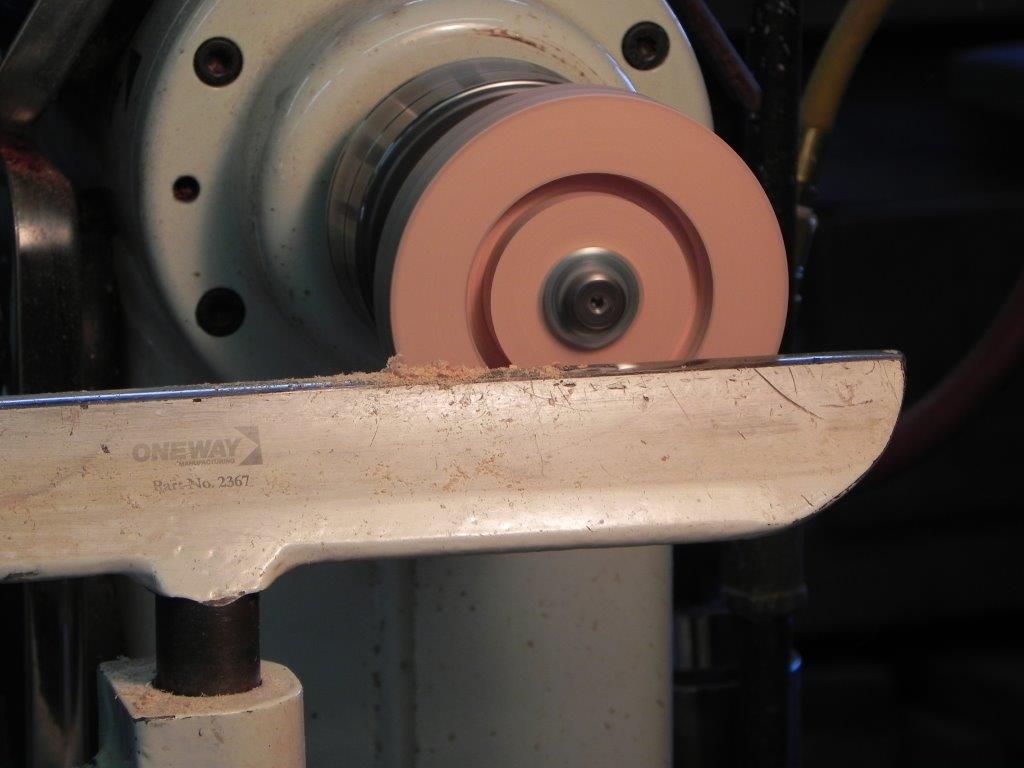
I have the luxury of having a second larger chuck with deep jaws to turn the inner diameter. In this case only one side of the inner diameter of the ring can be turned at a time so it must be flipped to put a radius on the second corner.
Large chuck used to turn inner radius.
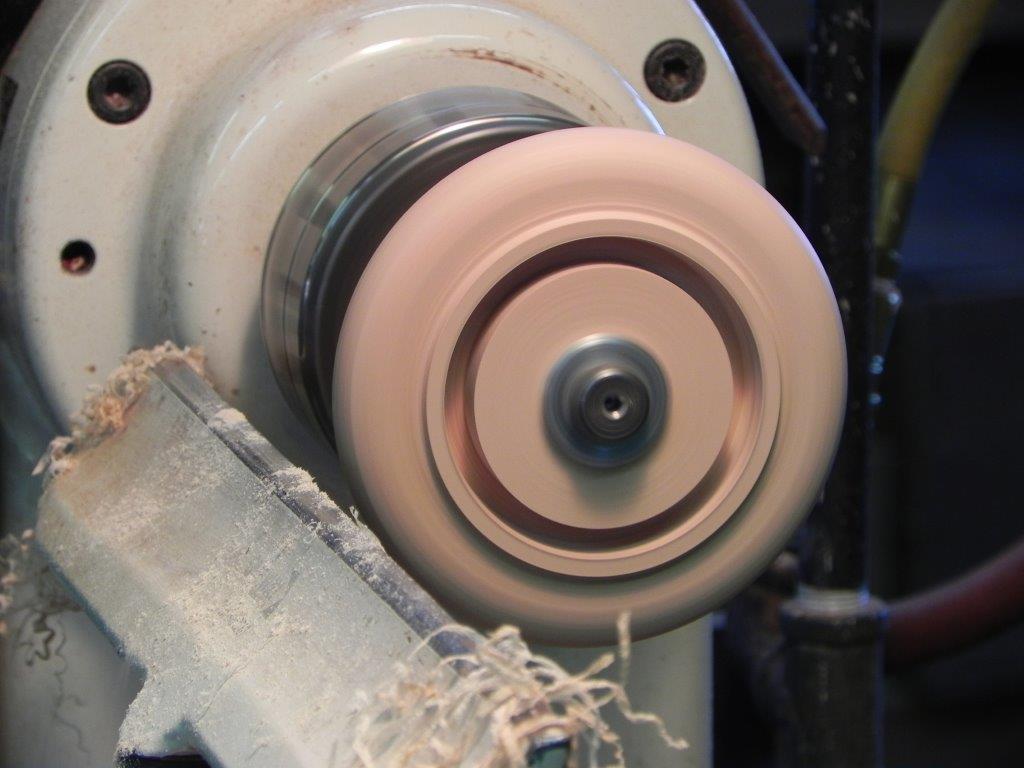
Both of these operations can be done using a single chuck using the smaller mandrel and switching to another suitable accessory jaw set. Perhaps the best jaw set for holding the ring by the outside diameter is the type that allows you to attach pieces of wood to the jaws so that you can turn jaws to your requirements. An added advantage of this method is that they will definitely not mar the surface of the finished outer diameter.
Step 1
Determine the inner and outer diameters of your ring(s). Mine are 4″ outside diameter and 2 1/2″ inside diameter. Things to consider are the bulk of the scarf and the capacity of your chuck. Cut a square blank no less than 1/2″ and no more than 3/4″ thick. Drill a 3/8″ hole in the center. There is no need to cut it round on a band saw because you can turn it round in seconds. The key to this is high speed so make sure the wood is sound and that your piece is secure.
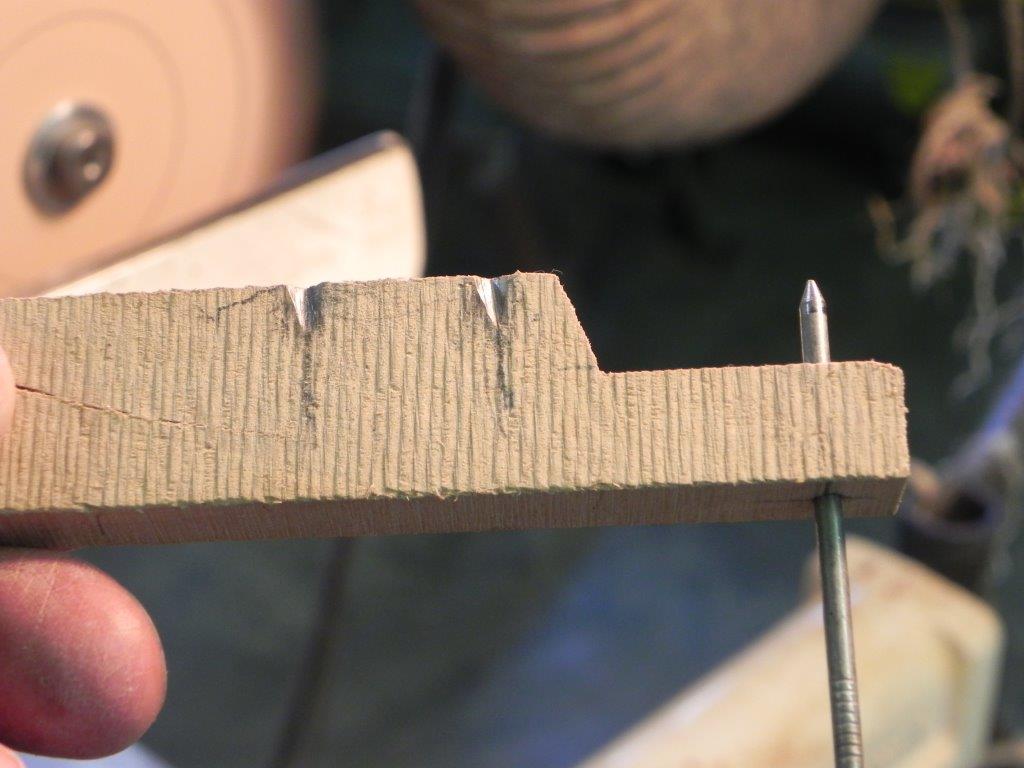
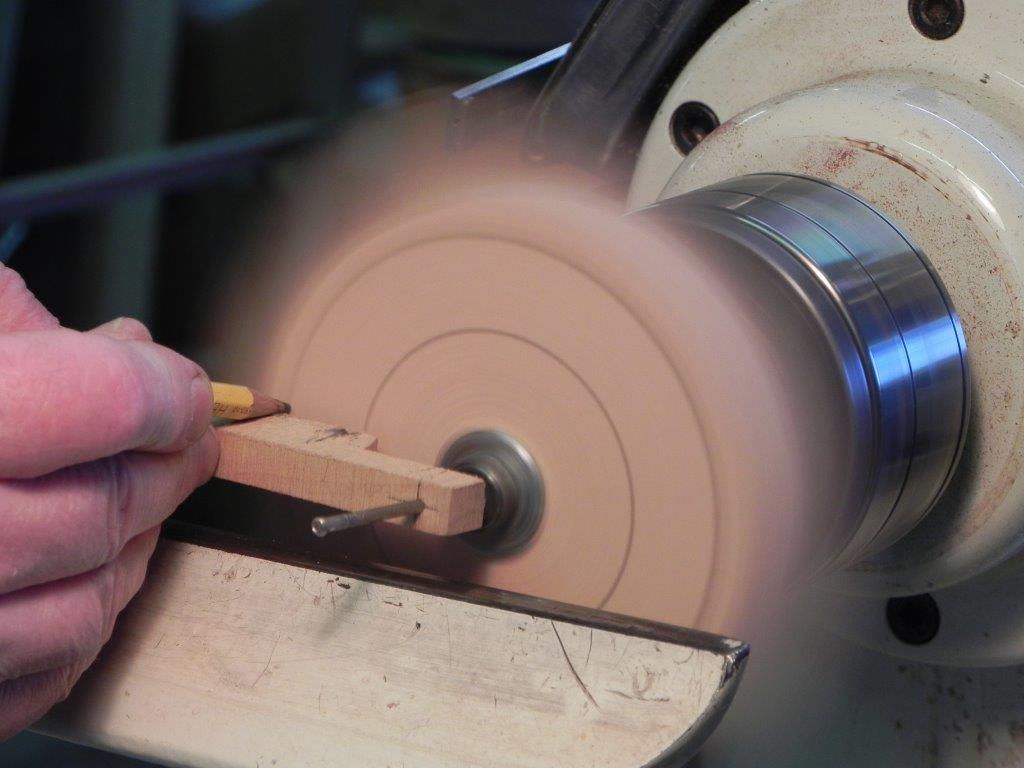
Once the corners are gone and you have a rough diameter, you can mark the finished inner and outer diameters. I have a story stick for this because of the number that I turn, but for one or a few it’s easy to measure off with a ruler.
Story stick with inner and outer diameters and center pin
Finish turning the outer diameter, then turn the radius on both sides. If you can only reach the outer radius, leave the second side until you flip the piece over. In this case, it would be a good idea to true the face of the blank prior to marking out and turning the diameters.
Use a parting tool or other suitable tool to size the inner diameter. At this time, penetrate only half the thickness of the piece. Use the tool as a measuring device by determining where half thickness is on the tool. Cut the inner radius but make sure you remove enough wood from the core waste to allow clearance for the gouge.
Finish sanding the outer radius.
Step 2
Part the ring off, being careful not to let the ring fly. The sound of the cut changes drastically just before it breaks free so stop the lathe at that point and break it off manually.
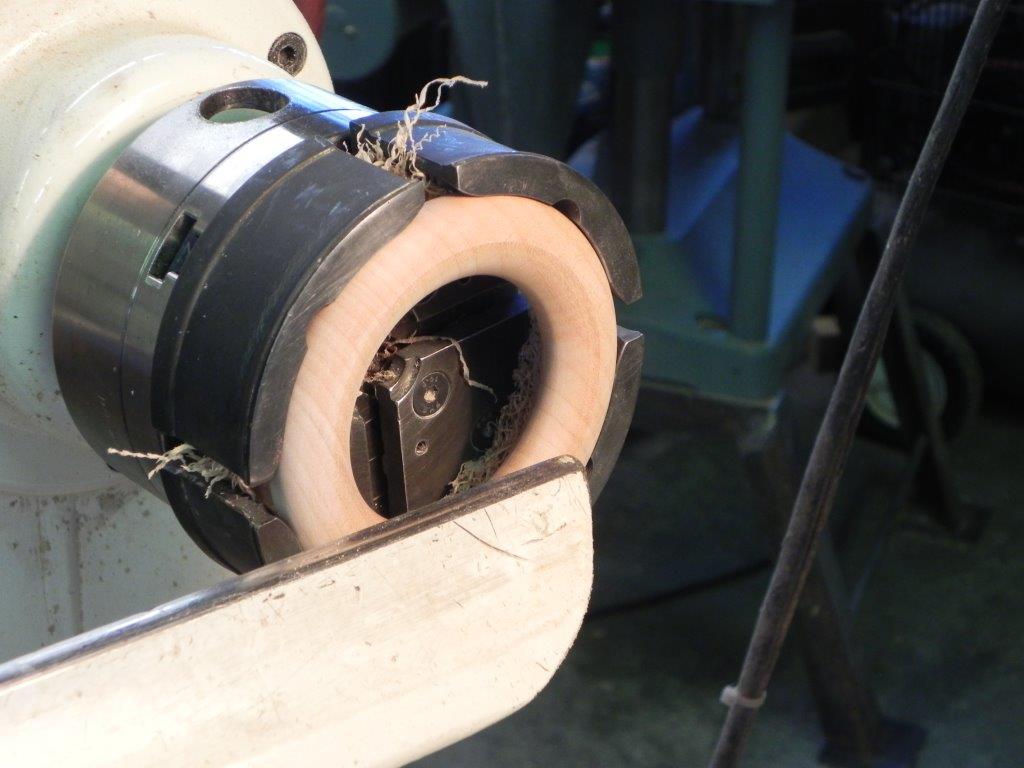
Change your setup to the larger chuck, holding the ring by the outer diameter with the unturned inner radius exposed.
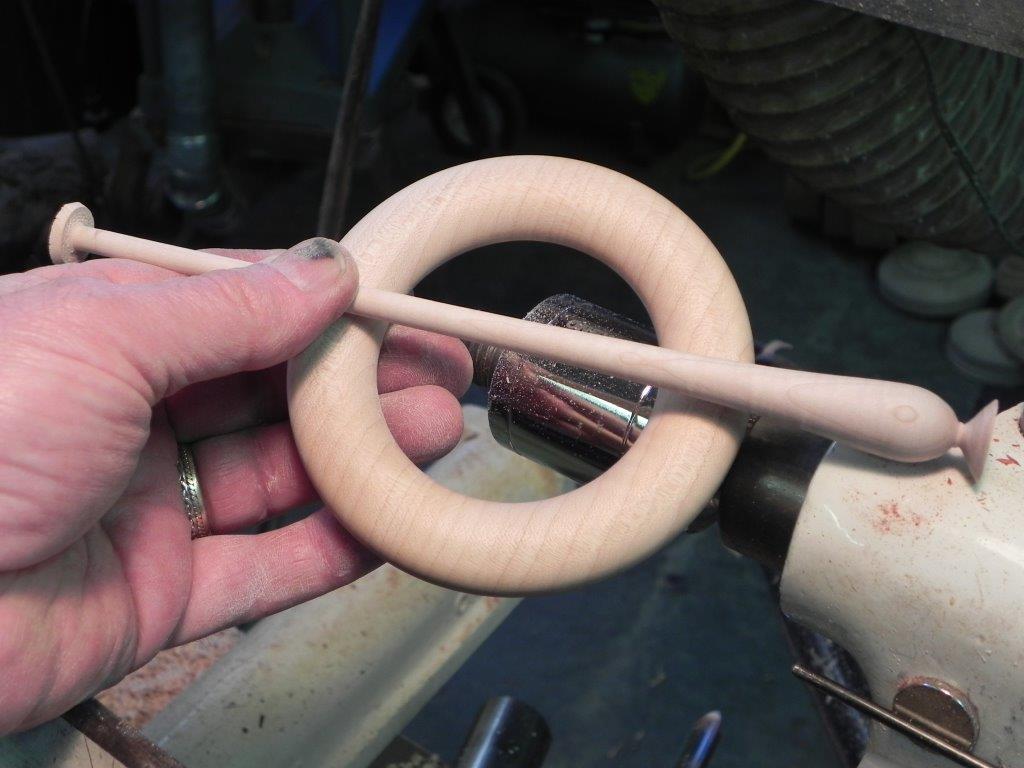
Finish turning this radius and finish sanding. Flip the ring and finish sanding the inner radius. The ring is complete.
Step 3
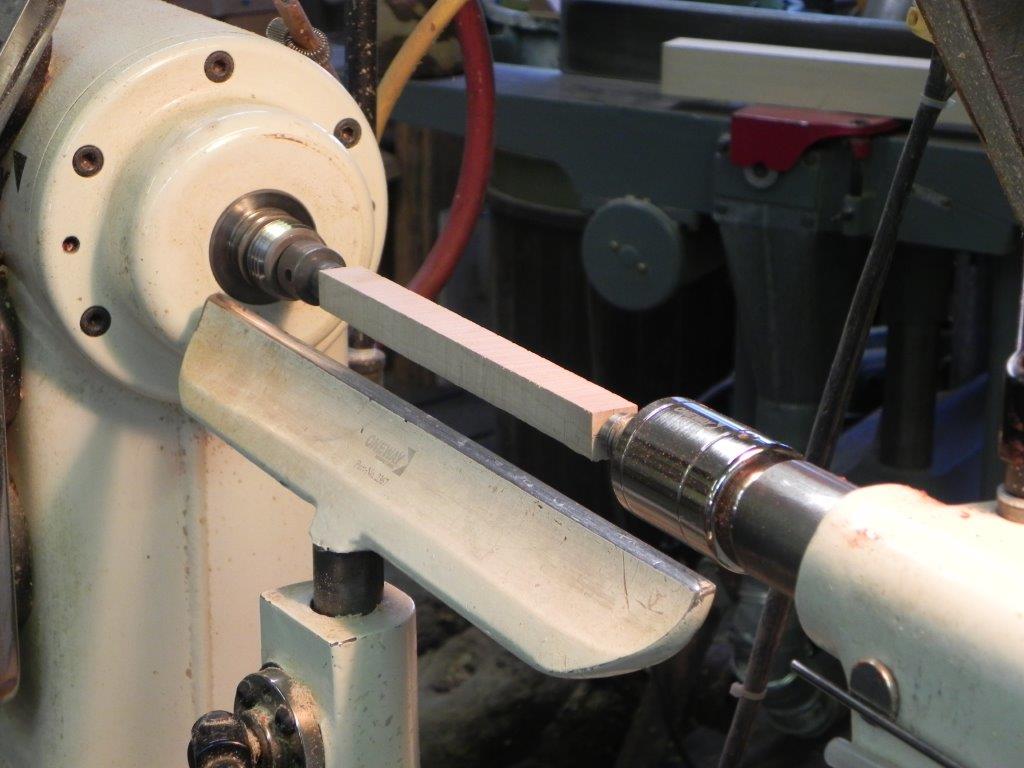
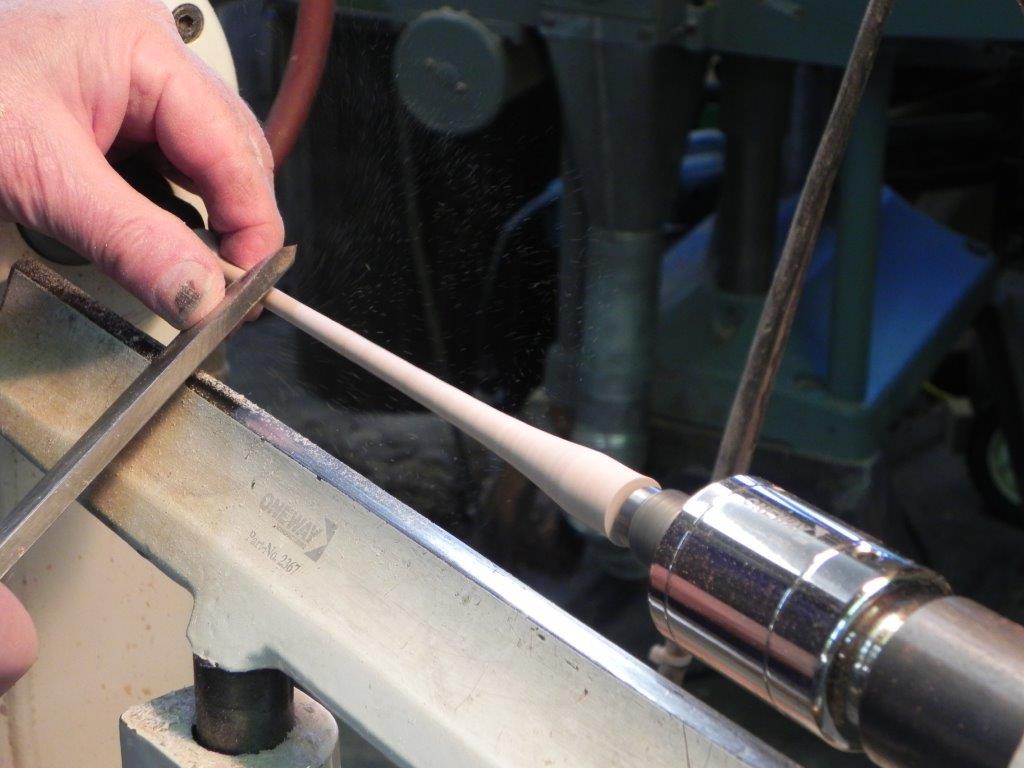
The blank for the pin should be about 3/4″ square stock about 8″ long. If your ring varies from the dimensions above, then adjust the length of the pin proportionately.
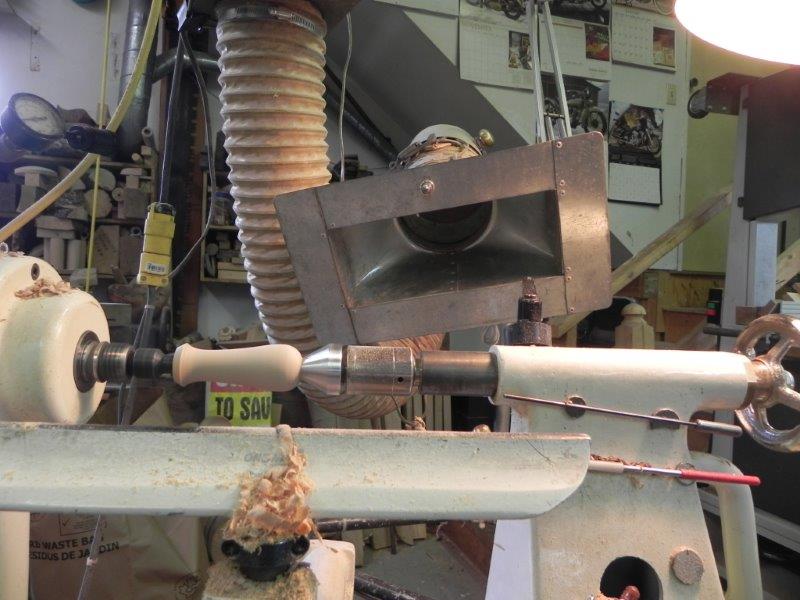
Mark the centers on the ends and mount between centers. Whatever drive center you have will be fine but I use a Oneway safe driver for small items such as this because if you get a catch, the piece simply stops turning rather than the usual dramatic and, in the case of a small diameter like this, catastrophic failure.
For something turned between centers you usually choose straight grain material but for this project you may have chosen figured wood. In this case, be prepared for a few failures since the grain will be running across the axis (several times, in fact). Not to worry, there’s not a lot of wood lost and if the piece breaks, you will be using your hand as a steady rest so it won’t fly anywhere.
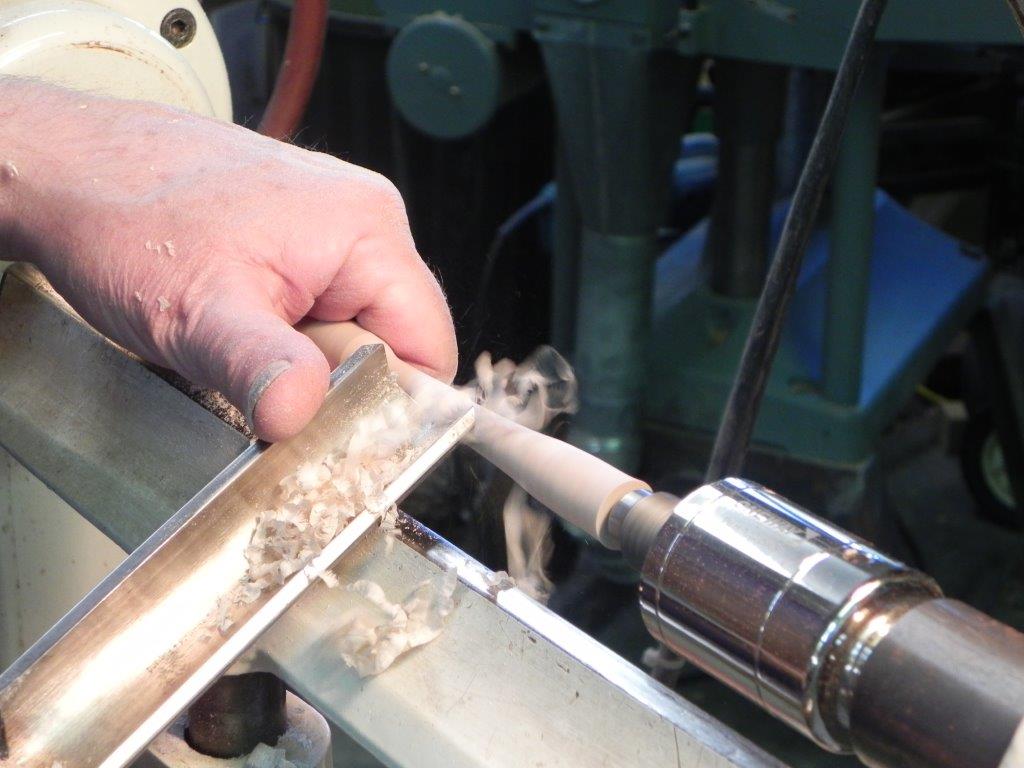
Turn the piece round with a spindle roughing gouge. Turning any very small diameter spindle should be done in stages. Rather than reducing the diameter over the full length, turn the piece to finished diameter in short lengths. The length of each stage will vary with diameter so you will have to experiment, but for this project the photos will give you an idea.
My preference — and for probably all right-handers — is to have the large end on the right so that you will be turning with the grain. In this case, start reducing and tapering the diameter right to left, leaving about 3/4″ on the right end to make the rounded end plus some waste allowance. Steady the piece loosely with the left hand and use the tool with the right (this is where left-handers may chose to have the “handle” on the left and work left to right). It is unlikely that you will hold the work too tightly since it will get too hot to hold almost instantly. A bare hand (e.g. no glove) is best for this for both safety and control.
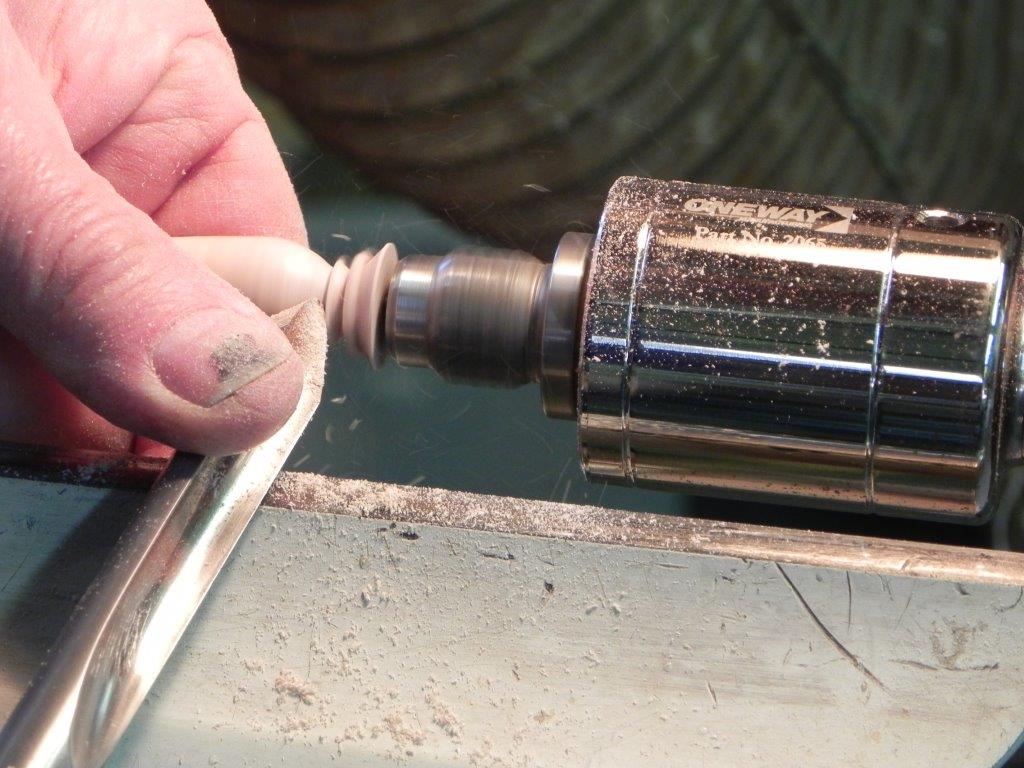
Turning about half the length to finished diameter and shape is the most suitable in my case, however the stability of the piece is the deciding factor. If you are confident with a skew, make the finish cut with a skew. Once down to the preferred diameter (in my case, about 5/16″), turn the remainder to finished diameter in stages.
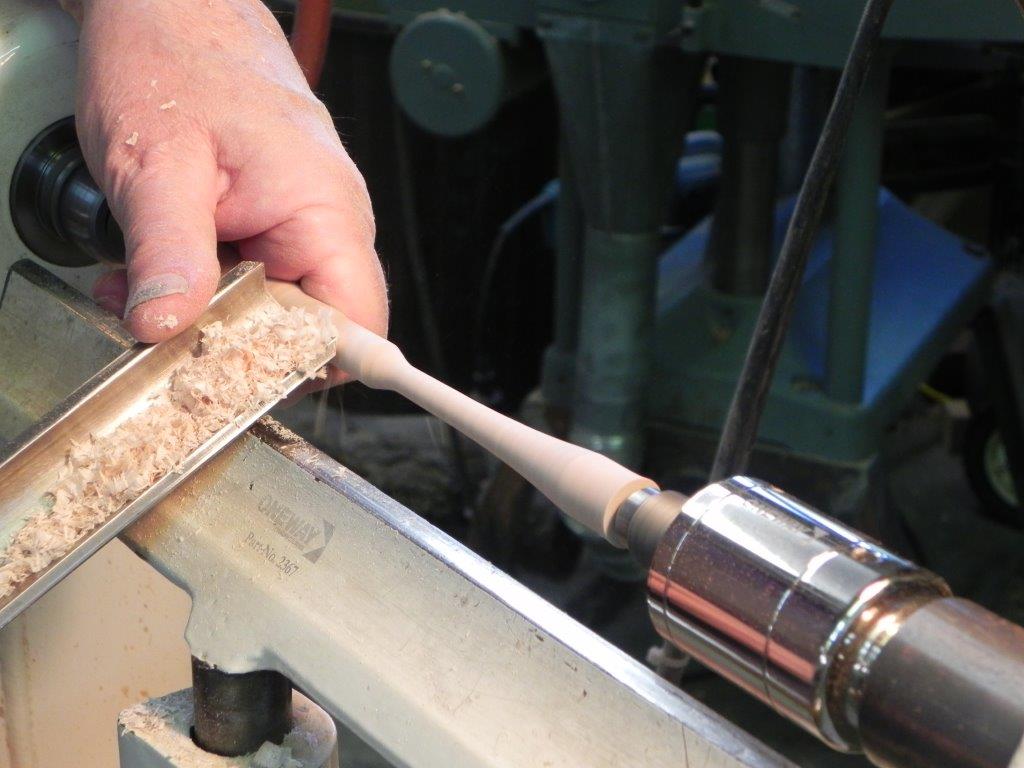
You can see I turned about half of the remaining length and then the remaining length. In any case, take as many steps as you require to reach the end. The length of your piece, the grain orientation and your level of confidence will be the determining factor. Remember, it’s not unlikely that you will break a few pieces so don’t loose heart if this happens. Because of the figured grain I allow for 10 percent failure, so 5 in 50, and I have turned a lot of these.
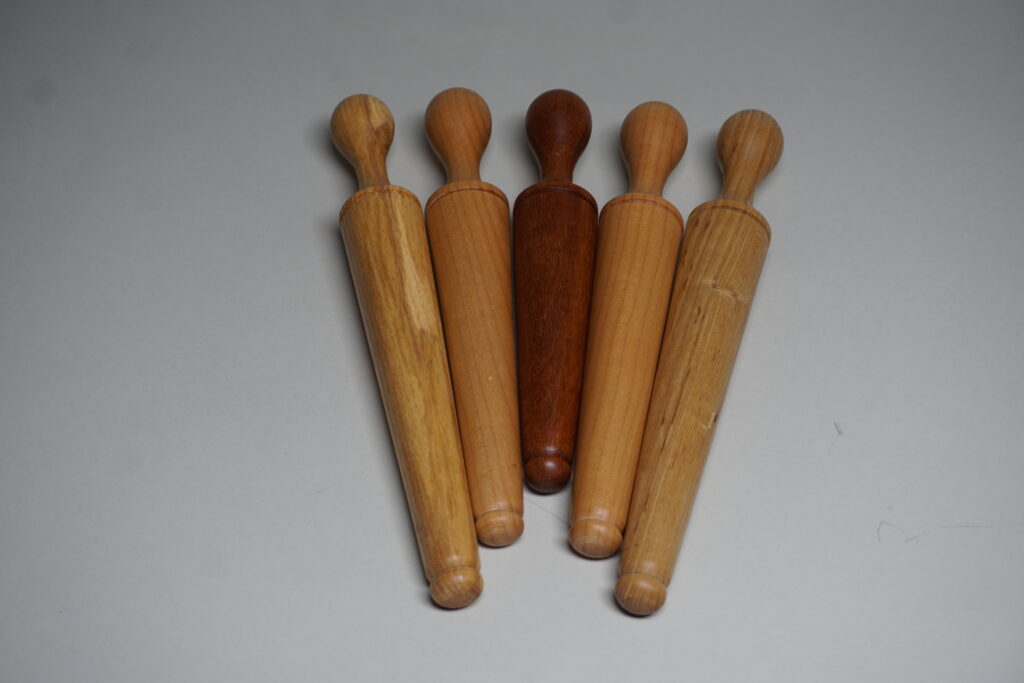
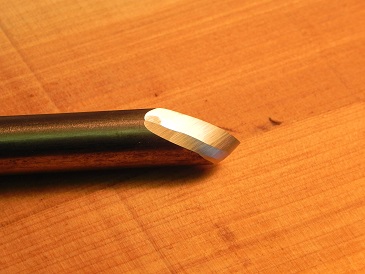
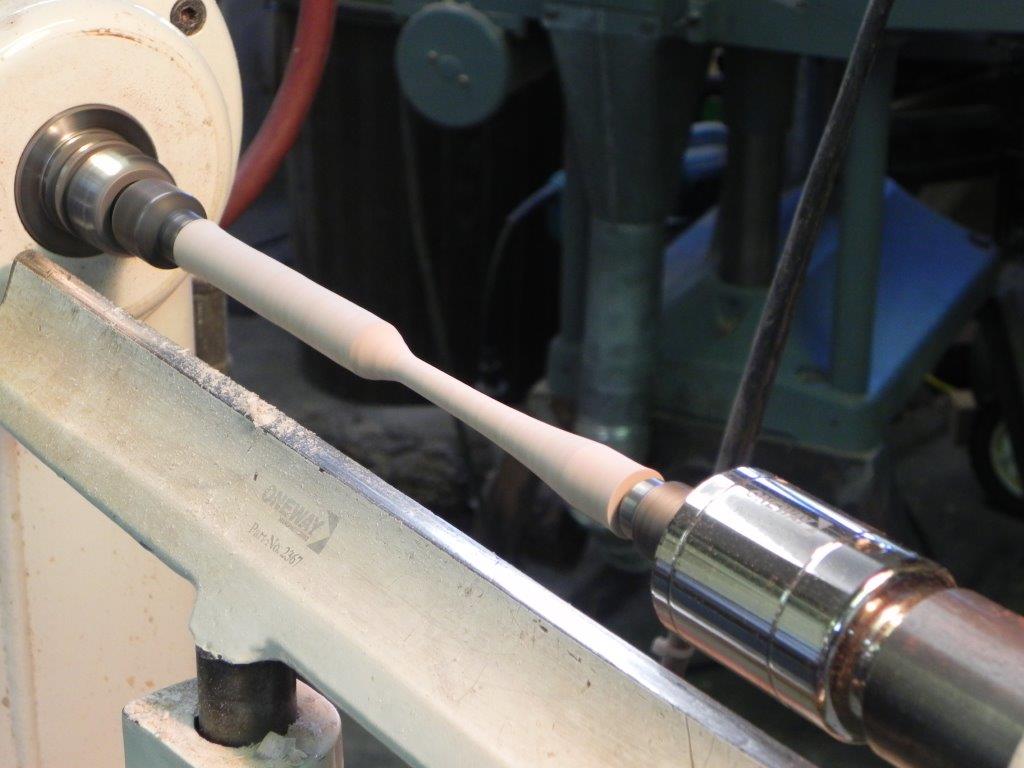
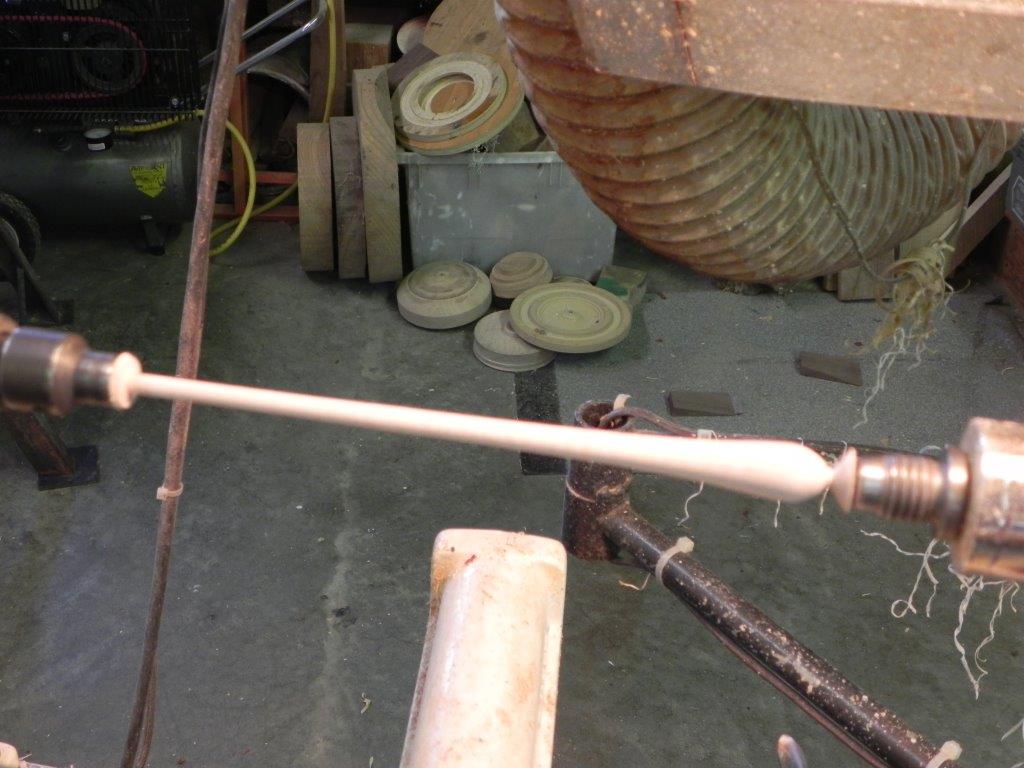
Use the long point of a skew as a scarper to rough the very last length, being careful to leave enough to finish with a proper skew cut. Alternately, cut your blanks long enough that this close work isn’t required. Use a spindle gouge to put a radius on the “handle” end. Carve or sand the waste nubs off the ends. I prefer to miter the small end so that it slides under the scarf easily.
Carve or sand the waste nubs off the ends. I prefer to miter the small end so that it slides under the scarf easily.
At this stage, I color the pieces. Coincidentally, I use the same dyes as the silk weaver that buys these, but you can use whatever method you prefer. I leave several natural because they look good as well, so you choose. I use two coats of Tung oil but again, that is your choice.